Author:
Clyde Lopez
Date Of Creation:
20 June 2021
Update Date:
1 July 2024
Content
- Steps
- Part 1 of 3: Creating the Right Containment Procedures
- Part 2 of 3: Watering, feeding and pruning orchids
- Part 3 of 3: Pest and Disease Control
- Tips
Orchids are beautiful and fragile plants of various shapes and sizes with flowers of various colors. There are more than 22 thousand species of orchids, so recommendations for care and maintenance may vary depending on the specific type of plant. However, there are some general, simple guidelines that apply to all orchids and help keep them healthy and beautiful.
Steps
Part 1 of 3: Creating the Right Containment Procedures
 1 Use pots with drainage holes. Be sure to use pots with drainage holes for your orchids to allow excess water to drain off. Otherwise, root rot can ruin your beautiful plants! If your orchids are in pots with no drainage holes, transplant them into other pots.
 - Place individual saucers or a common tray under the pots to prevent excess water from draining from the pots onto the floor.
 2 Use a special substrate with good drainage properties for orchids. You can use a bark or moss substrate. The bark has high drainage properties and does not allow waterlogging, but decomposes quickly enough. Moss retains moisture better, but requires more careful watering. Orchids in such a substrate also require more frequent replanting.
 - If the orchids are planted in the wrong substrate, replant them so that they bloom luxuriantly.
 3 Place orchid pots on south or east windows (if possible). Orchids need bright but indirect light. If possible, place orchids on south or east windows so that the plants receive the necessary amount of light of the appropriate intensity. If the plants are on the south window in the hot season, they need to be shaded with a transparent curtain to protect them from burns. When there is only a choice between west or north windows, place orchids on west windows.
 - The orchids will not have enough light on the north window to bloom.
 4 Keep the temperature around 16-24 ° C at home. Orchids thrive in moderate temperatures and die if they are too cold. Although specific temperature requirements may vary slightly from one species of orchid, in general, temperatures should not drop below 16 degrees at night. And during the day, the temperature should be 5-8 degrees higher than the nighttime.
  5 Provide easy air circulation. Since orchids do not grow in real soil, their roots need air circulation to keep them healthy. In warmer months, you can open the windows for easy ventilation. The rest of the time, you can turn on the ceiling fan in the room at a low speed or a regular rotating fan directed away from the orchids so that the air does not stagnate.
Part 2 of 3: Watering, feeding and pruning orchids
 1 Water your orchids when the substrate is almost completely dry. It is very important to water your orchids not on specific days, but based on how much water they consume. Every few days, gently dip 1–2 fingers into the substrate, then remove and rub together. If you don't feel moisture on your fingers, lightly water the orchid substrate and let it saturate with water. After a few minutes, drain the excess water from the saucers or the tray the pots are on.
 - Depending on the climate, humidity level and substrate used, orchids may require watering from several times a week to once every several weeks.
- Transparent pots will also help you understand when orchids need watering. If there is no condensation left on the pots inside, then it's time to water them.
 2 Spray your orchids with water daily if the indoor humidity is below 40%. Orchids thrive best in 40-60% humidity. Purchase a hygrometer from a garden store or large supermarket and use it to check the humidity level in your home. If the humidity drops below 40%, spray the orchids with water from a spray bottle with a fine spray once a day.
 - If the humidity is higher than 60%, turn on the dehumidification system in the room where the orchids are located to prevent the growth of bacteria and fungi.
 3 Fertilize your orchids once a month during the flowering period. Use a balanced liquid fertilizer such as 10-10-10 or 20-20-20 micronutrients. Prepare a twice weaker solution from the fertilizer and feed it to the orchids during the flowering period. Do not water the orchids for several days after feeding, otherwise the water will wash away the nutrients.
 - After flowering, the growth of the green mass of the plant will stop. During this period, orchids need less watering and fertilization until the stage of active growth begins again.
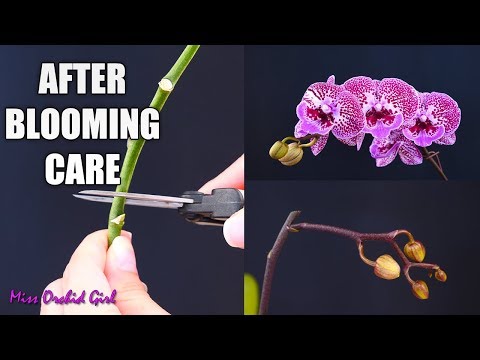
 4 Cut off faded flower stalks. Orchids do not bloom more than once on one peduncle (except for phalaenopsis). If you are growing phalaenopsis, cut the stems above the two lower buds or nodes when the last flowers are dry. For orchid species with pseudobulbs, cut the stems just above the pseudobulb. For other orchids, the peduncles should be cut as close to the substrate as possible.
 - A pseudobulba is a terrestrial thickening of the orchid stem at its base.
- Be sure to only use sterile orchid pruning tools.
Part 3 of 3: Pest and Disease Control
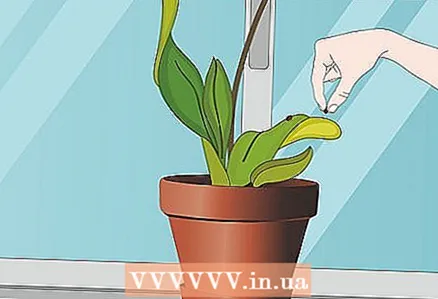 1 Remove scale insects and mealybugs by hand. Signs of damage by scale insects and mealybugs include the appearance of sticky leaves and black mold. Use your hands to remove all visible insects from the top and bottom of leaves and peduncles.
 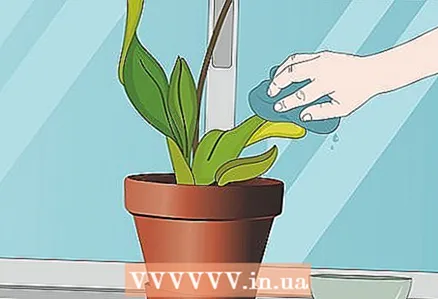 2 Treat affected leaves with soapy water. After removing the insects, take a mug or bowl, add some dish soap and water at room temperature. Moisten a soft cloth with the resulting solution and gently wipe each leaf and peduncle.Soapy water will remove sticky marks and black deposits, and will kill any remaining insects.
  3 If problems persist, treat your orchids with insecticide. If you've removed the pests and washed the leaves with soapy water and still show signs of infestation, purchase an insecticide from your local garden supply store. Ask your dealer to find you a product that can safely treat orchids. Use your chosen product according to the instructions on its packaging.
  4 Remove diseased tissue. If you notice that the leaves of the orchid have changed color or spots have appeared on them (light yellow, yellow, brown or black), then it is very likely that the plant is suffering from some kind of disease. The first step is to remove as much of the affected tissue as possible. Use a sterile tool and cut off any diseased leaves, stalks, and flowers. Be sure to disinfect the instrument being used both before and after trimming diseased tissue.
 - In some cases, it is wiser to get rid of the diseased plant entirely so that the disease does not spread.
 5 Treat infections with fungicidal or bactericidal agents. Common bacterial infections that can infect orchids include brown rot, black rot, brown leaf spots and pseudobulbs. Common fungal infections include destructive root rot, from which roots, pseudobulbs and orchid leaves begin to rot. After removing the affected tissue from the plant, spray the orchid with a fungicide or bactericide (depending on the specific problem).
 - You can find these products at your local garden center.
Tips
- If the orchid leaves are leathery and shriveled and the roots are in good condition, maintaining a green or white color, you are probably not watering the plants much. However, if the roots are in poor condition and are dying, you are probably flooding the orchids too much.


