
Content
- Steps
- Part 1 of 3: Preparing the Patient and Instrument
- Part 2 of 3: Taking Readings
- Part 3 of 3: Understanding and Interpreting Results
- Additional articles
With a mechanical (aneroid) tonometer, healthcare professionals measure blood pressure, which is the pressure with which blood acts on the walls of the arteries as the heart pumps it through the blood vessels. Aneroid blood pressure monitors are one of three types of blood pressure measuring devices: they are similar to mercury blood pressure monitors, and their readings are also taken manually, while digital blood pressure monitors give the result automatically. Although digital blood pressure monitors are easier to use, mercury and aneroid blood monitors are more accurate, but mechanical blood pressure monitors need to be calibrated more frequently. Blood pressure is measured in millimeters of mercury (mmHg) and can vary significantly depending on age, current physical activity, body position, medication intake, and previous medical conditions.
Steps
Part 1 of 3: Preparing the Patient and Instrument
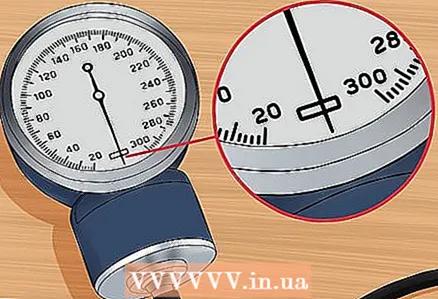 1 Make sure your aneroid tonometer is properly calibrated. Look at the scale and check that it reads zero before measuring. If the scale is not zero, the device should be calibrated using a mercury tonometer. Connect the Y connector to the mechanical tonometer, and when the arrow starts to move, check the readings on both devices and align the arrow so that the pressure on the mechanical tonometer corresponds to the readings of the mercury device.
  2 Select the correct cuff size. BOMore patients require larger cuffs, otherwise the measured blood pressure will be higher than the actual blood pressure. Likewise, smaller patients may use smaller cuffs, otherwise measurements will show lower blood pressure than they actually do.
 - To select the correct cuff size, place the cuff chamber on the patient's arm. The cuff chamber is the part of the cuff into which air is pumped. In this case, the camera should cover at least 80 percent of the patient's hand.
 3 Tell the patient what you are doing. This should be done even if you think the patient is unconscious and cannot hear you. Tell the patient that you are going to put on the cuff and take the blood pressure, and the arm will be slightly squeezed by the cuff.
 - Remind the patient not to talk while taking blood pressure measurements.
- If the patient is worried, try to calm him down - ask how he spent the day, or anything else that interests him. You can also ask the patient to take a few deep breaths to help them relax. If you measure blood pressure on a patient who is worried, the reading may be overestimated. However, some people are always nervous when visiting a doctor's office.
- If the patient is too nervous, try waiting five minutes for them to come to their senses and calm down.
 4 Ask the patient appropriate questions. Ask him if he drank alcoholic beverages or smoked 15 minutes before the blood pressure measurement. This can affect the readings. Also, check with the patient if they are taking any medications that may affect blood pressure.
  5 Position the patient correctly. The patient can stand, sit, or lie down. If the patient is sitting, his arm should be bent at the elbow and his feet should be on the floor. Make sure that your hand is at the same level as your heart. The patient should not support his arm as this may lead to incorrect results.
 - It is necessary to free the patient's arm from clothing - for example, roll up a sleeve that is too long. Be careful, however, that the rolled-up sleeve does not interfere with normal circulation in your hand.
- The arm should be slightly bent at the elbow. Place it on a flat, stable surface.
- Make sure the patient is comfortable, otherwise overpressure may result.
 6 Place the cuff over the brachial artery. Fold the cuff chamber in half to find the middle. Make sure there is no air in the chamber.Use your fingers to feel for the brachial artery (the large artery on the inside of your elbow). Place the center of the camera directly on this artery.
 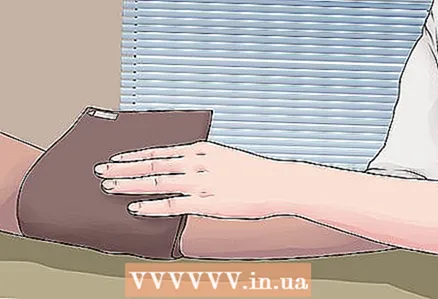 7 Wrap the cuff around the patient's arm. Wrap the tonometer cuff tightly around your bare arm above the elbow. In this case, the lower edge of the cuff should be located about 2-3 centimeters above the bend of the elbow.
 - For correct results, the cuff should fit fairly tightly on the arm. It should be so tight around the hand that it is difficult to get two fingers under the edge.
Part 2 of 3: Taking Readings
 1 Feel for your pulse. Place your fingers on the brachial artery and hold them there until you feel a pulse (called the brachial pulse).
 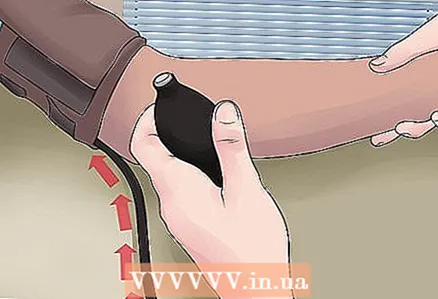 2 Pump air into the cuff. This should be done quickly. It is necessary to inflate the camera until the shoulder pulse is no longer felt. Then note the pressure in mmHg. Art. This reading will serve you to determine the systolic pressure.
 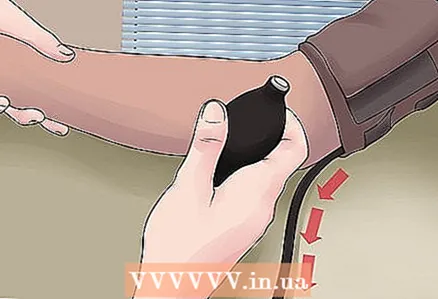 3 Release the air from the cuff. Free the cuff chamber from air and add 30 mm Hg to the previous reading. Art. For example, if the pulse is no longer felt at 120 mm Hg. Art., add 30 to this value, and as a result you get 150 mm Hg. Art.
 - If you do not want to repeat the procedure twice, you can immediately inflate the cuff to 180 mmHg. Art.
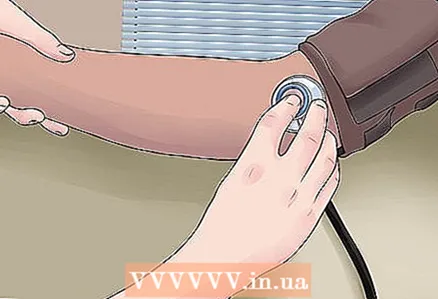 4 Place the bell of the stethoscope over the brachial artery. Place the stethoscope bell on the patient's arm just below the lower edge of the cuff. In this case, the center of the bell should be on the brachial artery so that you can hear the heartbeat.
 - Never support the stethoscope bell with your thumb. A pulse can also be felt in the thumb, which can distort the reading. Hold the bell of the stethoscope with your index and middle fingers.
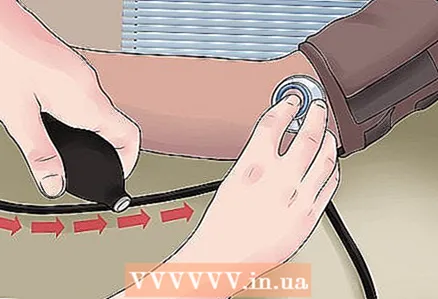 5 Inflate the cuff again. Rapidly fill the cuff with air until the pressure reaches the previous pressure with an added 30 mmHg. Art. Then stop pumping the cuff.
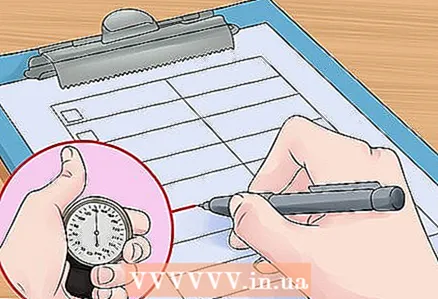
 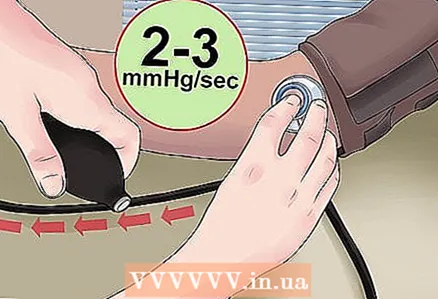 6 Let the air out slowly. Begin to release air from the cuff so that the pressure in it decreases at a rate of 2-3 mm Hg. Art. per second. When doing this, do not forget to listen to the pulse through a stethoscope.
  7 Note the moment when the sound appears. You should hear the beating sounds - the so-called Korotkov tones. Record the pressure at which these sounds began to be heard. This will be the upper, or systolic, pressure.
 - Systolic pressure is the pressure of blood against the walls of the arteries as the heart contracts.
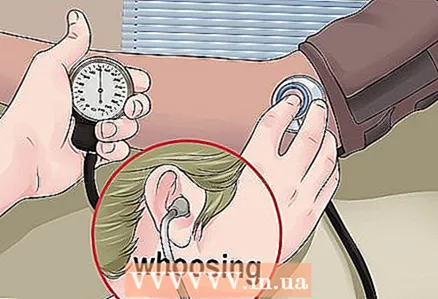 8 Note the moment when the sounds stop. At some point, you will hear a hissing, or "whistling" noise. After that, the sounds will stop. Record the pressure at which this happened - this is the lower, or diastolic pressure. Then release any remaining air from the cuff.
 - Diastolic pressure is the pressure of the blood against the walls of the arteries between the beats of the heart when it is relaxed.
 9 Record your measurements. Record the systolic and diastolic pressures and the size of the tonometer cuff used. Also, write down which arm the measurements were taken and the posture the patient was in.
  10 If the pressure is increased, repeat the measurements. In case of high pressure, it is necessary to measure it two more times with an interval of about two minutes between each measurement. Take the average of the last two measurements as the final result. If this value is high, the patient can be asked to monitor their blood pressure to determine if they have hypertension. Remember that two or three measurements are not enough to measure hypertension.
 - The patient should measure the blood pressure for 2-3 weeks and record the results, and then show them to the doctor in order for him to make a definitive diagnosis.
Part 3 of 3: Understanding and Interpreting Results
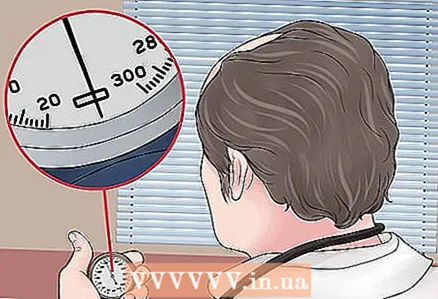 1 Understand the scale. The tonometer has a scale from 0 to 300 mm Hg. Art. You don't need values much higher than 200 mmHg.Art., since the systolic pressure is above 180 mm Hg. Art. considered critically high.
 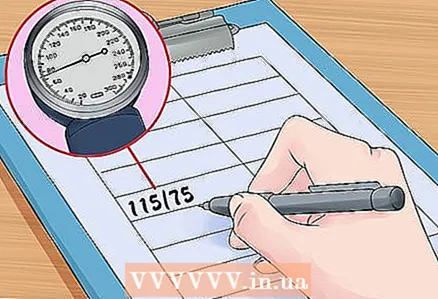 2 Learn to record your blood pressure correctly. Systolic blood pressure is written first. It is usually followed by a slash followed by the diastolic pressure. For example, normal blood pressure looks like 115/75.
 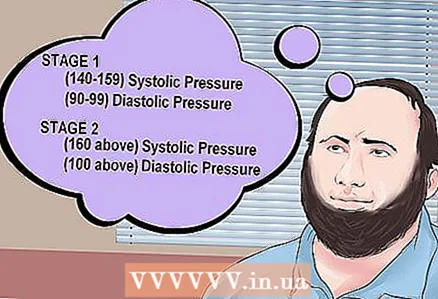 3 Find out when blood pressure is considered high. High blood pressure is called hypertension. At the first stage of hypertension, the systolic pressure is 140-159, and the diastolic pressure is 90-99 mm Hg. Art. At the second stage, the systolic pressure exceeds 160, and the diastolic pressure exceeds 100 mm Hg. Art. If you have a systolic pressure above 180 or a diastolic pressure above 110 mmHg. Art., you must go to the emergency room.
 - With prehypertension, the systolic and diastolic pressures are 120-139 and 80-89 mm Hg, respectively. Art. Normal blood pressure is less than these values, however, too low pressure can be observed.
- Doctors don't have a fixed interval for low blood pressure. Low blood pressure is usually only a problem if it is accompanied by other symptoms. These symptoms include dizziness, inability to concentrate, thirst, fatigue, nausea, rapid breathing, and blurry vision.
Additional articles
 How to make an enema at home
  How to know when pain in the left arm is associated with the heart
  How to interpret a tuberculosis skin test
  How to remove stitches
  How to get rid of acne inside the ear
  How to get rid of a rash
  How to Raise Your Blood Platelet Levels Naturally
  How to diagnose a ruptured calf muscle
  How to treat small petechiae
  How to insert vaginal suppositories
  How to check a fever without a thermometer
  How to get a vein injection
  How to Ease Medication-Related Nausea
  How to insert a dropper


