Content
- To step
- Part 1 of 4: Warm up and stretching
- Part 2 of 4: The five basic positions
- Part 3 of 4: Ballet moves for beginners
- Part 4 of 4: Improve your technique
- Tips
- Warnings
Ballet is a beautiful art form that you can practice as a form of self-expression or just to keep fit. While taking ballet classes is the best way to learn ballet, you can also practice the basic ballet moves at home if for some reason you can't take classes or just want to practice a little extra. Before you start, do a warm-up and stretch and stretch your body so that you are well prepared physically. Then learn the 5 basic positions and practice the most important ballet movements until you have mastered them. When you are ready, you expand your technique further by means of a ballet tutorial, following video lessons or by still taking ballet lessons.
To step
Part 1 of 4: Warm up and stretching
 Choose a room in which you can move well. Make sure you have enough room to bend, jump, and move around the floor without bumping into anything. Remove any objects that may interfere with your movement, such as a coffee table or items on the floor. If your room doesn't have a ballet bar, use the back of a sturdy chair for support if necessary.
 Tip: If ballet is important enough to you, you can install a barre on one of the walls of the room. You will be very comfortable with this while practicing.
 If the surface is very hard, cover the floor with a mat or a sturdy rug. Don't do ballet on hard surfaces like concrete unless you're laying out a mat. Jumping on a hard floor can damage your joints, including your knees. Use an exercise mat or rug to cover hard floors. You can also do ballet in a carpeted room.
 - You can find rubber mats made especially for ballet online.
 Warm up your body by doing 5 minutes of low-impact cardio. To avoid injury, make sure your muscles are properly warmed up before starting ballet. To warm up quickly, walk or jog in place for about 5 minutes. If you'd like, end your warm-up with a series of squats, kneeling exercises, and jumping exercises.
 - Make sure to warm up your body before stretching, as stretching with cold muscles increases the risk of injury.
 Stretch your muscles after you warm up. When your body is warmed up, stretch your muscles so they are ready for your ballet steps. Here are some stretches to try:
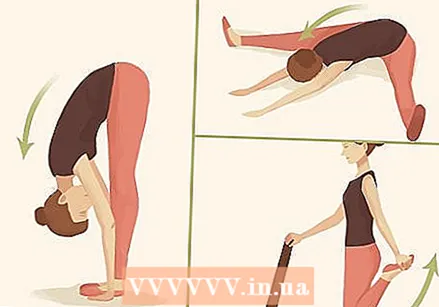
 - Bend over: Stand up straight with your feet together and your toes straight out. Hinge forward from your hips and reach toward the floor with your hands. Go down as far as you can and try to touch the floor. Hold this for 30 seconds.
- Leg-wide stretch: Sit on the floor and spread your legs in a "V". Let your toes point up. Lean forward and reach forward between your legs as far as possible. Hold this for 30 seconds.
- Stretch your quadriceps: Your quadriceps are the muscles in the front of your thighs. Stand up straight with your legs together and hold a chair with one hand for support. Lift one foot back and grab the top of your foot with your free hand. Draw the foot to your buttocks. Hold for 30 seconds and then switch legs.
Part 2 of 4: The five basic positions
 Start with the first position as it is the easiest. Stand up straight with your legs together and your heels together. Turn your toes out so that your feet are in a "V". Then lift your arms until they are in front of your body and make an oval. Your fingers should not touch.
 - Turn your toes out as far as possible. You may only be able to make a narrow "V" at first. However, over time you will become more flexible and you may be able to turn your toes all the way out.
 Now add the second position to your ballet positions. Stand upright with your legs a little wider than shoulder-width apart. Let your toes point out, away from your body. Spread your arms sideways, about shoulder height, with the elbows a little round and pointing slightly back.
 - As with the first position, turn your toes out as far as possible.
 Now try the third position. Stand up straight and cross your right leg in front of your left, with the heel of your right foot against the hollow of your left foot. Make your left arm an oval in front of your body, as in the first position, keeping your right arm out to the side. Or cross your left leg over your right leg and make your right arm an oval with your left arm sideways at shoulder height.
 - So you can do the third position both right and left.
- You could keep your arms in third position while doing jumps.
 Add the fourth position if you are flexible enough to do it easily. For an open fourth position, place your right foot about 6 inches in front of your left, with your heels aligned and your toes pointed out. Lift your left arm above your head with your arm slightly bent and hold your right arm in an oval shape in front of your body. For a closed fourth position, cross one leg over the other and put the heel of your front foot against the toes of your back foot. Then lift one arm slightly bent over your head while holding the other arm in an oval shape in front of your body.
 - Sometimes you can keep your arms in fourth position while jumping.
 Don't do fifth position until fourth position is easy for you. Place one foot against the other with your toes pointing out. Make sure the toes of your front foot are against the heel of your back foot and the toes of your back foot are against the heel of your front foot. Then lift your arms gracefully above your head, keeping them slightly bent. This position is difficult, so don't try it until you are flexible enough.
 - As with the other positions, you can do jumps with your arms in fifth position. It's easy to keep your arms in fifth position if you're just a beginner. It's the footwork that's hard.
Part 3 of 4: Ballet moves for beginners
 Do "demi pliés" in the first position. Stand in the first position with your legs together and your toes pointed out. Raise your arms out in front of you and shape them into an oval. Bend your knees out and slowly lower your body, keeping your heels flat on the floor. Tighten your muscles as you come back up. This is called a demi (= half) plié.
 - Plié is pronounced plie-jee, with the accent on jee.
- If you need some support, you can hold on to a ballet barre or the back of a chair.
- After you have learned to do a demi plié, continue with the grand plié. It's the same move, except you lift your heels off the floor and lower yourself all the way down.
- This is similar to a squat, but you have your heels together and your toes and knees are pointing out:
Variation: Once you've mastered the plié in the first position, try it in the second position. Each time you have perfected the movement, try a plié in the next position.
 Do "tendues" in first position. Stand up straight with your heels together and your toes pointed out. Push your foot against the floor as you slide it forward, sideways, or backward, until finally only the tip of your toes is touching the ground. Then slowly slide your foot back, keeping your heel closer to the ground, until you are back in the first position.
 - Tendue is pronounced tan-duu, with the accent on uu.
- If the tendues go well in the first position, try them from the other positions as well.
- You can use a tendon to move from first to second position. Do a sideward tendon and instead of sliding your foot back, lower it to the floor in the new spot.
 Put "relevés" in the first position. Stand up straight with your heels together and your toes pointed out. Slowly let your heels come off the ground as high as you can. Pause for 2-3 seconds, then slowly lower your heels back to the floor.
 - Relevé is pronounced 'free-flowing cattle', with an emphasis on cattle.
- Once you've mastered the relevés in the first position, try them in the other positions as well.
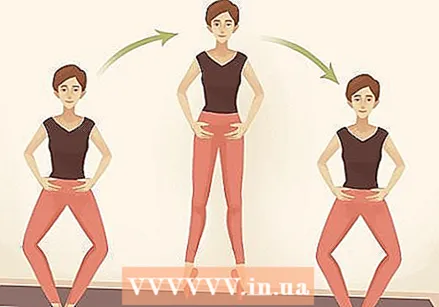 When you're ready for a basic jump, start with the "sauté." Do a demi plié in the first position with your back nicely upright and your upper body stretched upwards, as it were. Then jump up and come down in a demi plié. When you jump, first your heels and then your toes lift off the ground - while in the air your toes point down. When landing you first land on your toes and only then on your heels.
 - Usually sets of 4, 6, or 8 sautés are done one after the other. Pay attention to the shape so that each sauté is done correctly.
- Once you get it right, try to do it from second position as well.
 Do an "échappé" to move from the first to the second position. In the first position, start with your heels together, your toes facing out and your arms in an oval shape in front of your body. Do a demi plié, then hop off the floor in a sauté. Open your legs in the air and land in second position in a demi plié with your legs slightly wider than shoulder-width apart and your arms out to the side.
 - Échappé is pronounced ee-sja-pee, with the accent on pee.
- Jump from the first to the second position a few times, then from the second to the first.
- For example, if you jump from fifth position to second position, this is also called an échappé.
 Add the "grand jeté" to your jumps. Grand jetés are jumps where you fly through the air, as it were, with one leg extended and one leg stretched back. Place your arms in the fourth or fifth position. Take a short run-up, push off with one leg and put your other leg forward, then quickly extend your push-off leg back. You fly forward through the air and land on your front leg. As you fly through the air on the grand jeté, point your feet and straighten your legs.
 - Grand jeté is pronounced kran sje-tee, with the accent on tee.
- Jump as high as you can without straining your body and without bending your knees. Do bend your knees as you take off and land. With practice, you will be able to jump higher and further spread your legs.
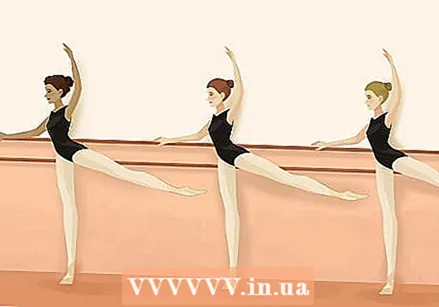
 Try "grand battements" to insert leg swings. A grand battement is a swing with a straight leg and a pointed foot, which you can do forwards, to the side or backwards. Keep your arms in the second position. You slide one foot across the floor, then lift it up for a leg swing. Swing your leg up as high as you can, with your toes straight - that is, with a pointed foot. Keep your standing leg straight during the leg swing.
 - You pronounce grand battement as kran bat-mah, with the accent on mah.
- When doing a grand battement back, lean forward slightly, but don't bend from the waist.
- Try to get your leg at least 90 degrees off the ground, but don't force it. If you practice this every day, you will be able to lift your leg higher and higher.
- As you get better at ballet you can also do grand battements with your arms in other positions.
Part 4 of 4: Improve your technique
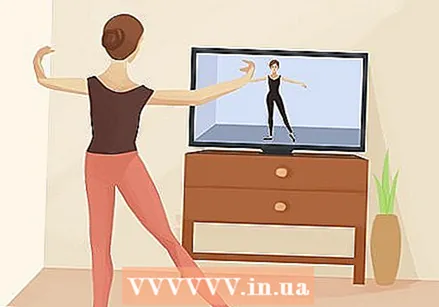
 Search for ballet lessons online, for example on YouTube. If you can't afford lessons, ballet lessons on video are a good alternative. Although this is not as good as lessons directly from a teacher, you can - especially if you practice a few times a week - learn the basics of ballet quite well through video lessons. Search for videos for the moves you want to try out and follow the directions carefully.
 - Sign up for ballet classes / blogs that you like.
- Keep in mind that you probably need real lessons if you want to become an advanced dancer. However, video lessons are a good way to start and can help you enjoy ballet as a hobby.
 Take lessons on DVD or on streaming sites. These classes are taught by professional teachers, so they can teach you the advanced moves / exercises. It won't be the same as working one-on-one with a dance teacher, but these classes will help you develop your dance technique.
 - Search for video workouts online that you can purchase. Preview the workout before purchasing to see if you can follow the instructions.
- Choose a video at your level. If you're a beginner, look for a step-by-step video to help you learn the basics.
 Attend real classes for personalized instruction. Attending real classes with a dance teacher ensures that you get useful feedback so that you can make improvements. In addition, this way you get the hang of ballet dancing faster and you can safely continue with the more advanced movements.
 - If you've been practicing at home and can't afford classes, ask the ballet school if they have a scholarship or internship program. Maybe you can earn a scholarship if you show talent and dedication, or you can get a discount if you help out in the studio.
Tips
- Listen to your body and respect your limits. It's okay if you can't jump high or let your toes point out all the way. With perseverance and a lot of practice it will get better and better!
- Invite people who are experienced and good at ballet to come and see you. They can give you feedback on what you can improve.
- Ballet at home may suit someone just looking for some basic techniques, but it can never completely replace taking real classes. A teacher who corrects you is critical if you plan on getting serious with ballet.
- Start with the basics and then gradually move on to the more advanced dance moves.
- It takes years to master ballet properly, so be patient and enjoy the process. You'll get better every time you practice, so hang on!
- Ballet takes a lot of time and practice! If you want to get good at it, you have to practice daily.
Warnings
- You better not try to dance on pointe - unless you are working with an instructor. You can injure yourself if you try it on your own.


