Author:
Charles Brown
Date Of Creation:
3 February 2021
Update Date:
1 July 2024

Content
- To step
- Method 1 of 3: Make a fragrant warm compress
- Method 2 of 3: Make a steamed warm compress
- Method 3 of 3: Determine when to use a warm compress
- Warnings
- Necessities
- Method 1
- Method 2
Warm compresses can be used for a variety of problems, from muscle pain to stiff joints. While you can buy heat packs from drug stores, it's just as easy to make your own using simple, inexpensive materials that you probably already have around the house. Warm compresses can help relieve pain from menstrual cramps, abdominal muscle cramps, and muscle spasms. Before treating a condition with a warm compress, check that your medical condition is best treated by applying heat or cold, and make sure you are taking proper safety precautions to protect yourself from potential burns.
To step
Method 1 of 3: Make a fragrant warm compress
 Gather your materials. All you need for the basic compress is a clean long sock and some dry uncooked rice, beans, or oatmeal to put in it. But if you want to give the compress a pleasant scent, you will also need a little ground peppermint, cinnamon or other aroma of your choice. You can use herbs from the kitchen, the contents of a sachet of herbal tea, or essential oils.
 - Try adding soothing lavender, chamomile, sage, or mint to your compress for an even more soothing experience.
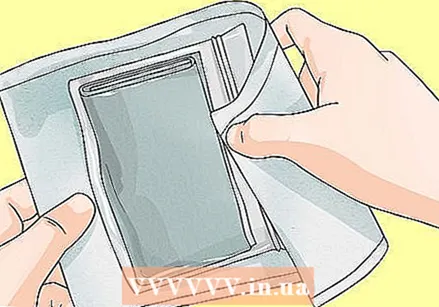
 Fill the long sock. Whether using the rice, beans, or oatmeal, pour into the sock until mostly full - about ½-¾ full. Leave enough sock material at the end to make a knot, unless you plan to sew the end of the sock closed for a permanent heat compress. In that case you can fill it almost to the top.
 - While filling the sock, you can add small pinches of your fragrance powder or herbs, so that there is a pleasant aroma throughout the compress.
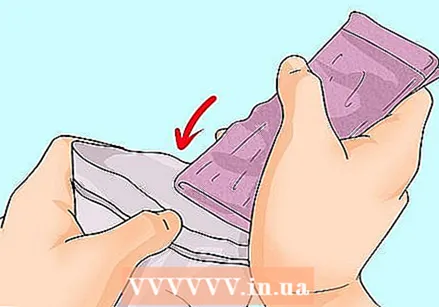
 Close the open end of the long sock. Depending on how long you want to keep your compress, you can close the sock temporarily or permanently. Tying a firm knot in the sock will keep the contents in place for a short time, but you can reuse the sock later. You can also sew the open side of the sock together for a more permanent compress.
 - Keep in mind that if you close the sock very close to the contents, you will make a hard compress, while if you close it further away you will have a looser filled compress. Experiment a little with how hard or soft you want the compress before sealing it.
- If you let the contents loosen up, you can easily drape the sock over your neck and shoulders to treat pain in that area.
 Place the compress in the microwave. After you close your compress, put it in the microwave for 30 seconds. After 30 seconds you can feel it and see how warm it is. When you are happy with the temperature, you can take it out and use it. If you want it warmer, keep using the microwave in 10-second increments until the compress is at the temperature you want.
 - Remember that red-hot materials against your skin can cause blisters and burns. Between about 21 and 27 ° C is optimal.
 Provide a barrier between your skin and the compress. You can wrap the compress or put a towel or T-shirt on your skin where you want to use the heat. This will prevent skin damage or burning. Make sure to check your skin every few minutes to make sure your skin is still in good shape.
  Place the compress against your skin. If it feels uncomfortably hot, remove it immediately and wait for the compress to cool slightly before putting it back on. When the compress has reached a comfortable temperature, hold it against the painful part for 10 minutes. Take it off after 10 minutes to let the skin cool down a bit. Once your skin has cooled down, you can put it back on for 10 minutes if you wish.
 - If your skin looks dark red, purplish, blotchy red and white, blistering, swollen, or if you develop bumps, call the doctor. You may have skin damage from the heat.
Method 2 of 3: Make a steamed warm compress
 Dampen a clean washcloth. Run water over the washcloth until it is saturated with water. It must be dripping wet. Then put the washcloth in a resealable plastic bag (such as a Ziploc bag). Fold the cloth neatly to make sure it heats evenly when you put it in the microwave. Do not close the pouch at this time.
  Place the washcloth in the pouch in the microwave. Place the pouch and washcloth in the center of the microwave, with the pouch still open. Heat it on the highest setting for 30-60 seconds, after which you can heat it in 10-second increments until it reaches the temperature you want.
 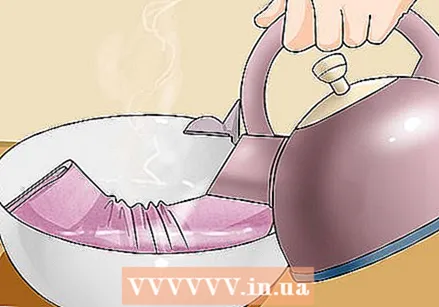 Use a kettle as an alternative. If you don't have a microwave, or don't like putting plastic in the microwave, you can also heat some water in a kettle on the hob. Place the washcloth in a bowl and pour the boiling water over the washcloth. Then use pliers to put it in the plastic bag.
 - You can also put the warm cloth directly on your skin if you want moist warm, but you have to be extremely careful that the compress isn't too hot. This type of warm compress is useful for cavity pain, but be aware of the danger of burns.
 Be careful when handling the plastic bag. Since the washcloth was soaked in water, scalding steam may come from the plastic bag. Be careful when removing the bag and washcloth from the microwave to avoid burns - hot steam can seriously burn the skin, even if you don't come into direct contact with the hot object.
 - Use kitchen tongs to grip the materials if they are too hot for your hands.
 Close the bag with the washcloth in it. Once you've heated the wet washcloth to your desired temperature, you'll want to trap the steam and heat in the pouch to keep it from cooling down too quickly. Again, be careful not to burn yourself - steam can cause serious burns and it is absolutely essential that you protect yourself. Cover your fingertips with a second washcloth or a pair of oven gloves to protect your skin when closing the pouch.
 - Wrap the plastic bag in a clean towel. You don't want to put the hot plastic directly on your skin, so use a clean towel as a protective barrier. Place the plastic bag in the center of the towel, then fold the towel around the heated material. Do this in a way that prevents the bag from slipping out of the towel, and does not leave more than a single layer of towel between the heat and your skin.
 Place the intricate compress against your skin. Let the compress cool if it feels uncomfortably hot. Remember to give your skin a break from the heat every ten minutes, and don't put the compress against your skin for more than 20 minutes.
 - If your skin looks dark red, purplish, blotchy red and white, blistering, swollen, or if you develop bumps, call the doctor. You may have skin damage from the heat.
Method 3 of 3: Determine when to use a warm compress
 Apply heat to sore muscles. Sore muscles are often the result of excessive lactic acid build-up in the muscle tissue. When you use a warm compress on a sore muscle, the heat draws more blood to that area. The increased circulation flushes out excess lactic acid, making your muscles feel less sore. It also brings more oxygen to the site, which speeds up the healing process for damaged tissue. The warm sensation can distract the nervous system, causing fewer pain signals to be sent to the brain.
  Use moist heat to treat muscle spasms. If you are experiencing muscle cramps for a long time, your first step is to rest the affected muscle. Take it slow and avoid the activity that initially tensed your muscle to the point of cramping. Wait 72 hours before applying heat so that any inflammation in the area can subside. When the three days are up, apply a moist, warm compress to the affected area to speed up the healing process.
  Treat stiff joints and arthritis pain with either heat or cold. Both methods can be effective in treating joint problems, although some people prefer either. You can try alternating these two until you figure out which one works better for you.
 - Cold ice packs numb the pain you are experiencing and reduce inflammation and swelling in your joints by contracting your blood vessels. While extreme cold may feel uncomfortable at first, it is very helpful in numbing acute pain.
- Warm compresses dilate the blood vessels, increasing blood flow, which speeds up the healing process. The heat also loosens the tissue and ligaments in the stiff area, increasing freedom of movement.
- You can also apply heat by soaking the injured area in warm water. You can do this by swimming in a heated pool or simply soaking in a warm bath.
 Avoid heat therapy if you have certain conditions. Pregnancy, diabetes, poor circulation and heart disease (such as high blood pressure) may not respond as well to heat therapy. Talk to your doctor before using a warm compress to relieve muscle or joint pain.
 - You should always have a layer of dust between the heat source and your skin to avoid burns.
 Do not use heat for acute injuries. Heat is best used to treat chronic conditions such as persistent muscle pain, cramps, or chronic joint pain. Cold, on the other hand, is better suited to use immediately after an acute injury such as a sprained ankle. So, if you are pulling a muscle, put ice on it immediately to reduce the swelling within the first 48 hours. If the pain lasts for several days, use heat to speed up the recovery process.
Warnings
- Do not leave a warm compress in the same place for too long as it can burn. Move it around a bit every few minutes while you relax.
- Don't put the compress in the microwave for more than a minute, it can get scalding hot and melt the pouch.
- Remove the compress if it starts to feel uncomfortable. It is meant to feel good.
- Never use warm compresses on children and babies.
Necessities
Method 1
- Clean long sock
- Enough dry, uncooked rice, beans, or oatmeal to half fill the sock
- Fragrance powder or essential oils of your choice (optional)
- Microwave
- Towel
Method 2
- A washcloth
- Water
- A microwave or kettle
- A resealable plastic bag
- A dry towel or pillowcase
- Tang


