Author:
Laura McKinney
Date Of Creation:
4 August 2021
Update Date:
1 July 2024
Content
The injection can be done safely and properly in the private space of your home. The safe injection process not only protects the patient, the person giving the injection, but also protects the environment. There are two common ways to inject drugs at home: subcutaneous injection (eg insulin injection) and intramuscular injection. If you need to give an injection to yourself or a friend or family member, you will first need to learn how to give the injection from a healthcare provider who prescribes the medication to be administered.
Steps
Method 1 of 4: Prepare before injection
Determine the type of injection. Your doctor must give you detailed instructions on the type of injection and the technique of the injection. When you are ready, review the specific instructions that came with the medication, as well as the instructions of your doctor, nurse, or pharmacist. If you have any questions or doubts about the method and timing of the injection, you must let them know. Also be sure of the syringe type, needle length and needle size before proceeding.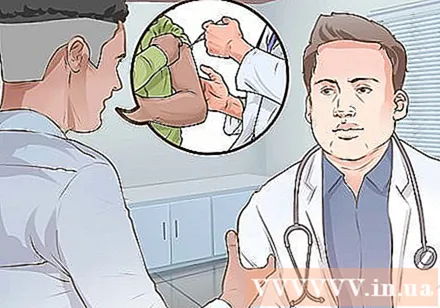
- Some drugs are available commercially in syringes, while others require you to draw into the syringe from a dropper vial.
- You must be familiar with the products to use, as some patients use more than one home injection.
- It is easy to get the wrong syringes and needles for one drug for use with another drug's syringe and needle.

Get familiar with the product packaging. Not all injectables are packaged the same way. Some drugs require you to reassemble before an injection, while others come packed with everything, including syringes and needles. Please repeat, most important As a health care provider, you must instruct you about the drug to be injected and all the specific preparation steps for that medication. Simply reading the instructions is not enough, but you have to approach a health care professional directly to ask questions, to get advice about medications and how to use them.- After you speak with your doctor, you can review the documentation that came with the product, which contains step-by-step instructions for preparing the medicine before the injection. With that said, reference to the literature cannot be substituted for the medical staff's direct instruction on how to prepare and administer medication.
- It also provides information about syringe size, needle length and needle size if the products are not included in the packaging.
- The drug comes packaged in a single dose vial. For many manufacturers, the common package for injectable drugs is to put the drug in what is known as a single-dose vial.
- The label on the bottle will usually say “single dose vial” or abbreviated to SDV.
- This means that each vial contains only one dose of medication, and there may be a little left over after you have prepared the dose for injection.
- This residual medication must be discarded, not kept for next use.
Prepare an injection from a multi-dose vial. Some medications come packaged in multi-dose vials, meaning you can take multiple doses of medication from a single container.- The label on the vial should read "multi-dose vial" or abbreviated it as MDV.
- If the medicine you are taking is packaged in a multi-dose vial, you should write the date of the first opening of the medicine on the packaging.
- Keep the medicine in the refrigerator cooler between uses, don't keep the medicine in the freezer.
- For drugs in multi-dose vials, the manufacturer often adds a little preservative to the drug during the manufacturing process. It restricts bacterial attack but protects only the purity of the drug for 30 days after opening the vial.
- You should throw away the vial 30 days after the first opening, unless your doctor tells you otherwise.
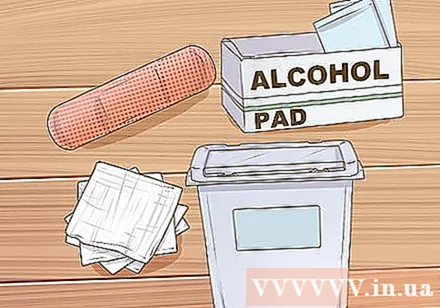
Gather things to use. The first is the medicine vial, medication-attached syringe, if any, the set of syringes-needles purchased separately or separate syringes and needles will be recombined when needed. Other things you need are alcohol swabs, absorbent gauze or cotton balls, bandages, and sharps trash.- Remove the seal on the outside of the vial, then wipe the rubber top of the vial with an alcohol swab. Always allow the area to dry the alcohol in the air, blowing in it can easily contaminate the medicine bottle or the newly wiped skin.
- Use a gauze pad or cotton ball to apply pressure on the injection site to reduce bleeding. Use a bandage to seal the wound.
- The sharps container is a way to safely protect patients, caregivers and the community from dangerous medical waste. Trash bins are made from thick plastic to store sharp items, like lancets, tubes, and needles. When the bin is full, people transport the garbage to a place that specializes in medical waste disposal.
Drug examination. Make sure you buy the correct strength medication for the required strength, and have not passed the expiration date. Medication vials or medication containers must be stored strictly according to the manufacturer's instructions. Some products do not change properties when kept at room temperature, others require refrigeration.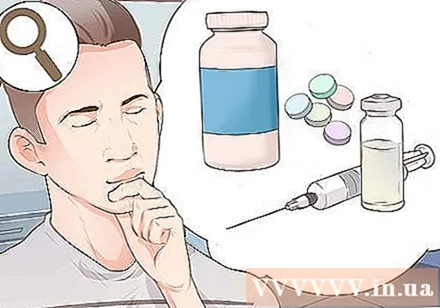
- Inspect the packaging for visible damage such as cracks or chipping on the medicine container.
- Look closely at the area around the lid of the bottle, looking for cracks and chipping in the sealing layer around the cap. If there is a chipping, the sterility of the package is no longer reliable.
- Observe the liquid inside the vial. Look for any unusual or suspended material in the medication, and most injections are usually clear.
- Insulin is cloudy in color. Except for insulin that is cloudy, if you see anything other than a clear liquid, the vial must be thrown away.
Hand washing. Wash your hands well with soap and water.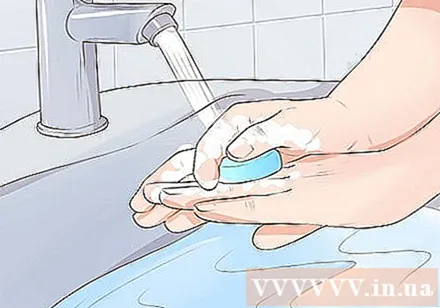
- Wash the entire nail area, between the fingers and the wrist.
- This is to prevent contamination and reduce the risk of infection.
- It is recommended to wear natural rubber medical gloves prior to the injection to increase protection against bacteria and infection.
Examine the syringe and needle. The syringe and needle must remain in a sterile sealed container, showing no signs of damage or deterioration. After opening the package, you need to check for cracks in the tube body or discoloration of all parts, including the rubber on the piston. If there is any damage or signs of deterioration, do not use the syringe.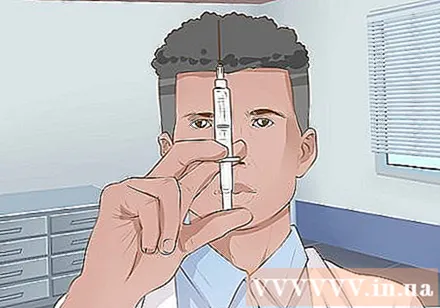
- Check the needle for signs of damage. The needle should not be bent or broken, and do not use any product that shows signs of damage, including damage to the packaging, as this indicates that the needle is no longer in a sterile state.
- Some syringes and needles have an expiry date printed packaging, but not all manufacturers do this. If you are concerned that the product is out of date, you should contact the manufacturer. Before calling, you should get the production batch number if available.
- Dispose of damaged or degraded syringes, including obsolete syringes, in the sharps container.
Buy the correct syringe type and size. You must use the correct syringe designed for the medication you are going to use. Avoid swapping different syringes as this can lead to serious errors in dosing. You should therefore only use the type of syringe that is recommended for the drug you intend to use.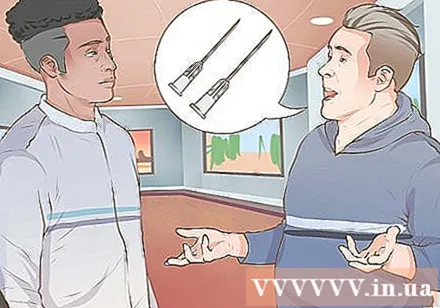
- Choose a syringe that will only contain a little more than the dose to be injected.
- Follow the manufacturer's recommendations for needle length and needle size.
- Needle size is the number that indicates the diameter of the needle, a larger number means the thinner the needle. If the drug has a high viscosity then the needle size number should be small, ie the needle has a larger diameter.
- Currently most syringes and needles are manufactured in sets for safety reasons. When choosing a syringe size, you also choose the length and the needle size. You must use the correct kit for the medication to be injected, this information is detailed in the product documentation, or you can ask your pharmacist, doctor or nurse.
- Currently, separate syringes and needles are still sold. If you have these, you must combine them.Be sure to check that the size of the syringe and needle match each other, the needle is sterile, has not been used, and the length and size match the type of injection. Intra-muscle and subcutaneous injections use different types of needles.
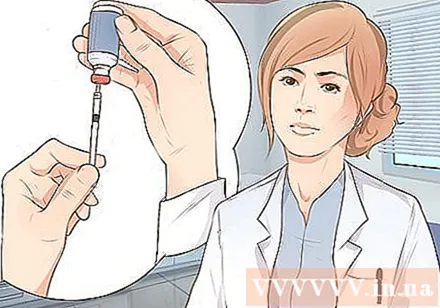
Withdraw the medication into the syringe. Follow the directions on the package if you have one, or just draw the medication from the vial into the syringe.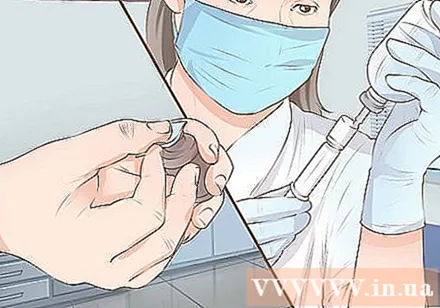
- Sterilize the mouth of the vial with alcohol and let dry for a few minutes.
- Prepare to put the medicine in the tube. First you need to know the exact dose of medication to take out, and make sure the syringe contains the correct amount of medication as directed. This information is on the label or you should follow the instructions of your doctor or pharmacist.
- To draw the medication into the syringe body, pull the plunger backwards to draw in the same amount of air as the medication needed.
- Turn the vial upside down, poke the needle through the sealing rubber and push the plunger to pump air from the tube into the vial.
- Then pull on the plunger to draw the correct amount of medication into the tube body.
- Sometimes you can see air bubbles in the tube. Tap the syringe while the needle is still in the bottle, so air bubbles travel to the top of the syringe.
- Push the air back into the vial, then continue to draw more medication if needed to make sure you have the right dose.
Help the patient relieve pain. Consider applying cold compresses to the area before the injection to relieve the pain, especially if the patient is a child. Let them sit in a comfortable position with the skin about to be injected.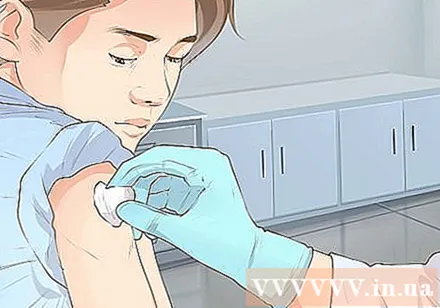
- You should stand in a position that makes it easy to access the area where the injection is needed.
- Ask the patient to hold and relax as much as possible.
- If you use rubbing alcohol, wait a few minutes for the skin to dry before puncture the needle.
Method 2 of 4: Subcutaneous injection
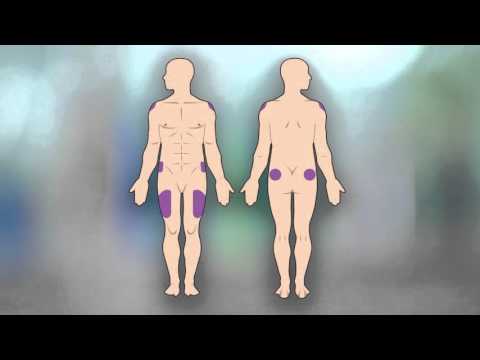
Locate the injection site according to your doctor's instructions. Subcutaneous injection means injecting the drug into the subcutaneous fat layer, which applies to certain drugs and to small doses of the drug. The fat layer where the medication is injected is between the skin and the muscle.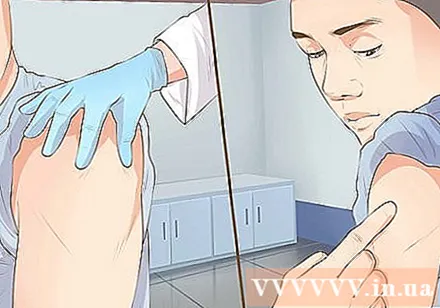
- A suitable location for subcutaneous injection is in the abdomen, you should choose an area below the waist and above the hipbone, about five centimeters from the navel. Avoid injections near the navel.
- Subcutaneous injection can also be done in the thigh, about the middle of the knee and hips, slightly skewed to the side so that you can pinch a stretch of about 2.5 to 5 cm of skin.
- The lower back is a good place for subcutaneous injection. Aim for the area above your buttocks, below your waist, and midway between your spine and the hip edge.
- You can also inject into the biceps, as long as there is enough skin to pinch a 2.5 to 5 centimeter segment. Choose a position between your elbow and shoulder.
- Alternate injections at different parts of the body to avoid bruising and skin damage, or you can also inject the same site, but you should choose a different skin to inject each time.
Start the injection. Clean the skin around and where the injection is needed with rubbing alcohol, let the alcohol dry itself before injecting. Waiting time for the alcohol to dry is about one to two minutes.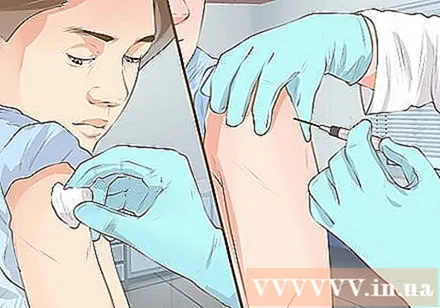
- Do not use your hands or anything to touch this area while you wait.
- Make sure you have selected the correct medication, injection site, and dose as directed.
- Hold the syringe with your dominant hand and remove the needle cap with the other hand. Use your non-dominant hand to pinch the skin where the injection is needed.
Determine the needle puncture angle. Depending on how much skin you can pinch up, the puncture angle can be 45 degrees or 90 degrees.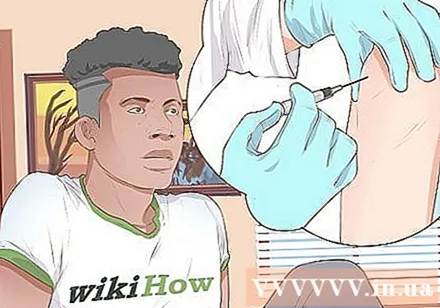
- Use a 45-degree puncture angle if you can only pinch 2.5 cm of skin.
- If you pinch 5 cm of skin, you should poke the needle at a 90 degree angle.
- Grasp the syringe tightly and act quickly when inserting the needle into the skin.
- Use your dominant hand to quickly and carefully insert the needle at the predetermined angle, while the other hand is still pinching the skin. The quick needle puncture helps the patient not feel stress.
- There is no need to test for blood draw when subcutaneous injection. It is also not harmful to take this step unless you are taking an anticoagulant injection, such as enoxaparin sodium.
- Pull the plunger back slightly to see if blood is being pulled into the syringe. If there is blood you have to pull out the needle and re-inject it in another location, otherwise if there is no blood, you can continue to inject the medicine.
Inject medication into the patient. Push down on the plunger until all the medicine has entered the patient's body.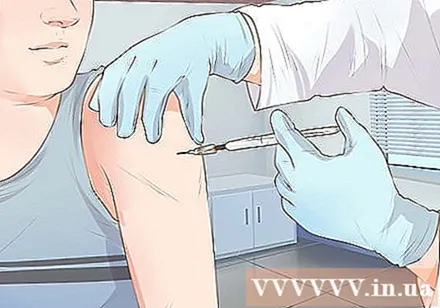
- Pull out the needle. Use your finger to press on the skin above the injection site, with a quick and careful movement, withdraw the needle at the same angle when puncture.
- The whole process should take no more than five or ten seconds.
- Place all sharp waste in the correct trash.
Insulin injection. Insulin is injected under the skin but requires a different type of syringe to be used for more accurate dosing, usually patients will have to inject insulin continuously every day. So you should make a note of the injection sites for rotation after each.
- Notice the difference in the syringe. Using a regular syringe can cause serious dose errors.
- Insulin syringes are divided in units instead of cc or ml. You must pay attention to this point when using insulin syringes.
- Work with your doctor or pharmacist to know what syringe to use for the type and dose of insulin they prescribe.
Method 3 of 4: Injections in muscles
Determine the injection site. Intra-muscle injection is the delivery of medication directly into the muscle. You need to choose a site for the injection so that the muscle tissue is easily accessible.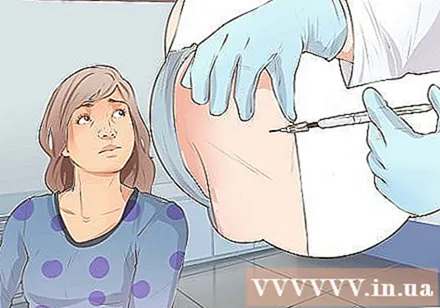
- There are four basic sites suitable for this injection: the thighs, hips, buttocks, and biceps.
- Alternate positions to prevent bruising, pain, scarring, or new skin changes.
Inject into the thigh. The location you need to determine for the injection is called the thigh muscle.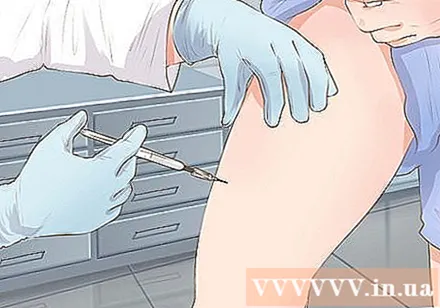
- Intuitively divide the thigh into three parts, the middle part is the target you will be injecting.
- This is a good place to inject drugs into the muscle because it is easy to see and approach your target.
Use your outer hip muscles. This muscle is located on the hip. Use body markers to determine where to inject the medication.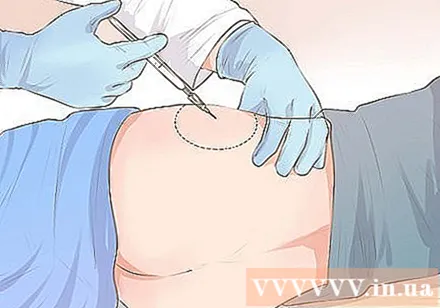
- Here's how to find it: ask the client to lie on one side. Place the palm of your hand on the cheek outside the upper thigh where it will reach the buttocks.
- The fingers point towards the patient's head and the thumb pointing towards the groin.
- You should now feel the bone along the ring and little finger.
- Create a V shape by moving your index finger away from the other fingers. The location to be injected is the middle part of the V-shape.
Inject to the buttocks. The position you are looking for is called the back-butt muscle. This location is easier to find with some practice, but when you are just starting out, you should use landmarks and divide the area into four sections to ensure accuracy.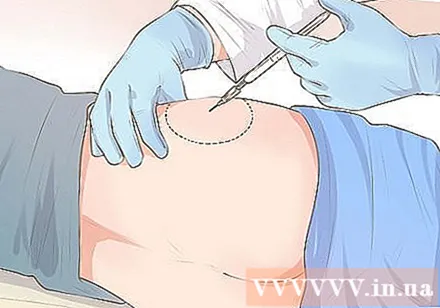
- Draw an imaginary line or real line (using an alcohol swab) from the top of the buttocks to the side of the body. Find the center point of the line and move up 8 cm.
- Draw another line that crosses the first line and forms a cross.
- Locate an arched bone in the outer upper quadrant. The injection site is located in this quadrant and below that arc bone.
Inject into the biceps. The tautus is located in the biceps and is a good place for intramuscular injection if there is enough muscle. You should inject into another site if the patient is thin or has little muscle in this area.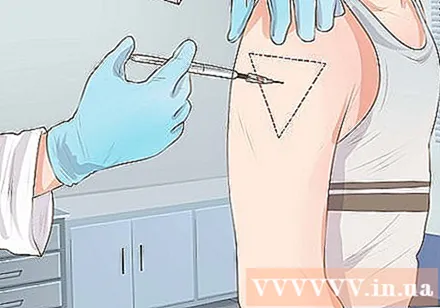
- Look for the ridge on the shoulder, the bone that crosses the biceps.
- Draw an imaginary triangle with the base of the muzzle and the shoulder, and the top at the same point as the armpit level.
- Inject in the middle of the triangle, 2.5 to 5 cm below the muzzle.
Clean the skin around and where the injection should be done with an alcohol swab. Let the alcohol dry on its own before giving the injection.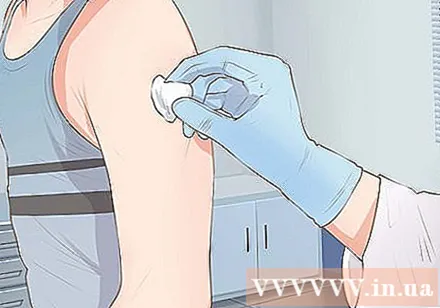
- Do not touch this place with your hands or anything while waiting.
- Hold the syringe with your dominant hand and remove the needle cap with the other hand.
- Press gently against the area of the skin you're about to inject, and pull the skin out to stretch it.
Needle piercing. Using your wrist to poke the needle through the skin at a 90-degree angle, you need to poke the needle deep enough to make sure the medication reaches the muscle tissue. Choosing the correct needle length will help you to travel more accurately.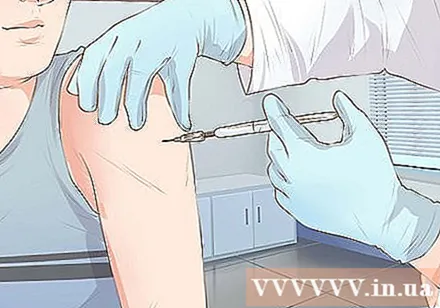
- Check for bleeding by gently pulling on the plunger. Watch for blood withdrawing into the syringe as you pull on the plunger.
- If there is blood, you must carefully withdraw the needle and re-inject it into another site, if there is no blood, you can start the injection.
Carefully inject the drug into the patient. Push down on the plunger until all the medicine has entered their body.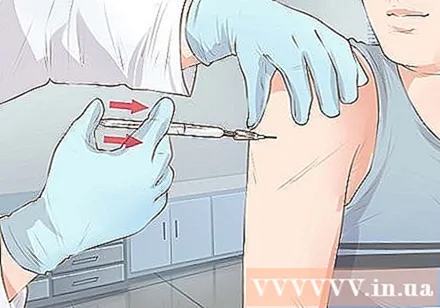
- Do not push the plunger too hard because this will go too quickly, but you should push firmly and slowly so that it does not cause much pain.
- Pull out the needle at the same angle as the puncture angle.
- Use a gauze pad or cotton ball and bandage to cover the injection site, then be sure to check it often. Make sure the injection site is clean and free of bleeding.
Method 4 of 4: Pay attention to safety after injection
Watch for signs of an allergy. The first time a new drug is given, the patient should be vaccinated in the clinic so that symptoms and signs of allergy can be monitored by a doctor. However, if signs and symptoms of an allergic reaction appear in the following injections, you should seek immediate medical intervention.
- Signs of an allergy include hives, hives, or itching; Rapidly breath; difficulty swallowing; feeling like a blocked throat or airways; swollen mouth, lips or face.
- Call the emergency number right away if the symptoms get worse. If the drug you have just injected contains an allergen, your body will respond more quickly.
Treat the wound if infection occurs. Even the best injection technique can sometimes lead to infection.
- Contact your doctor right away if you have a fever, flu symptoms, headache, sore throat, joint and muscle pain, or digestive problems.
- Other symptoms that require immediate medical attention include chest tightness, nasal congestion, a rash all over the body, and neurological problems such as confusion or disorientation.
Observe the injection site. Watch for changes in skin tissue at the injection site and in the immediate vicinity.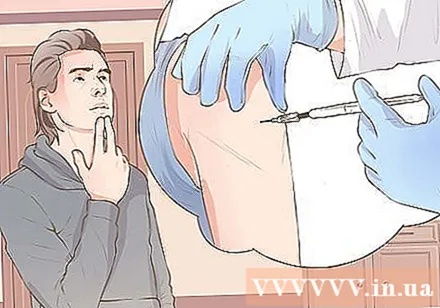
- Some drugs are more likely to cause a local reaction than others. You should read the medication guide before the injection to know what reactions will occur.
- Common reactions at the injection site are redness, swelling, itching, bruising, and sometimes lumps or stiffness.
- For patients requiring frequent injections, alternating injections at different sites can reduce damage to the skin and surrounding tissue.
- If the reaction at the injection site does not go away, you should go to a hospital for evaluation.
Dispose of used items safely. The sharps container is a safe way to dispose of lancets, tubes, and needles. You can buy this trash from the supermarket or online.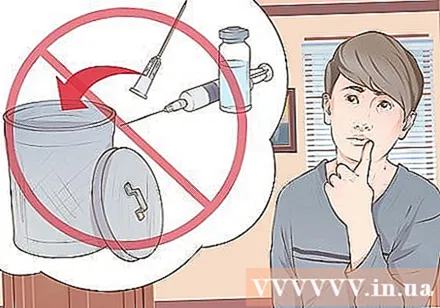
- Never put lancets, tubes, and needles in the regular trash.
- At present, there is no requirement for waste classification to be applied to individual households. However, you can ask your doctor or healthcare staff about how to safely dispose of medical waste and ensure the safety of your family and community.
- Used sharp objects such as needles, lancets and syringes are dangerous medical waste, as they get bacteria from the skin and blood from direct contact with you or a sick person during the injection.
- Consider working with a company that specializes in returning returnable kits. They provide you with a sharps container, and have a mechanism that allows you to mail your full trash back to them. That company is responsible for the proper disposal of medical waste.
- Ask your pharmacy about how to safely dispose of any unused excess medicine. Usually, the opened potion can be placed in the sharps container.
Warning
- Again, you should not self-medicate without adequate guidance from your health care provider. This article is not intended as a substitute for the instruction of a doctor, nurse or pharmacist on how to administer parenteral medication.


