Author:
Monica Porter
Date Of Creation:
17 March 2021
Update Date:
1 July 2024
Content
Nothing is more frustrating than that you have a lot of great songs on your iTunes account but don't know how to switch to iPod. iTunes can be a tricky program to use, especially if you've linked your iPod to your account on your computer for the first time. If you are still struggling, don't be discouraged! This guide will help you understand how Apple programs now work. Learn how to transfer music from your iTunes library to your iPod (as well as how to transfer music without iTunes), see step 1 below.
Steps
Part 1 of 2: Add music to iPod
Connect your iPod and open iTunes. To begin the process of adding music to iPod, we need to open iTunes. If you have not connected your iPod to the device, it should be plugged in as soon as you open iTunes. After a few seconds, iTunes will recognize the device and display a small "iPod" icon in the top right. Click this button.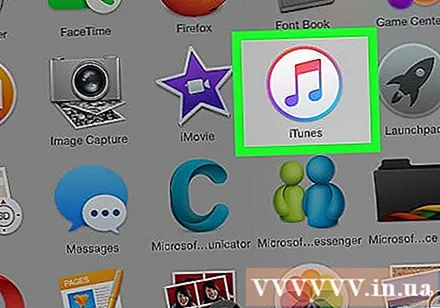
- Note: with iPad, iPod Shuffle and other iTunes compatible devices, the connection process will be similar, but the labels of the buttons will be different.
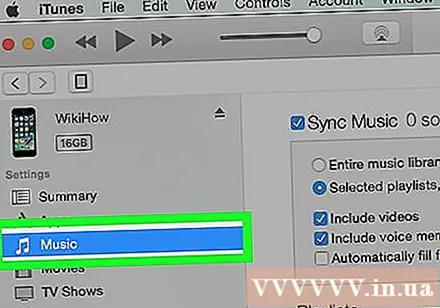
Click "Music" on the next screen. After you click the "iPod" button, a screen displaying a series of information about the iPod will appear, including the device name, storage capacity and many other options. No need to care too much, just click "Music" at the top of the window to continue.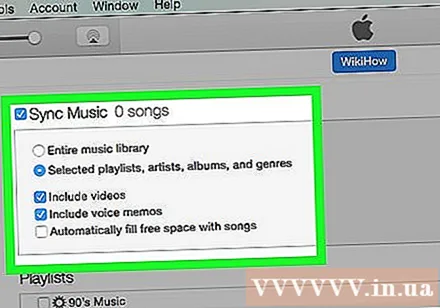
Choose between syncing entire library and selective songs. At the step of transferring music to iPod, you have two options: iTunes can automatically transfer the entire library to the player, or let you choose the song you want. Check the radio button next to the "Entire music library" option if you want to add an entire library, or "Selected playlists, artists, albums, and genres" if you want to choose your own songs.- At this point, you should also take a look at the miscellaneous options below. For example, if you want to add music videos that are in your library, check the box "Include music videos", and so on.
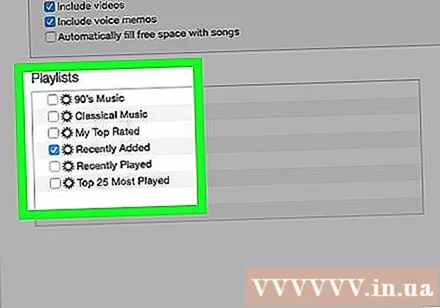
If you want to choose to add manually, select your playlist / artist. With the option to manually add songs to your iPod, you can use the menus in the bottom half of the iTunes window to choose which songs to add. Scroll across the playlist, artist, genre, and album menus and check the box next to the song you want to add to your iPod.- For example, if you want to add singer Al Green's songs to your iPod, you need to scroll on the artist list until you find Al Green's name, then check the box next to his name. On the other hand, if you just want to add songs from this artist's best album, scroll on the album list until you find it. Greatest Hits of Al Green and check the box next to that option.
- Don't worry if some of your selections overlap as iTunes won't add the same song to your iPod twice.
Click "Sync" (short for "Synchronize") to add the song. Whether you choose to add songs manually or automatically, after selecting songs you need to click "Sync" on the bottom right of the screen. iTunes will start adding the songs you selected to your iPod right away. You can observe the progress through the progress bar that appears at the top of the iTunes window.
- Do not disconnect iPod during this process. The sync will be interrupted and the songs you selected will not be fully transferred. In addition, iTunes can also freeze or function improperly.
Enjoy the music. So you have successfully added songs to your iPod. To play music, disconnect your iPod, plug in your headphones, select the song from the "Music" option at the bottom right of the iPod's main menu and start enjoying.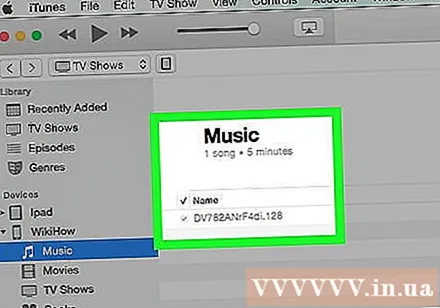
- Note: although this tutorial describes how to add songs to iPod, the process is similar for other multimedia formats as well. For example, if you want to add a movie to your iPod, you need to click the "iPod" icon, then click "Movies" at the top of the iTunes window and proceed like the instructions above.
Unmark the sync option to delete the song. When you want to delete songs from your iPod, connect the device to your computer and proceed as usual to the sync screen. If the option is not already selected, you need to click on the radio button next to "Manual" to add a song. Now, start scrolling across the artist windows, playlists, and so on unmarked the box next to the content you want to delete from your iPod. Once selected, click "Sync" to apply the changes. advertisement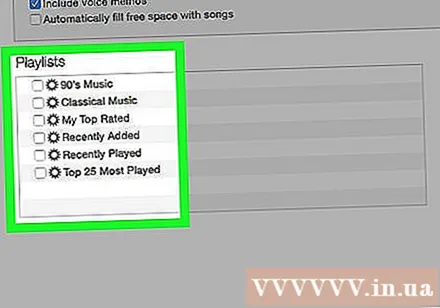
Part 2 of 2: Connecting to iTunes for the first time
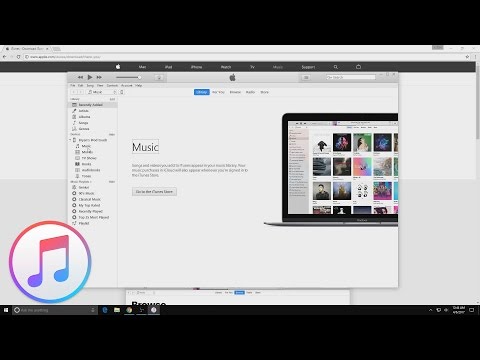
Download some iTunes settings. If you don't have iTunes, you'll need to download and install it before continuing.While we can add music to iPod without iTunes (see above), this is the most popular way these days. In addition, iTunes is free, you just need to download and install to enjoy many useful features such as access to the iTunes Store in the program and options to automatically sync iPod library with library on computer. .
- To download iTunes, simply go to iTunes.com and click the "Download iTunes" link at the top right. Provide your email address and then click "Download Now" to begin downloading.
Connect iPod to computer. The newly purchased iPod will be bundled with a USB cable. This cable allows users to transfer multimedia data between computer and iPod. You need to plug the small, flat cable into your iPod (the corresponding port will be on the bottom edge of the player), the other end plugs into the USB port on your computer to get started.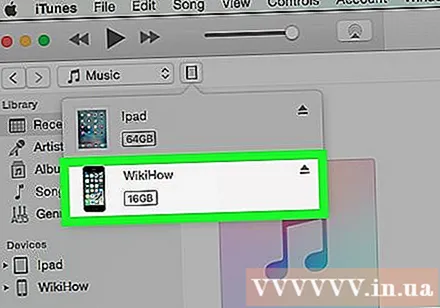
- Note: iPod models other than the standard version (eg iPod Shuffle) will have a cable with a different connector. However, all iPod cable variants have a USB port connector.
Wait for iTunes to recognize the iPod. When you plug in your iPod, iTunes will automatically launch. If not, you can open the app yourself. In a few moments, iTunes will recognize the iPod and the Apple commercial logo will appear on the iPod without your confirmation. At the same time, a progress bar will also appear at the top of the iTunes window showing iTunes is downloading the data needed to interact with the iPod. This process may take a few minutes, wait until iTunes is finished preparing.
- If iTunes doesn't recognize the device itself, don't worry. iTunes frequently crashes with new devices. Try disconnecting your iPod and then plugging in, opening and closing iTunes, or restarting your computer before visiting the iTunes Support support page.
- Also, if your iPod is running low on battery, you need to wait for it to charge for a few minutes using computer power before iTunes realizes it.
Follow the instructions on the screen. Finally, iTunes will automatically launch a large welcome message. Click "Continue" to continue. You will then see a screen titled "Sync with iTunes". Click "Get Started" on the desktop to go to the introduction screen with various options such as:
- Update to the latest firmware for iPod. If the iPod's software is outdated then when you click "Update" the latest update will be downloaded and installed. This feature keeps your iPod full of features and security fixes.
- Create data backup on iPod. There is no data to back up if this is your first time using an iPod, but choosing the automatic backup location (on your computer or iCloud) will help us not to worry in the future.
Click "Done". To exit the current screen, simply click the blue "Done" button at the top right of the iTunes window. After exiting iTunes, you will return to the screen you were using before.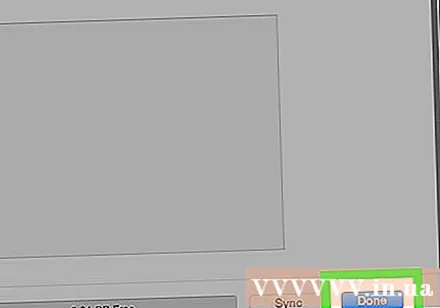
- From here, you can add music to your iPod as you normally would (see top).
Advice
- To buy new songs, you need to open the iTunes Store. You can access the iTunes store through the button at the top right of the iTunes window.
- Listen to the song before you buy it. You can listen before you buy by double-clicking on the song on the Store.


