Author:
Frank Hunt
Date Of Creation:
14 March 2021
Update Date:
1 July 2024
Content
Visual Basic 6.0 is a programming language developed by Microsoft that is not that difficult to learn and apply by beginners, as well as useful for advanced programmers. Although it is no longer supported by Microsoft, thousands of applications still run on this language and many more are in development. This guide will show you how to create a simple calculator in Visual Basic 6.0.
To step
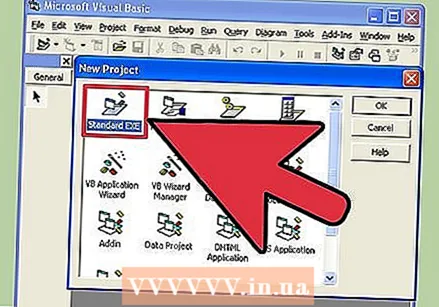 Open Visual Basic 6.0 and create a new one Standard EXE Project On. Standard EXE projects provide you with a handful of commands and tools that can be useful in developing simple and more complex programs.
 - You can also choose from one VB Enterprise Edition Project with which you have many more tools to work with. However, for a novice programmer, it is recommended to choose Standard EXE Project.
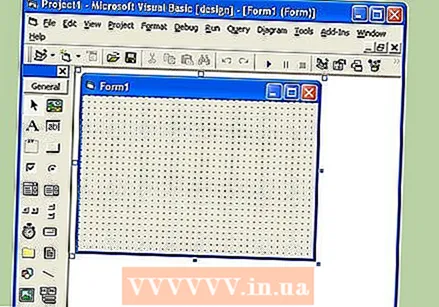 Understand the project window. In the middle of the screen you will find a box with many dots. This is your form. A form is where you will place the various elements (command buttons, images, text boxes, etc.) for your program.
 - On the left side of the screen you will find a menu with tools. These tools contain various predefined elements of a program. You can drag these elements into your form.
- You will find the form layout at the bottom right. This determines where your program will be shown on the screen when the project is completed and executed.
- In the middle, on the right side, you will find the Properties box with the properties of each element in the form. You can use this to change the various properties. If no element is selected, the properties of the form are shown.
- At the top right you will find the project explorer. This shows the different designs - forms that are part of the project.
- If one of these boxes is missing, you can add it by clicking the "View" button in the main menu.
 Drag a label onto the form and change the label text to "Enter the first number".
- The text of a label can be changed using the Properties dialog box.
 Create a text box to the right of the first label. Delete any text displayed in the text box by clearing the "Text" field in Properties.
  Create another label and change its text to "Enter the second number" and create another text box to the right of it.
 Drag four command buttons under these two labels. Change the text of these command buttons to "Add", "Subtract", "Multiply", "Divide" respectively.
  Create another label with the text "Result" and a text box to the right of it and below the four command buttons. This text box will be used to display the result. This completes your design.
  To start coding, click the form in the project explorer and then select the button on the far left. The encryption screen opens.
 - Click the drop-down box in the top left corner of the encryption screen. Click on all commands (Command1, "Command2", etc.) one by one, so that the coding overview is visible in the coding screen.
 Declare the variables. Enter the following:
 - Dim a, b, r as double
- a is the entered value in the first text box, b is the value entered in the second text box and O is the result. You can also use other variables.
 Enter the code for the Add command (Command1). The code is as follows:
 - Private Sub Command1_Click ()
a = Val (Text1.Text)
b = Val (Text2.Text)
r = a + b
Text3.Text = r
End Sub
- Private Sub Command1_Click ()
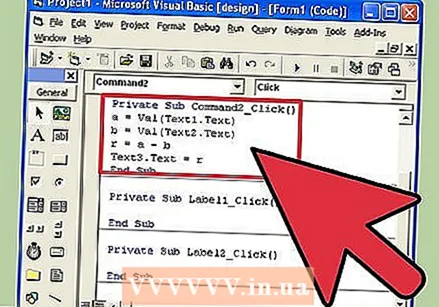 Code the Subtract command ("Command2"). The code is as follows:
 - Private Sub Command2_Click ()
a = Val (Text1.Text)
b = Val (Text2.Text)
r = a - b
Text3.Text = r
End Sub
- Private Sub Command2_Click ()
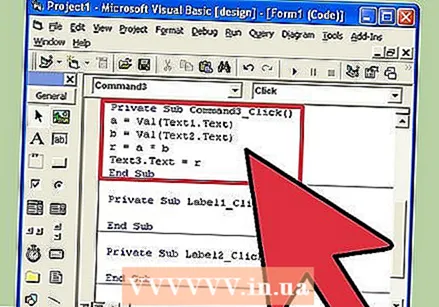 Code Multiply (Command3). The code is as follows:
 - Private Sub Command3_Click ()
a = Val (Text1.Text)
b = Val (Text2.Text)
r = a * b
Text3.Text = r
End Sub
- Private Sub Command3_Click ()
 Encrypt Share (Command4). The coding is as follows:
 - Private Sub Command4_Click ()
a = Val (Text1.Text)
b = Val (Text2.Text)
r = a / b
Text3.Text = r
End Sub
- Private Sub Command4_Click ()
 Click the start button or press F5 to run your program.
- Test all assignments and see if your program works.
 Save your project and the form. Create your project and save it as a .exefile on your computer. Run it whenever you want!
Tips
- Add colors to the form and text boxes, using the Properties dialog!
- Learn to debug your programs in case an error occurs.
- You can create different variations of a simple calculator. Optionally, use a drop-down list instead of command buttons.


