Author:
John Stephens
Date Of Creation:
2 January 2021
Update Date:
3 July 2024

Content
- Hot glue can be difficult to clean once it is on the countertop, so be extra careful. Glue sometimes gets thrown out of guns too, so you should always place the glue gun on the covered desk.
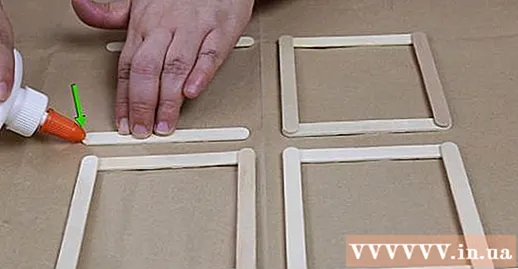
- These squares will be the walls of the house.

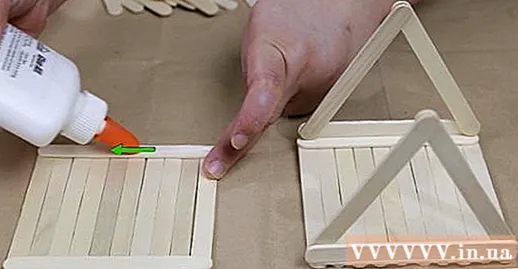
Attach popsicles to fill the wall frame. Lay down the square, stick the popsicles in rows enough to fill the square. Spread a row of glue on opposite square sides and place the popsicles. Repeat this step to complete all four squares.
- Be sure to stick the popsicles together so that there are no gaps in the wall.
- You probably won't have enough room left when you reach the last stick. If so, use a multi-purpose knife to trim the popsicle stick so it fits into the frame.
Part 2 of 3: Making a roof
Building the original frame. Arrange 3 popsicles into a triangle, the ends of the popsicles overlap at 3 corners. Stick that is stacked on any stick. Use a small drop of glue to stick the popsicles at the 3 corners. Repeat this process to create another triangle.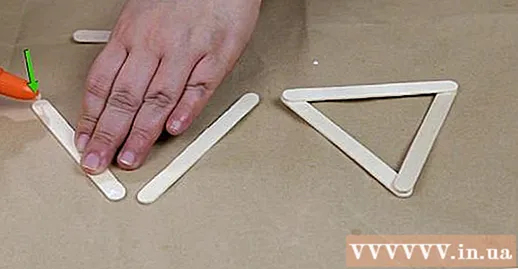
- This basic roof style uses only two triangles, but you can make the roof more solid by adding a third triangle between the two main triangles of the roof.
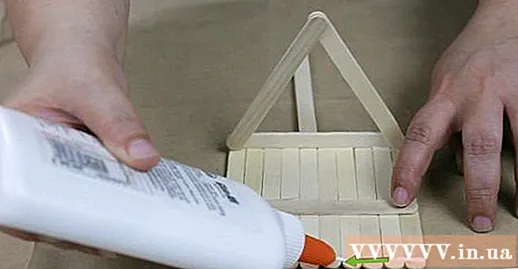
Arrange the popsicles to form one side of the roof. Place one drop of glue onto the flat surface of each popsicle stick. Attach the popsicles to both triangles at a vertical angle. Repeat this movement until the popsicles fill the length of the sides of the triangle. Arrange the popsicles close together. Hold each popsicle stick for at least 5 seconds to allow the glue to stick.- Be gentle when attaching each stick to prevent the previously attached rods from being pulled out of the triangle.
Laying the second side of the roof. In the same way as the front, you need to attach the popsicles to the opposite side of the roof. Be careful when handling the roof so that it doesn't come off of any popsicles.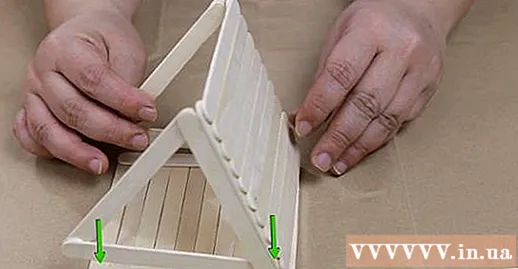
Cover the open ends of your roof. You now have a set of open roof frames at both ends. If desired, you can completely conceal the interior of the roof. Starting at the bottom edge of the triangle, stick a popsicle stick across the roof frame. When adding each popsicle stick, you will have to cut each stick slightly as the closer the triangle gets to the top.- A fully enclosed roof will make the house with ice cream look more realistic, because real houses are built that way.
Part 3 of 3: Assembling the house
Cut out the windows. If you want to make the house more lively, you can cut one or two empty boxes on the wall to make a window. The easiest way to do this step is to cut before you attach the walls. Carefully use a multi-purpose knife to cut a square 2.5 cm x 2.5 cm on one or two walls.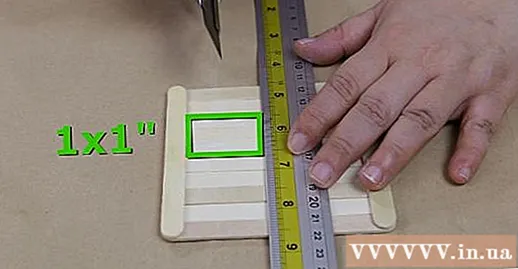
- Make the windows in the center of the wall or sideways if you like.
- To embellish the house, you can use the pieces of ice cream just cut out to make curtains on either side of the window or as a frame around the window.
Cut a doorway. You can make the ice cream house look even more realistic by cutting an empty box on the wall as the door. The size of the door will depend on the size of the popsicles. Make the door nearly the full height of the house and about 1/3 of the width of the house. Use a multi-purpose knife to cut.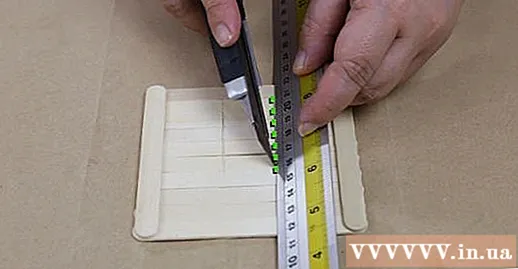
- You can stick a piece of paper the size of a box on the edge of the door to look like a real door. Fold it along the edge of the paper and tap it against the door so it opens and closes.
Glue walls together at corners. Erect the two walls so that the popsicles lie vertically. Spread a line of glue along the inside edge of the popsicle stick at the end of each wall. Gently press the adhesive edges together for about 30 seconds.
- Take turns to attach the remaining two walls to create a basic structure for the house.
Roof fitting. Fix the roof by spreading a line of glue along the top edge of the frame. Place the roof on top and gently press it down long enough for the adhesive to stick. You can also choose not to have the roof glued off so that you can lift and place objects inside the house.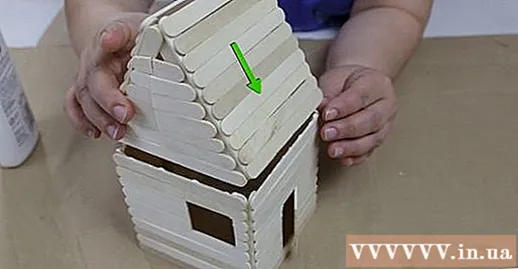
Home decoration. There are almost no limits in home decor options. Use spray paint to paint the entire house in one color. Use paintbrushes to paint walls one color and roofs in another. Stick fabrics or wrapping paper to add some style to your walls. You can stick moss, flowers or sticks to the house to look like a house in the woods. advertisement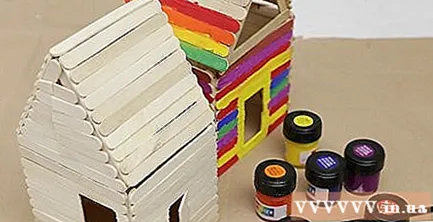
Advice
- This style of ice cream house is mainly decorative and can be uncertain when playing hard.
- You can paint or decorate the house with as many styles as you like after it's done.
- Prepare and gather materials in advance.
Warning
- Be careful when cutting the popsicles to lest splashes into your hands.
- Always use care when using a knife to avoid cuts.
What you need
- Craft popsicle sticks or popsicles
- Heat glue gun or other glue
- Multi-purpose knife
- Paper (optional)
- Paints or other decorative products (optional)


