Author:
Judy Howell
Date Of Creation:
2 July 2021
Update Date:
1 July 2024

Content
This tutorial is going to teach you how to easily create a table in Adobe Illustrator.
To step
 Select the rectangular selection tool in the toolbar.
 Click and drag in the document to create a rectangle according to the desired dimensions. (This rectangle can be resized later, using the Scale tool).
 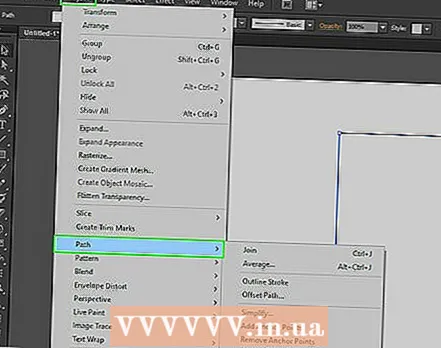 With the newly selected rectangle selected, go to the "Object" menu, scroll down to "Path" and choose "Split by Grid ..." from the submenu. Do not click in the document outside the rectangle, otherwise the necessary command will not be available, and this step will not work.
  Set up your table. Click the checkbox next to "Preview" (this shows the result of each setting you want to change), then enter the desired number for rows and columns. To ensure there is no space between the cells of the table, set the values of "Gutter" to "0".
 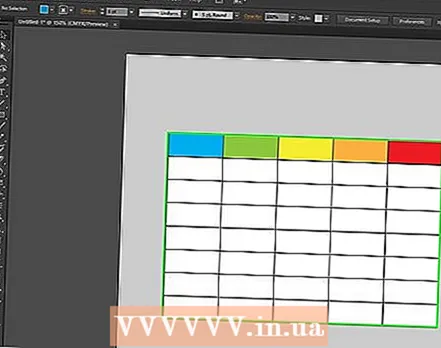 The table is created. You can change the color and line width, or add text in each box.
 - Click the border of each cell with the Selection tool to adjust the fill color or the stroke color with the Swatches palette.


