Author:
Joan Hall
Date Of Creation:
3 July 2021
Update Date:
1 July 2024

Content
- Steps
- Method 1 of 4: Knitting on the canvas with half columns (chain stitch crochet)
- Method 2 of 4: Single crochet across the canvas
- Method 3 of 4: Crochet a circle (polka dot)
- Method 4 of 4: Step Seam
- What do you need
By crocheting on a finished fabric, we mean any technique for decorating a knitted product using a crochet hook. One of the simplest techniques is knitting on the surface of the product with half-columns, better known as a chain stitch, crocheted. Once you have mastered it, you can try other techniques, following our advice.
Steps
Method 1 of 4: Knitting on the canvas with half columns (chain stitch crochet)
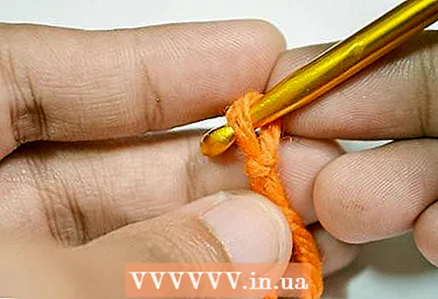
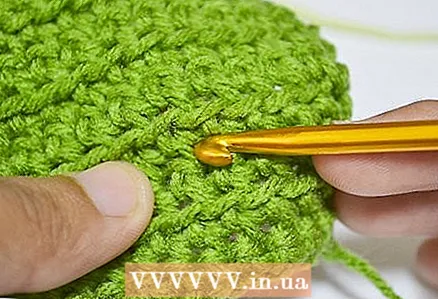 1 Insert the hook into the first loop. Insert the head of the hook at the point on the finished blade where you want the pattern to begin.
 - The hook is inserted from the front (from the front of the web).
 2 Hook the thread. Secure the thread to the hook head with a slip knot.
 - The slip knot should be on the wrong side of the canvas.
- Keep in mind that the slip knot step can be skipped, but it will secure the first loop of the pattern more securely, so we strongly recommend doing it anyway.
 3 Pull out the loop. Pull the hook so that it is in front of the canvas again. The loop formed by the slip knot will be on the face of the garment.
 - Both the free end of the thread and the working thread must remain on the wrong side.
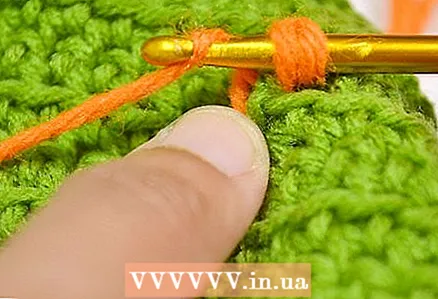
 4 Insert the hook at the next point. Insert the head of the crochet hook into the next stitch, gap, or row.
 - The point you choose depends on your drawing. If it goes along the posts of the canvas, insert the hook into the next post or skip in the same row. If the pattern does not match them, insert the hook into the appropriate column or skip of the adjacent row.
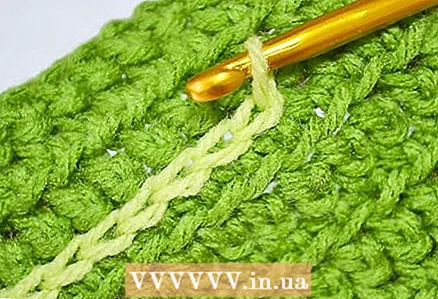
 5 Grab the thread. Crochet the thread from the wrong side of the knit.
 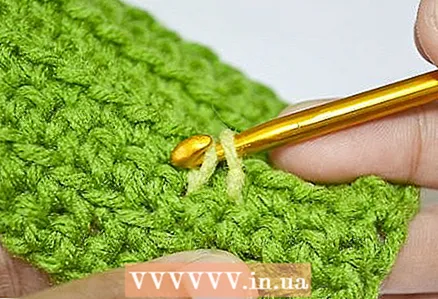 6 Pull out the loop. Bring the hook with the captured thread to the right side of the product. This creates a loop.
 - At the end of this step, you will have two stitches on the hook.
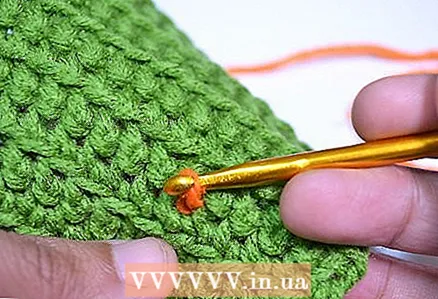
 7 Pull the second loop through the first. With the head of your hook, pull the top loop through the bottom loop.
 - After that, one loop will remain on the hook.
- You now have the first half stitch (the first stitch of the chain stitch).
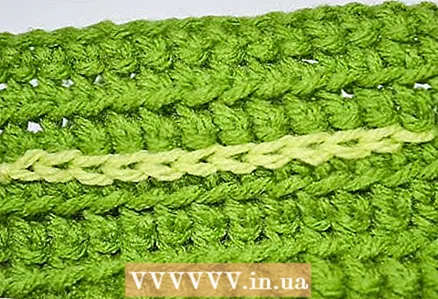
 8 Repeat as many times as needed. Continue to sew the same stitches over the knitted fabric until you complete the pattern.
 - The crocheted tambour stitch can be used to embroider outlines, parallel lines and objects of any shape.
 9 Secure the thread. When you are finished, cut the thread from the wrong side of the fabric, leaving an end about 10 cm long. Pull it through the loop on the hook (still from the wrong side) to secure the stitches you made.
 - Thread the excess thread under the stitches from the wrong side of the garment.
- This step completes the process and the last loop is removed from the hook.
Method 2 of 4: Single crochet across the canvas
 1 Hook the thread. Use a slip knot to secure the yarn to the hook.
  2 Insert the hook into the first loop. Insert the crochet hook into the first column where you want to start your drawing.
 - More precisely, you need to insert the hook behind the back horizontal arch of the post you are about to knit over.
- If you know how to knit with ordinary single crochets: this horizontal bow will play the role of the top loop of the previous row, into which you usually knit a column.
 3 Pull out the loop. Grab the thread with the crochet hook while it is still under the fabric. Crochet the thread through the fabric to the right side to form a loop.
 - After this step, the hook should have two stitches.
 4 Grab the thread with your crochet hook. Crochet the thread again, working forward.
  5 Pull out the thread. Gently pull the yarn you grabbed through the hooks through both loops on the hook.
 - You have completed one single crochet.
- Please note: after completing the column, you should have one loop left on the hook.
 6 Repeat as many times as needed. Work as many single crochets across the surface of the canvas as needed for your pattern.
 - Basically, you will be knitting a row of regular single crochets. The only difference is that you will not knit them along the edge of the previous row, but along the surface of the product that you are decorating in this way.
 7 Secure the thread. When finished, cut the thread, leaving an end 10 cm long. Grab it with your crochet hook and pull it through the last loop on the hook.
 - This will remove the last loop from the hook and secure the work.
- Remember to tuck in the remaining end of the thread to hide it and to keep the knitting from unraveling.
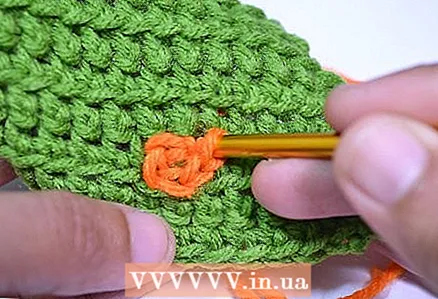
Method 3 of 4: Crochet a circle (polka dot)
 1 Insert the hook into the canvas. Insert the crochet hook into the first column or gap where you want the pattern to start.
 - There should be no thread on the hook yet.
- Please note that the product should be facing you, but the thread should be at the back.
 2 Pull out the loop. Grab the thread with the crochet hook and pull it forward.
 - After completing this step, one loop should remain on the hook.
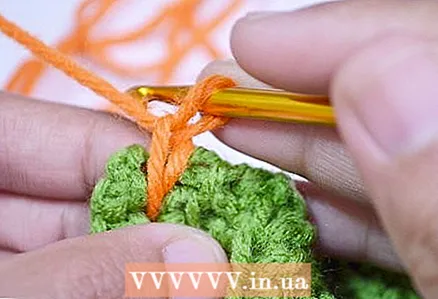
 3 Insert the hook into the next column. Insert the crochet into the stitch or pass directly next to the one you just knitted into.
 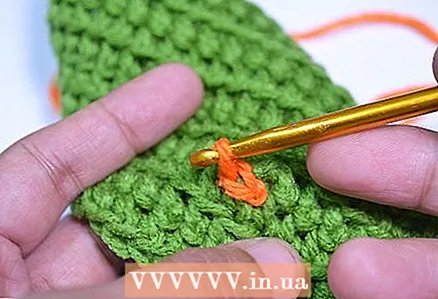 4 Make one chain stitch. Grab the thread with your crochet hook. Pull the thread through the fabric and the loop on the hook in one go.
 - If this technique is too difficult for you and you cannot cope, you can first pull the thread forward through the canvas, and then pull it through the loop on the hook.
- Basically, you've just knitted an air loop on the surface of the finished fabric, thereby securing the thread in place.
 5 Repeat several times. Insert the crochet hook into the second stitch you were stitching into and repeat the procedure to make another chain stitch. Repeat until you get the desired size circle.
 - For a medium sized pea, you will need three to five stitches.
- Each air loop must be knitted into the same column of the finished fabric.
 6 Insert the hook into the next column. When you have knitted a circle of the size you want, insert the crochet into the column or pass directly next to the one in which you knitted the air loops.
  7 Make one chain stitch. Grab the thread with the crochet and pull it forward through the fabric while pulling it through the loop on the hook.
 - As before, to make it easier for you, you can first pull the thread forward through the fabric, and then through the loop on the hook.
- This last chain loop completes your pea.
 8 Secure the thread. Cut the thread, leaving an end 10 cm long. Pull it through the loop on the hook to finish and secure the work.
 - Pull the remaining end to the wrong side and tuck into the linen to hide. This step will also allow the knitted element to be held in place more firmly.
Method 4 of 4: Step Seam
 1 Insert the hook into the canvas. Insert the hook into the first column you plan to start with.
 - The product must lie face up; the yarn should be behind it.
- There should be no thread on the hook yet.
 2 Hook the thread. Use a slip knot to secure the yarn to the hook.
 - The slip knot should be close to the hook head on the wrong side of the garment.
 3 Make one chain stitch. Grab the thread with the crochet hook and pull it through the loop on the hook to create an air loop.
 - At the same time or immediately after you sew the buttonhole, pull the hook and thread back to the right side of the fabric.
 4 Insert the hook into the next column in the opposite direction. Insert the crochet hook next to the first stitch - not in the direction you normally knit, but in the opposite direction.
 - If you are right-handed, insert the hook into the next column to the right.
- If you are left-handed, insert the hook into the next column to the left.
- In this step, you begin to perform the first "baby step".
 5 Pull out the loop. Grab the thread with the crochet hook behind the fabric, then pull it to the right side to create a loop in the process.
 - After this step, there should be two loops on the hook.
 6 Grab and pull the thread. Grab the thread with the crochet hook and pull it through both loops on the hook.
 - In this step, you have sewn one cross stitch. In another way, this element can be called a single crochet, tied in the opposite direction.
 7 Repeat the "crustacean step" as many times as necessary. Work this element further down your canvas until you finish the desired pattern or edging.
 - To complete each step:
- Insert the crochet into the next stitch (in the opposite direction to normal knitting).
- Grab the thread and pull the loop to the right side.
- Grab the thread again and pull it through both loops on the hook.
- Continue to walk in the same direction to the end of the row. If you did everything correctly, you will have a jagged line.
- To complete each step:
 8 Secure the thread. Cut the thread, leaving an end 10 cm long. Pull it through the last loop on the hook to secure the work.
 - Pull the remaining end of the thread to the wrong side and thread into the inside of the fabric. This will secure the stitching seam and hide the excess thread.
What do you need
- Crochet
- Yarn
- Crochet hook
- Scissors


