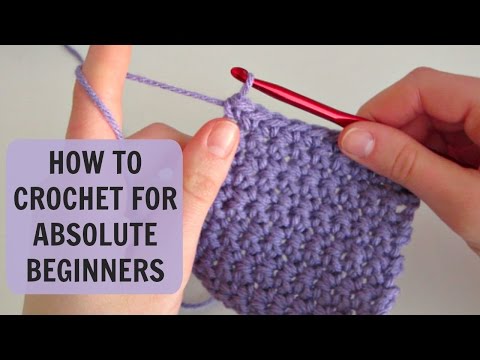
Author:
Eric Farmer
Date Of Creation:
8 March 2021
Update Date:
1 July 2024
Content
- Method 2 of 3: Method Two: Basting Stitch
- Method 3 of 3: Method Three: French Knot
- Tips
- What do you need
- The hook should be approximately the same size as the embroidery hook.
- Make a slip knot:
- Form a loop by crossing the free end of the yarn under the pinned end.
- Take the pinned side and pull it up through the loop, creating a second loop in the process.
- Wrap the first loop around the second.
- Insert the hook into the second loop and tighten the second loop on the hook.
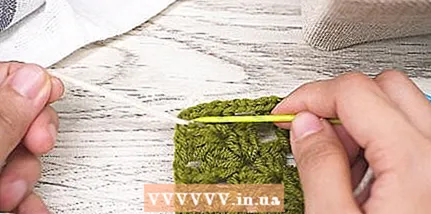
 2 Pull the buttonhole towards the front. Carefully remove the slip unit from the hook. Make a loop from the wrong side of the fabric, then insert the crochet hook into the nearest hole and grab into the loop. Pull the loop of the slip knot through the front.
 - The knot itself should be on the wrong side of your project.
- The point at which you are working should be the point at which you want to start your embroidery.
3 Insert the crochet hook into the fabric from the right side. With the loop of the slip knot on the hook, insert the hook through the hole behind the adjacent stitch. - This is the next stitch that can go right, left, up, or down. It could even be a stitch diagonally from your current position. The next stitch is simply the closest stitch needed to complete the embroidery pattern.
- This step begins the surface slip stitch.
4 Pull the loop through the front. At the back of the project, wrap the yarn around the crochet hook in a counterclockwise direction. Pull the loop of yarn back through the front of the project. - This step continues the slip stitch process, but does not end it.
5 Pull the second loop through the first. Pull the new loop you just made through the original slip loop knot, allowing the knot to slip off the hook. - The new loop should now be the only one on the hook.
- This step completes one surface slip stitch.
- Consider securing the knot or base of the slip knot from the wrong side of the fabric as you make the first slip stitch. This can help keep the stitch straight, neat and tight.
6 Slip stitch to next stitch. Sew a second slip stitch using the same method as for the first. - Insert the hook into the hole after the next stitch in the pattern, keeping the loop on the hook.
- The yarn on the hook should be on the wrong side of the fabric, wrapped counterclockwise.
- Pull this yarn back through the right side of the fabric and through the loop onto the crochet hook. The previous loop should come down and the new one should be left on the hook.
7 Repeat this slip stitch as needed. Continue sewing slip stitches in the same order until you have finished the embroidery you want. 8 Insert the hook inside out. After sewing the last stitch of your project, carefully remove the hook from the work buttonhole. Insert the hook from the wrong side, lifting the work loop in the process and dragging to the wrong side. - Make sure the work loop stays open when you remove the hook.
9 Secure the yarn. Cut the yarn, leaving a tail about 7.6 cm long. Pull this ponytail through the work loop onto the crochet hook, lowering the loop and securing the yarn. - Weave the remainder of the ponytail into the wrong side of the fabric, hiding it behind the slip stitch at the front. This will make the embroidery more durable and hide excess yarn.
Method 2 of 3: Method Two: Basting Stitch
- 1 Insert the yarn into the needle. Insert one end of the yarn through the eye of the needle. Do not tie the yarn with the needle.
- Instead of tying the yarn in a knot, you should stretch the tail about 10 cm. Press down on the tail constantly as you work to keep the yarn taut and in the right place.
- If the yarn starts to jump out of the needle during operation, just insert it back and continue working.
- 2 Tie the other end of the yarn. Cut off the length of the yarn if it is too long for your project. Tie a large knot at the loose end of the yarn you just cut.
- The yarn should be slightly longer than the total length of the finished embroidery.
- You don't need to use slip knots. A standard top-down knot works well.
- Make sure the knot you are tying has more gaps between the stitches. A large knot will help keep the embroidery from falling apart.
- 3 Start on the wrong side. Use the needle to pierce the desired spot at the beginning of your specimen from the inside out to the front side.
- Pull the needle out all the way until the knot is firmly on the wrong side.
- 4 Stitch at the bottom elsewhere. Sew the needle one full stitch at a time, then insert it into the gap on the opposite side of that stitch.
- Pull the needle all the way through the wrong side of the fabric. Continue pulling the needle out until the stitch yarn is snug against the fabric.
- If desired, you can make the stitch length longer by making more than one stitch with the needle before inserting it back into the fabric.
- This completes one basting stitch.
- 5 Pull the yarn back out. Pass the thread over a different stitch from the wrong side, then stick the needle through the hole on the other side of that stitch. Pull out the needle and yarn from the right side of the fabric.
- By doing this, you start a new stitch.
- Make sure the yarn on the wrong side of the fabric is snug against the fabric when you pull the needle out.
- If desired, you can change the stitch spacing by skipping more than one stitch.
- 6 Repeat the process as needed. Continue working this pattern until you reach the end of the project.
- Sew one full stitch from the right side, and then insert the needle into the fabric.
- Sew one full stitch from inside out, then insert the needle into the fabric.
- 7 You can sew a second line of basting stitch. If there is one stitching, it will create a dashed line, giving the embroidery a "stitched" look. If you want to create a continuous line, go over the first line with another line.
- Basically, you work in reverse and reverse the embroidery stitches. When you get to the stitch that shows the top of the fabric, sew the stitch that shows the bottom. For each stitch that is visible on the bottom of the fabric, make a stitch that is visible on the top.
- 8 Tie the end in a knot. When you reach the end of the embroidery, insert the needle into the fabric from the right side and pull it all the way to the wrong side. Tie a large knot to complete the embroidery.
- A standard top-down knot will suffice here. Just make sure the knot is too big to fit the holes in the material.
- You can trim off excess yarn or fabric from the wrong side. Just make sure it is no longer visible from the front.
Method 3 of 3: Method Three: French Knot
- 1 Pierce with a needle and knot the yarn. Trim the yarn to about 25.4 cm long. Make a knot at one end of the yarn, then thread the other end through the hole.
- Pull about 10cm of yarn through the eye of the needle to keep the yarn from slipping as you work.
- For this step, a standard top-down knot will work. Do not use a slip assembly.
- The knot should be larger than the crochet holes in the fabric so that the knot does not pop out through the holes during operation.
- 2 Insert the needle from the wrong side. Insert the needle from the seamy side to the point where you want to make the French knot. Pull out the needle and thread completely from the front.
- Ideally, you should place the needle between the stitches in your initial piece of knitting.
- Continue to pull the yarn from top to bottom so that the knot at the end of your yarn is snug against the wrong side.
 3 Pinch and pull out the needle. With the index and thumb of your non-dominant hand, clamp the yarn 7.6 to 10 cm above the surface of the fabric.
 - Place the needle against the yarn, between the pinched fingers and the surface of the fabric.
- 4 Wrap the yarn around the needle. Using your non-dominant hand, wrap the yarn around the needle two to four times.
- Continue pinching the yarn as you did before. You must provide a good tension to prevent the yarn from unwinding.
- The thickness of the French knot will vary depending on the number of turns you wrap around the knot. The more you wind the yarn, the larger the French knot will be.
- 5 Insert the tip of the needle back into the fabric. Pick a point directly next to the exit point, but do not use the same location. The adjacent stitch should be thin.
- Until you completely pull out the needle.
- Don't use the exact same holes. If you do this, at the end of the work, the knot will most likely pop out through the wrong side of the fabric.
- 6 Squeeze the coil. Use your non-dominant hand to gently pull the yarn downward, causing the spools to tighten.
- Continue to pull the coil, twisting into a tight bundle, so that it is snug against the top of the material.
- 7 Push the needle all the way through.
- The needle and tail twisting from it should pass through the center of the linked spools, pulling them into a decorative knot.
- 8 Make a knot on the wrong side. Tie another large knot on top on the wrong side of the fabric to secure the French knot on the other side.
- Trim off the rest of the ponytail, if necessary, or stitch the ponytail into the fabric on the wrong side.
Tips
- You must determine what you want to do before you get started. You can draw your sketch on a separate diagram or piece of paper. You can also use a pre-made template from the Internet or from an embroidery book if you don't have your own ideas.
- Sew stitches in between the stitches of the original fabric. If you penetrate parts of the stitch, the result may look sloppy. Also, by holding the yarn with intermediate threads, you can more easily change stitches if you make a mistake.
- Don't sew too tight stitches. Pull only the embroidery stitches until they are snug against the fabric. Too much tension on the yarn can cause you to work closer to the fabric and may even cause the fabric to fray.
- Always keep an eye on the needle. This will help prevent the yarn from slipping out of the needle.
What do you need
- A piece of knitted fabric
- Contrasting yarn
- Crochet hook (optional; only for surface slip stitch)
- Yarn needles
- Scissors


