Author:
Florence Bailey
Date Of Creation:
20 March 2021
Update Date:
27 June 2024
Content
1 Prepare the mixing surface. Thick dough is easiest to knead on a flat surface at your waist. Prepare your countertop, table, or other hard surface for kneading by washing it with warm soapy water and wiping it off with a completely dry towel. Flour the dry surface to prevent the dough from sticking while kneading.- For some recipes, knead the dough in a bowl. In these cases, it is usually kneaded for a minute or two. For recipes that require more than three minutes of kneading, a flat surface must be used.
- If you don't want to knead the dough directly on your work surface or countertop, you can spread floured parchment paper on top of it. You can also buy a special non-stick coating from the store that is designed for this purpose.
 2 Combine the ingredients for the dough. Use the ingredients listed in your recipe list. The main ingredients for the dough are usually flour, yeast, salt and water. Combine the ingredients with a wooden spoon and prepare to knead.
 - If there are residues of flour on the sides of the bowl, then the dough cannot be considered completely ready. Stir it constantly with a spoon until all the ingredients are combined.
- If you find it difficult to mix the dough with a wooden spoon, knead it with your hands.
3 Transfer the dough to a work surface. Remove the dough from the bowl directly onto a flat, prepared surface. It should form a loose, sticky ball. The dough is ready to knead. Part 2 of 3: Knead the dough
- 1 Wash your hands before kneading. This process requires bare-handed work, so wash and dry your hands before starting. Remove rings and other jewelry that might get caught in the dough. Roll up your sleeves so you don't get dirty. Since you are working on a floured surface, you will need to wear an apron.
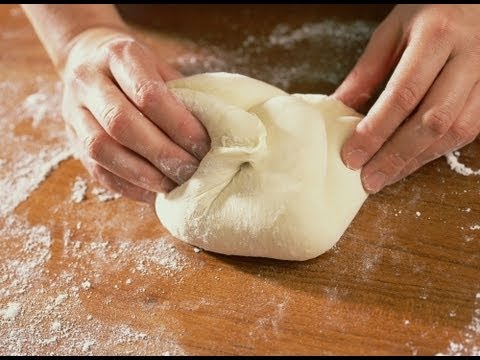
- 2 Knock the dough together. When you first put your hands in the dough, it will be sticky and difficult to pile up. Continue kneading the dough with your hands, forming it into a ball, pressing and changing the shape. Continue doing this until the dough is no longer sticky and falls apart as the ball forms.
- If it seems to you that the dough does not lose its stickiness, sprinkle it on top with additional flour, mixing it into the total mass.
- You can dip your hands lightly in the flour to prevent the dough from sticking too much.
- If it seems to you that the dough does not lose its stickiness, sprinkle it on top with additional flour, mixing it into the total mass.
- 3 Knead the dough. Place your palms on the dough, pushing it forward slightly. This is called "beating" the dough and helps kick-start the gluten action. Continue doing this until the dough is slightly springy.
- 4 Knead the dough. Fold the dough in half and press your palms forward to press down firmly. Turn the dough over slightly and fold it in half, again resting your palms. Repeat this for 10 minutes, or until the dough is completely kneaded according to the recipe.
- The kneading process should be rhythmic and stable. Don't work too slowly; work each section of the dough quickly, without taking too long a pause between turns.
- 10 minutes is enough time to complete the task. If you are tired, ask someone else to replace you and continue the kneading process.
- The kneading process should be rhythmic and stable. Don't work too slowly; work each section of the dough quickly, without taking too long a pause between turns.
Part 3 of 3: Finish kneading
- 1 Consider the texture. The dough will initially be sticky and full of lumps, but should be shiny and smooth after 10 minutes of kneading. It should be slightly sticky and firm to the touch. If lumps and stickiness still remain, continue to knead.
- 2 Check if the dough holds its shape. Roll the dough into a ball and place it on a work surface. Has it kept its ball shape intact? If the dough is ready, the shape should remain the same.
- 3 Pinch the dough. The dough becomes elastic after kneading, and it is difficult to stretch it, like a spring. Pinch a little dough between your fingers. If it comes out, it will look like an earlobe. When you poke the dough, it should return to its shape.
- 4 Continue to follow the recipe. Most recipes require leaving the dough in a warm place to grow for several hours after the first batch. Once the mass is twice as large, you need to knead it down and mash it for a couple of minutes, then let it rise again before baking.
- If you've kneaded the dough until it's tight, firm and shiny, the bread should be soft, easy to chew on the inside and crispy on the outside.
- If the dough is not kneaded very thoroughly, the bread will turn out to be tough, dense and slightly flat.
- If you've kneaded the dough until it's tight, firm and shiny, the bread should be soft, easy to chew on the inside and crispy on the outside.
Tips
- For any non-leavened baking, you should probably knead hard enough for a smooth, smooth dough and completely blended ingredients. For bread, you need gluten, but gluten-free and yeast-free recipes can make the dough tough.
- The dough is very difficult to knead with your hands. Alternatively, you can beat it with a mixer.
- Stick to the mixing time, especially if the recipe says so. 20 minutes can seem like a long period of repetitive action. Don't shorten this time.
- Learn to distinguish between bread flour (for leavened dough) and pastry flour (for non-leavened dough). The first promotes the appearance of gluten. Differences in the types of wheat flour are more important than whether it is white or unbleached.
- Add flour as needed to keep the dough from sticking. In general, if you are making bread, add enough flour if the dough does not meet the recipe's requirements. The amount of extra flour will vary slightly depending on the moisture content of the cake. If you are making something different, such as cookies, add the recipe flour plus a little on the outside to avoid sticking too much.
- Cool, dry hands are best for kneading.
- Try not to tear, but simply pull the dough.
- The dough scraper can simplify the cleaning process. Anything with a smooth but fairly blunt edge will work well.
- For easier hand washing, especially when kneading sticky dough, wear disposable latex gloves.


