Author:
Mark Sanchez
Date Of Creation:
27 January 2021
Update Date:
3 July 2024
Content
- Method 2 of 3: How to apply a cast on your face
- Method 3 of 3: Finishing work
- Tips
- Warnings
- What do you need
 2 Prepare material for work. Cut the plaster bandage into strips. You will need enough stripes to cover your face in three layers.
 - The stripes should be approximately 5 cm by 7 cm.
- You will need both long and short stripes, as well as wide and narrow ones. It will be easier for you to cover your entire face with them.
- Place the strips in a bowl. Place a second bowl of warm water next to it, in which you will dip the strips.
 3 Find an assistant from whom you will remove the mask. He should be wearing clothes that he will not mind getting dirty with plaster.
 - Decide whether you want to mask the entire face or only half of the face. Discuss this beforehand. If you want to make a full face mask, you will need to leave the nostrils open so that the person can breathe freely.
- The process will be easier if your helper is lying on the floor. He can also sit in a chair. If so, wrap a towel around his neck and shoulders.
- Ask him to pull his hair off his forehead and comb it back.
Method 2 of 3: How to apply a cast on your face
- 1 Ask a helper to take the desired position. As we said, it will be easier for you to make the mask if he is lying face up on the floor. If he decides to lie on the floor or sit in a chair, then ask him not to move throughout the entire process. You cannot laugh and wrinkle your face, as this will ruin the mask.
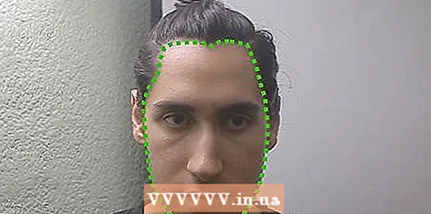
- 2 Apply petroleum jelly to his face. Especially thickly smear the hairline, eyebrows and the area around the nose. Be sure to do this, otherwise your assistant will be hurt when you remove the mask from him.
- 3 Apply the first layer of the mask. First, dip the strip in a bowl of warm water and use your fingers to wipe off any excess water. The stripes will contain more gypsum on one side than the other. They should be applied to the face with the side on which there is less plaster. Lay the strips in even layers, leaving no gaps between them.
- Wet the smaller strip and lay it diagonally across the nose, starting from the left eyebrow and ending next to the right nostril. Make sure the person can breathe freely.
- Moisten another strip and lay it diagonally in the opposite direction so that the two strips form an X above the bridge of the nose.
- Moisten and place a larger strip on your forehead so that it overlaps the top of the X. Remember to smooth out the stripes.
- Overlay the remaining stripes. Continue wetting and overlaying the stripes until you have used up all the stripes. Don't put them under your nose.If necessary, cut the strip to the desired size.
- 4 Check how the first layer is laid. Are there any uncovered skin areas? Make sure the stripes overlap correctly.
- 5 Apply a second layer. Start applying more layers, paying attention to poorly covered areas first. Use larger stripes this time and try to make the layer as even as possible, with as few wrinkles and bumps as possible.
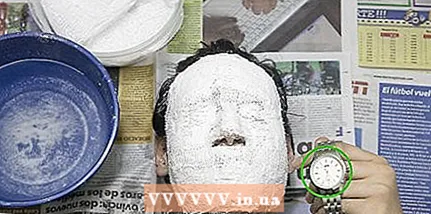 6 Take a break and let the mask shrink slightly. Cut and smooth where needed. Before applying the third layer, you need the mask to shrink. But you can't dry it yet.
 - 7 Start applying the third layer. Start at one edge of the mask, placing the ends of the stripes behind the other edge of the mask. This will smooth out any sharp edges left over from the first layers.
- Start adding details. Make the nose, eyebrows, browbones, and so on more to give the mask an expression. To do this, you need to add narrow stripes, gently smoothing them out.
- Try to strengthen the weak points of the mask, especially the area of the nose and around the eyes, by adding additional stripes there.
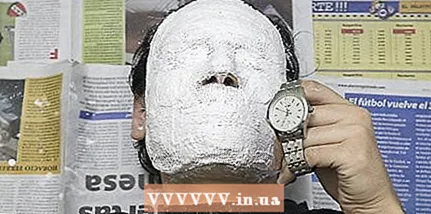 8 You can start drying the mask. After you finish applying the stripes, your helper's face may start to itch. Ask him to gently raise his eyebrows, wrinkle his nose, and gently move his facial muscles so that the mask can be removed.
 - 9 Remove the mask. When your helper tells you that he no longer feels that the mask fits snugly around his face, gently grasp the edges of the mask and begin to lift it, while sticking your fingers inward towards the center of the mask.
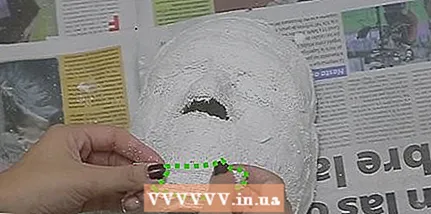
- While the mask is still not completely dry, take a hole punch or awl and poke holes about 3 cm behind the eyes through which you pass the tape.
- It is advisable to leave the mask overnight to dry.
Method 3 of 3: Finishing work
 1 Add even more detail by sticking on extra stripes. You can add more detail to the mask by pasting additional plaster strips onto it. Don't forget to smooth them out.
 - You can add details to the mask such as a beak (made from a paper plate), horns (made from paper cones), or large bumps (made from crumpled newspaper). Place plaster strips on top.
- If you want to add details such as higher cheekbones or a pointed nose, then use paper-backed modeling clay. First, apply a layer of clay to the mask, and then start sculpting the desired details. Place plaster strips on top and let the mask dry again.
- 2 Clean the surface of the mask. Use sandpaper to smooth out any unevenness on the surface of the mask.
- You can also cover the mask with white tissue paper. First grease the mask with glue, then cover it with paper.
- Also peel and paper over the back of the mask to prevent the plaster from scratching your face.
- 3 Color the mask. You can use a variety of paints, feathers, sequins, beads, etc.
- If you want to paint the mask, cover it first with a layer of gypsum primer. Let the primer dry before painting.
- When you are finished decorating the mask, tie a ribbon or string to it so that you can wear it over your face.
Tips
- Sometimes a wire ring is attached to the masks instead of laces so that it can be easily removed.
- Add extra details to the mask when you finish making it, not at the beginning of the process. You will see how many lanes need to be added, what needs to be changed, etc.
- The half mask ends along the lower edge of the cheekbone.
- You can varnish the mask to keep it dry.
Warnings
- Never block a person's nostrils with plaster.
- If you plan on making a large mask in several layers, place a pillow under the helper's head to support the neck. And tell him to be patient.
- For 24 hours before applying the mask, ask your helper to hold a piece of plaster of paris on your wrist to check if they are allergic to plaster.
What do you need
- Plaster bandage
- Water
- Newspaper or paint film
- Petrolatum
- White modeling clay on a paper base.
- Plaster primer
- Paints, glitters, beads, etc.
- Lace or tape


