Author:
Mark Sanchez
Date Of Creation:
27 January 2021
Update Date:
2 July 2024
Content
To take full advantage of the power of a digital camera, you need to understand what exposure is. Of course, some of your shots will be successful anyway, but when you learn how to set the correct exposure, your work will cease to be "photos" and become real photographs and valuable memories.
Steps
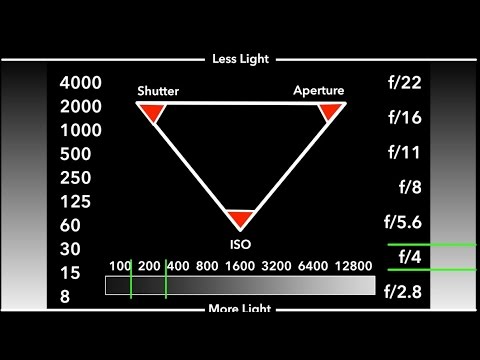
 1 Understand what exposure is and how it affects photographs. Exposure is a general term that encompasses two aspects of photography that determine how light or dark an image will appear.
 - An exposure meter is built into the camera to control exposure. The light meter determines the correct exposure, namely the aperture value and shutter speed. The aperture value is defined as the ratio of the focal length to the size of the aperture opening and is denoted by a fraction with the letter "f" (for "focus") in the numerator, and sometimes by an uppercase "F" and a number. F / 2.8 (F2.8) means 1 / 2.8, while f / 16 (F16) is 1/16. The larger this number, the smaller the aperture opening it corresponds to. Imagine a pie sliced into pieces: 1 / 2.8 of the pie is much larger than 1/16.
- Don't be intimidated by this, but the aperture and shutter speed will be different for each photo, depending on the lighting conditions and how light or dark you want the photo to be.
- Here's a simple example to figure it out. Imagine a bucket of water with a hole in the bottom. If the hole is large (open aperture), water will flow out quickly (fast shutter speed). Conversely, if the hole is small (closed aperture), water will flow out slowly (slow shutter speed).
- Exposure, or the amount of light, is determined by two parameters: the aperture value (the size of the open hole) and the shutter speed (the time during which the camera shutter remains open). Opening the shutter for longer will allow more light to enter the film or image sensor, and the photo will be brighter. If you reduce the shutter speed, less light will enter the film or sensor and the result will be darker. Long exposure: the picture is more exposed, there is more light; fast shutter speed: the picture is less exposed, there is less light.
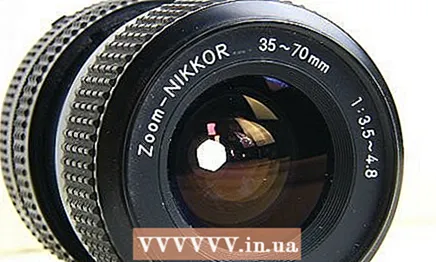 2 Learn what aperture is. The aperture value (f-number) is a fraction that represents the size of the open hole compared to the focal length of the lens. The diaphragm is a light-tight partition in the lens with an adjustable diameter hole through which light enters the film or matrix.
 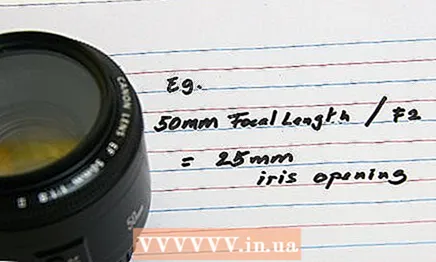 3 Here's an example. Let's say you have a 50mm f / 1.8 lens. Aperture value number is calculated as the focal length divided by the diameter of the aperture opening. So 50 / x = 1.8, or x ~ = 28. The actual diameter of the hole through which the light passes is 28 mm. If the aperture was f / 1, then the hole would be 50 mm, since 50/1 = 50. This is what is meant by the aperture value.
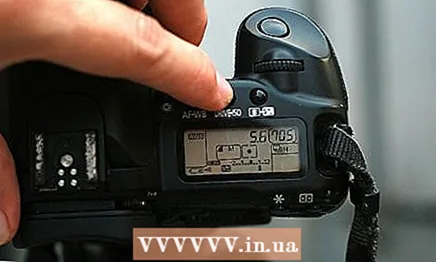
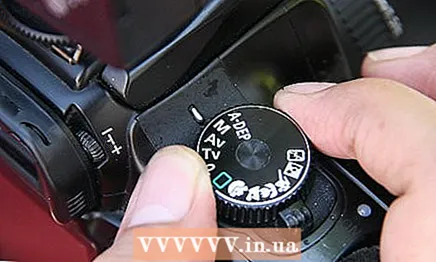
  4 Explore your digital camera's manual mode (M mode). In manual mode, you can set the value for both aperture and shutter speed. If you want complete control over your shooting and exposure, you need to learn how manual mode works - it's not just crazy geeks and people who still shoot on film! Manual mode is still alive today, even in the digital world today, as it allows you to adjust all the settings that affect the look and feel of an image.
  5 Understand why you need to change exposure. Aperture is extremely important for photography; it lets light into the lens, and light is the most important thing in photography. If there is no light, there will be no image.
 - Set the aperture value to adjust both the amount of light and the depth of field (the area in which the objects in the frame will be in focus).
- Shoot at wide open apertures such as f / 2 or f / 2.8 for a blurry background and an extremely sharp subject. Open apertures are also used when shooting in low light conditions to avoid blurry shots.
- Shoot at medium aperture, f / 5.6 or f / 8, so your subject is clear and objects in the background are slightly out of focus but distinct.
- Shoot with a closed aperture, such as f / 11 or even smaller if possible, so that all the details of the landscape - the flowers in the foreground, the river, and the mountains in the distance - are in focus. However, depending on the format, very small apertures, such as f / 16 and below, can cause loss of sharpness due to diffraction, or refraction.
- For many photographers, aperture is much more important than shutter speed for great photos, as it adjusts the depth of field in the image, and it is difficult to tell by eye the difference between pictures taken at a shutter speed of 1/250 or 1/1000 of a second.
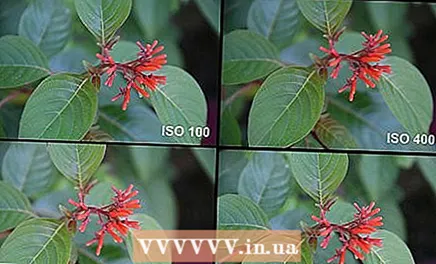 6 Understand why you need to change the ISO value. In a digital camera, the ISO setting is changed to adjust the sensitivity to light.In bright light, use a low ISO setting for less noise in the image, as at ISO 100 the shutter speed will be fast enough. In dim lighting conditions where there is not enough ambient light, you will need to increase the light sensitivity. Therefore, raise the ISO value from 100 to 1600 or even 6400 if necessary and the camera settings allow enough light to enter and the image was not blurred. However, at what cost will you achieve this? By raising the ISO, you increase noise (in film photography, grain) and reduce color. Therefore, try to set the ISO as low as possible, but not underestimate it to such an extent that the picture comes out blurry.
 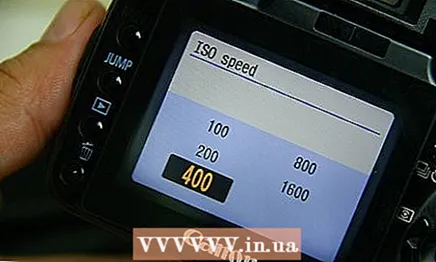 7 Determine what ISO value is required for your shot. ISO in digital photography means, in principle, the same as in film. Previously, you bought a film of the desired sensitivity, depending on what kind of lighting you were going to shoot. Now, in different lighting conditions, you change the ISO value in your camera.
 - How do I install the ISO? Some cameras have a button labeled "ISO" on top. Press the button, turn the jog dial and change the value.
- In some cameras, you need to go to the menu and find the ISO setting there. Select it from the menu, then change with the jog dial. Now you know how to set the ISO value in your digital camera.
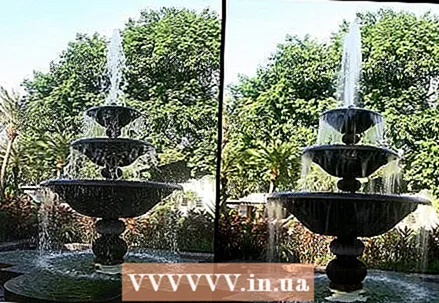 8 Stop the movement by changing the shutter speed. Change the shutter speed setting on your camera for crisp shots on the move. If you are shooting handheld, the shutter speed should match the focal length or be faster. In other words, if you are shooting with a 100mm lens, a shutter speed of 1 / 100th of a second is optimal. At this shutter speed, blur caused by camera shake can be eliminated.
 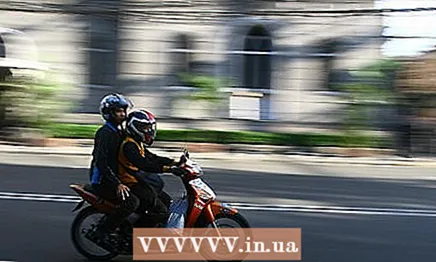 9 If you are photographing moving subjects, set a shutter speed between 1/500 and 1/1000 so that they "freeze" as they move.
 10 If you are photographing in low light and need to "let in" more light into the lens, set the shutter speed between 1/30 and 1/50 of a second. This will blur the motion in the frame, so use these values when you are shooting in low light or when you want to create a blurry effect on a moving subject.
 - Medium shutter speed: 1/125 or 1/250 for most photographs.
- Fast shutter speed: 1/500 or 1/1000 - for shooting moving objects.
- 1/30 or 1/50 - for shooting moving subjects with a blur effect or in low light.
 11 Learn how to change the shutter speed on your digital camera. This could be a tuning wheel, a button on the camera, or one of the menu items.
 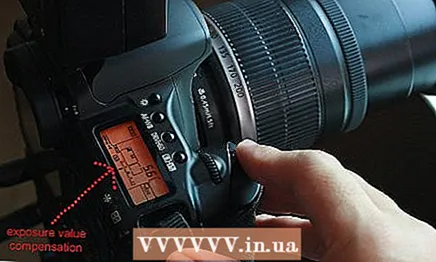 12 It's always best to underexpose. Of course, you always want the exposure to be perfect, but if you can't do it, it's better to let the picture be underexposed (underexposed, darkened). When a photo is overexposed, all information is lost and cannot be recovered. If the snapshot is underexposed, you have a chance to restore it during post-processing. You can achieve underexposure with your camera's exposure compensation tool.
  13 Explore the program mode of your camera. The different exposure modes in your camera allow you to adjust the image in different ways. The basic mode is programmed (mode P), which allows you to influence both shutter speed and aperture, and automatically changes the second parameter, so that the photo is exposed exactly according to the metering results. The advantage of program mode is that you don't need to know everything. This is only slightly higher than the fully automatic mode.
 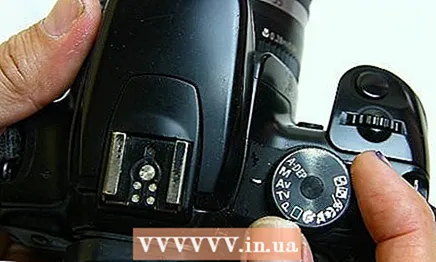 14 Get to know the Aperture Priority Mode. On your digital camera, you can select aperture priority mode (A or Av mode). In this mode, you adjust the aperture value to set the exposure.The camera will select the appropriate shutter speed. Aperture priority mode is considered the most useful and preferred in most situations. So choose your aperture, whether it's f / 2.8 for a blurry background, f / 8 for a moderate depth of field, or f / 16 for everything in focus.
 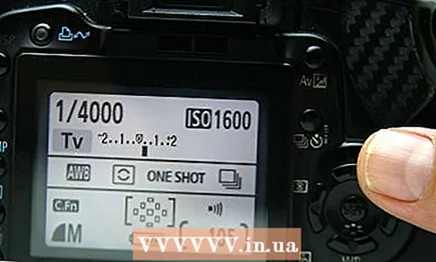 15 Explore Shutter Priority Mode. Get to know at least a rough outline of your camera's shutter priority mode. Its advantage is that you can set the shutter speed that best suits your purpose, and then the camera will choose the appropriate aperture value. This mode is referred to as S or Tv depending on the camera model.
 - In shutter priority mode, select the shutter speed and the camera will set the aperture value.
- When shooting with shutter priority, the camera will take the photo at the specified shutter speed, regardless of whether the photo is correctly exposed or not.
What do you need
- Digital camera


