Author:
Marcus Baldwin
Date Of Creation:
18 June 2021
Update Date:
1 July 2024

Content
Ankle injuries can take a very long time to heal, especially if they are not properly treated. Anyone can get such an injury, but athletes are especially susceptible to this. It is a good idea to rewind the ankle so that the athlete can continue to compete with a minor ankle injury. The rewound ankle has stronger support and remains mobile.
Steps
 1 Ask the patient to climb onto a table or flat, stable surface with their leg hanging several centimeters above the ground. His foot should be in an upright position at a 90 degree angle, and remain in this position throughout the entire dressing.
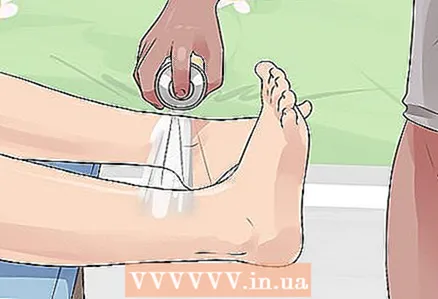
 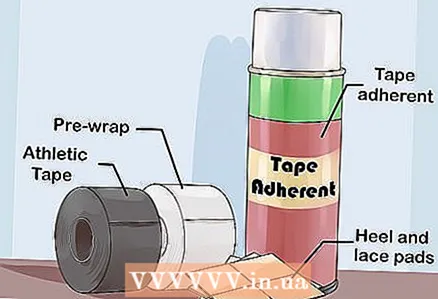 2 Spray BZK (Fast Drying Glue) lightly over the entire leg. Try to do this evenly.
 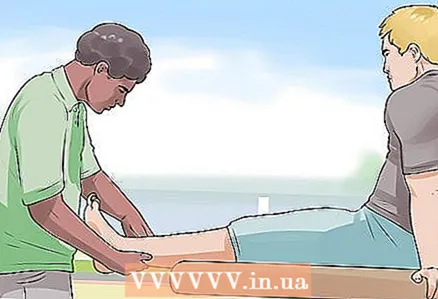 3 Place padded pads on the heel, top, and sides of the ankle. These pads will protect your ankle from chafing under the elastic bandage.
 - For added protection, you can apply a lubricant under the pads themselves, but this is optional.
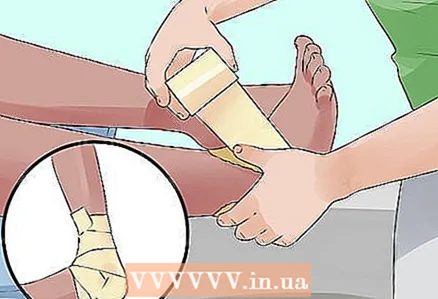
 4 Begin tying the pre-dressing from the middle of your foot to the top of your calf. Cover your leg completely to prevent the dressing tape from sticking to your leg. You can leave the heel open.
 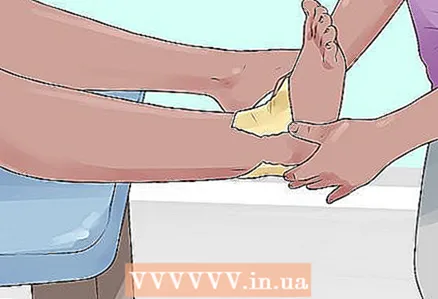 5 Place the three downward retention bands from where you started to tie the pre-dressing material. Each strip should overlap approximately half the width.
 - Make sure each fastening strip has the same tension. Too little tension - and they will not properly secure the pre-dressing, too tight - and blood circulation in the leg can be disrupted or completely stopped.
- Ask the athlete if they are comfortable enough.
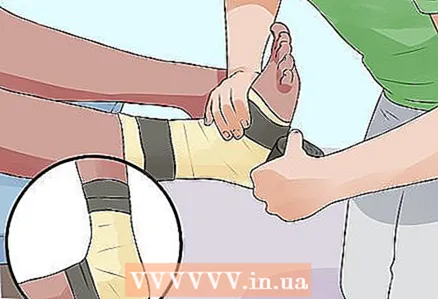
 6 Attach three semi-overlapping staples, start on the medial side (inside) and work towards the lateral side (outside). These staples will look like U-shaped strips.The tape will start at the medial anchor, move to the medial ankle, going under the leg, to the lateral ankle, and end at the lateral surface of the anchor.
 - Again, pay attention to the tension of the brace, it should be the same at the lateral ankle, under the foot, and the medial anchor.
 7 Finish by lightly wrapping the staples with horizontal strips of material. Using the horizontal direction of the bandage, work your way towards the foot. After the last stroke of material reaches the heel, make another diagonal stroke over the top of the ankle.
 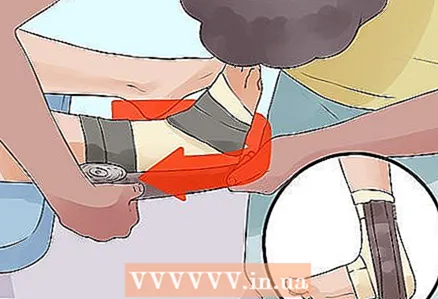 8 Add two heel locks. There should be two lock skeins going in different directions. You can start at the ankle (the protruding part of the bone on the ankle), work down below the foot and work back towards the front of the ankle, then slide over the back.
 - Once the tape wraps around your leg, you can remove the tape and continue the other way.
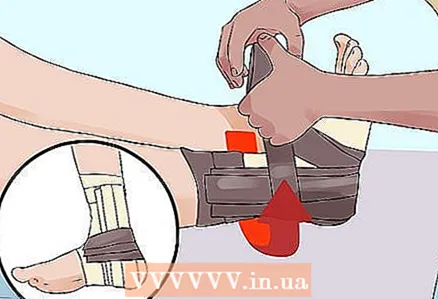 9 As in the previous paragraph, wind two eight-shaped loops, and both in opposite directions. Start at the top of your foot on the instep, where it meets the lower leg, pull the tape under the foot, up again, and around the back of the ankle. The tape should end where it started.
 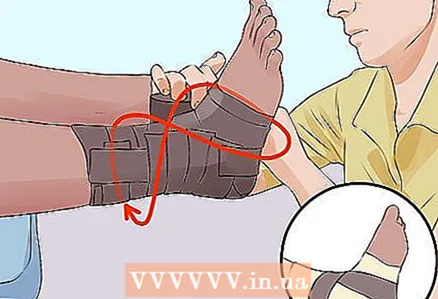 10 Attach three horseshoes. They should run from the midline of the medial anchor, around the Achilles tendon, and end at the midline of the lateral anchor.
 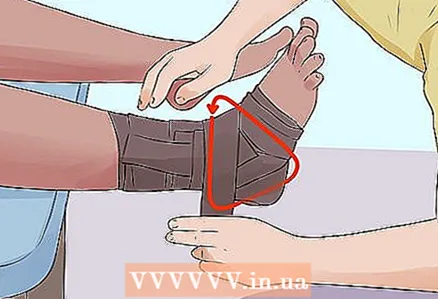 11 Add fillers where necessary and check if all of the pre-dressing is covered.
 12 Ask the patient how he is feeling (if the bandage is tight or too weak). If all is well, you have just done a good bandaging.
Tips
- Do not allow the athlete to play if the bandage is uncomfortable or painful. This could hurt him even more. Explain to him that the band may feel a little tight because of the support it provides to the leg.
- Try to avoid creases in the tape; rewind if the pre-dressing material curls up.
- On average, 1 or 1.5 rolls of tape should go to one ankle.


