Author:
Clyde Lopez
Date Of Creation:
21 June 2021
Update Date:
1 July 2024
Content
- Steps
- Method 1 of 3: Block Users on Tumblr
- Method 2 of 3: Block tags with the Tumblr Savior add-on
- Method 3 of 3: Block tags with the XKit add-on
If you are tired of facing certain content when you visit Tumblr, why not blacklist and block it in your account? Tumblr has a built-in feature that allows you to ignore specific users and blogs. If you want to blacklist certain tags and keywords, you will have to use a third-party extension.
Steps
Method 1 of 3: Block Users on Tumblr
 1 Log into Tumblr. Open the Tumblr home page. If you are not signed in right away, please do so now by entering your email address and password. Click "Login" to continue.
 - The login page is located at: https://www.tumblr.com/login
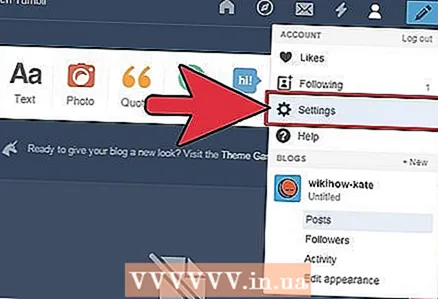 2 Open the settings page. Take a look at the top bar in your Tumblr account. Click on the Account icon to display the context menu. The Settings option is represented by a gear icon. Click on it to continue.
 - After that, you will be redirected to the account settings page.
 3 Find the Ignored Users button. It's at the bottom of the Account Settings page, to the left of the Delete Account and Save buttons. Click on Ignored Users to continue.
 - To quickly get to the Ignored Users page, open it directly by going to tumblr.com/ignore.
- Even if you choose to open the page directly to the above address, you will still have to log into your Tumblr account first.
- To quickly get to the Ignored Users page, open it directly by going to tumblr.com/ignore.
 4 Enter the username in the text box that says: "Enter the URL or name of the blog owner to block it." Click on the field and enter the required information.
 - Enter the entire blog address (Example: Username.tumblr.com) or just one username (Example: Username).
 5 Click on the blue "Ignore" button next to a username to add that user to the ignored list.
- On the Ignored Users page, below the text box, a list of users you are currently ignoring will appear.
- If you make a mistake with the name or want to unblock someone, click on the "Stop Ignoring" button. It is next to that person's username in the Ignored Users list.
- If you add a user to the ignore list, you will no longer see his or her posts in your feed, as well as the comments that user leaves on the site. This user will no longer be able to see your posts or send you messages from their account.
Method 2 of 3: Block tags with the Tumblr Savior add-on
 1 Download Tumblr Savior. Tumblr Savior is a free third-party browser add-on that lets you hide Tumblr posts tagged with specific words or phrases. Before proceeding, you need to download this add-on.
 - Download the add-on version that matches your browser:
- Tumblr Savior for Chrome: http://tumblr-savior.chrome.bjornstar.com
- Tumblr Savior for Firefox: http://tumblr-savior.firefox.bjornstar.com
- Tumblr Savior for Safari: http://tumblr-savior.safari.bjornstar.com
- Tumblr Savior for Opera: http://tumblr-savior.opera.bjornstar.com
- Follow the instructions on the screen to install the appropriate add-on in your browser. After installing the add-on, restart your browser to continue.
- Download the add-on version that matches your browser:
 2 Open your Tumblr Savior settings. Open the Tumblr Savior add-on in a browser and go to its settings page.
 - Find the Tumblr Savior icon in your browser toolbar. It looks like a skewed white square with a black "T" inside. Click on the icon to open the add-on settings window.
- If there is no such icon in the browser toolbar, try opening the browser add-ons list and selecting "Tumblr Savior" from there to access its settings.
 3 Enter tags in the Black List field. The add-on home page will contain one or more text boxes titled "Blacklist". Enter the tags you want to blacklist in these fields.
 - The tags you enter will depend on what content you want to block.
- The add-on will analyze the publication for the presence of the entered word or phrase, so choose carefully. If you want to block posts that use a keyword as a tag, enter the hashtag character (#) in front of the keyword.
- To add more tags when you run out of text boxes, click on the "add" button below the bottom text box.
 4 Click "Save". After you add all the desired tags to the blacklist, click the "Save" button.
 - You may need to restart your browser for the changes to take effect.
- The add-on will block all publications that contain words in the blacklist, and will not allow them to appear in your personal account. For example, if you block "nsfw", then all publications containing the keyword "nsfw" will be hidden from you in the feed.
Method 3 of 3: Block tags with the XKit add-on
 1 Download XKit. XKit is a free third-party add-on that is embedded in the Tumblr code. Before proceeding, you need to download this add-on.
 - Open the official add-on page and click on the download or install link. The page will automatically detect your browser and provide the appropriate version for it. Please note that XKit is currently available for Chrome, Firefox and Safari.
- The download page is located here: http://xkit.info/seven/download/
- After installing the add-on, restart your browser to continue.
 2 Open Tumblr. Open the Tumblr home page. If you are not signed in right away, please do so now.
 - The login page is located at: https://www.tumblr.com/login
 3 Open XKit on Tumblr. Find the XKit icon at the top of your Tumblr account. Click on it to open XKit preferences.
 - The XKit icon looks like a series of crossed Xs and is usually located next to the power icon.
 4 Install "Blacklist" from the list of add-ons. The blacklist is not included with the XKit app installation. You need to install this function yourself from the XKit preferences window.
 - Take a look at the bottom of the XKit panel. There you will see the Get Add-ons tab. Click on it to open it.
- On the Get Add-ons tab, use the search box to find the Blacklist add-on.
- When the Blacklist add-on is found, click on the Install button below it. Follow the instructions on the screen to install the blacklist feature.
 5 Start XKit again if needed. After installing the Blacklist, you should still have an XKit window open. If you accidentally logged out, open XKit again.
 - Click on the XKit icon at the top of your Tumblr account.
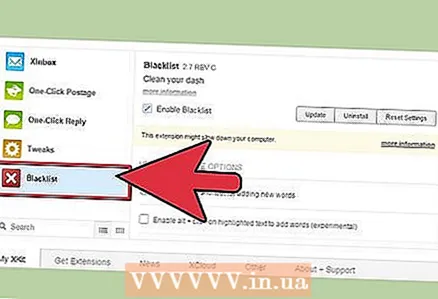 6 Open the blacklist. Go to the "My XKit" tab at the bottom of the XKit panel to open the main add-on settings and select "Blacklist" from the sidebar that appears.
 - “My XKit” is the first tab that should open by default the first time you access XKit settings.
- After you click on "Blacklist", the blacklist settings will appear. If you want, you can change the parameters of the interface, but if you just want to add words to the blacklist, then there is no need.
- You can quickly navigate to the black list by pressing Alt + B on your keyboard, but for this, the keyboard shortcuts must be enabled. Before using this feature, you need to enable it in the blacklist settings.
 7 Add tags and keywords. There is a menu at the bottom of the Blacklist window that allows you to add tags to the blacklist. Enter the tags in the box one at a time.
 - Tags must match the type of content you want to block.
- Please note that the add-on will automatically analyze the publication for the presence of the keyword. If you want to block posts that tagged a keyword or phrase, enter the hashtag character (#) in front of the keyword.
 8 Save your changes. When you've added all the keywords and tags you need, click Save and return to your Tumblr account.
 - You may need to refresh your Tumblr page for the changes to take effect.
- After you add keywords to the blacklist, the add-on will block any posts that contain words and phrases in the blacklist. For example, if you block "nsfw", then all publications containing the keyword "nsfw" will be hidden from you in the feed.


