
Content
This article guides you on how to increase the RAM memory for Minecraft games to assist in fixing some memory-related errors. If you are using a personal Minecraft version, you can easily increase RAM with Launcher from version 1.6 to 2.0.X. Check your Launcher version number in the lower left corner of the Launcher window. If you intend to change the RAM of the server (server), you need to create a file that helps run the game Minecraft with more memory. However, it is best not to increase more than half to two-thirds of your computer's total RAM for Minecraft games.
Steps
Method 1 of 3: Use Launcher version 2.0.X
- Check the available RAM on the computer. The amount of RAM shows how much memory you can allocate to Minecraft games. To test the RAM:
- For Windows - Open Start, click the gear Settings (Setup), click System (System), click About (Info), then look at the number next to "Installed RAM".
- For Mac - Open Apple menu (Menu), click About This Mac (Mac Information), then look at the number to the right of the "Memory" section.
- Update Java program. Visit Java's website at https://www.java.com/en/download/ and click the "Download" button at the bottom of the latest Java version. This step helps ensure that your Java is updated to the latest version and is ready for RAM allocation.
- If you are using Windows, make sure you have downloaded the correct bit version for your operating system.
- Open Minecraft Launcher. Double-click the Minecraft icon to do this.
- If the Launcher window says "1.6 ..." in the lower left corner (or at the top of the window), use Launcher version 1.6.X.
- Click the card Launch options. This option is at the top of Launcher.
- Make sure that the switch Advanced settings turned on. This switch is in the upper right corner of the Launch Options page. If the switch isn't already green, click it before proceeding.
- Click the profile you want to change. If you only see one option on this page, click it.
- Switched on JVM arguments. Click the switch on the left side of the "JVM arguments" to enable this feature.
- Change the amount of RAM that Minecraft game can use. You should see a line in the "JVM arguments" text field, the first part says -Xmx1G; Change the number "1" to the number of gigabytes of RAM you want to allocate to Minecraft.
- Example: You can change this text to "-Xmx4G" to allocate four gigabytes of RAM to Minecraft.
- Click SAVE. This save button is at the bottom of the window. Minecraft game will now use the amount of RAM selected for the current profile. advertisement
Method 2 of 3: Use Launcher version 1.6.X
- Check available RAM on the computer. RAM capacity helps you know how much memory you can allocate to Minecraft. To test the RAM:
- On Windows - Open Start, click the gear Settings (Setup), click System (System), click About (Info), then look at the number next to "Installed RAM".
- On Mac - Open Apple menu (Apple Menu), click About This Mac (Mac Information), then look at the number to the right of the "Memory" section.
- Update Java program. Visit Java's website at https://www.java.com/en/download/ and click the "Download" button at the bottom of the latest Java version. This will ensure that your Java is updated to the latest version, ready for RAM allocation.
- If you are using Windows make sure you have downloaded the correct bit version for your operating system.

Open Minecraft Launcher. In version 1.6.X and above, you can allocate more RAM directly from Minecraft Launcher. If you are using an older version, see the next section.- If the Launcher window says "2.0 ..." in the lower left corner, use Launcher version 2.0.X.
Choose your profile. Click Edit Profile (Edit profile) and select a profile from the list.

Turn on JVM Arguments. In the "Java Settings (Advanced)" section, check the "JVM Arguments" box. You will be allowed to type command line to edit Minecraft games.
More RAM. If left as default, Minecraft will only provide 1 GB of RAM. You can increase this amount of RAM by typing -Xmx#G. Instead of, replace # equal to the number of gigabytes you want to allocate. Example: If you want to grant 18 GB, you need to type -Xmx18G.

Save the file. Click Save Profile to save your settings.The desired amount of RAM will now be applied to the selected profile. advertisement
Method 3 of 3: Use a Minecraft server
Check the RAM available on the computer. The amount of available RAM indicates how much memory you can allocate to Minecraft. To test the RAM: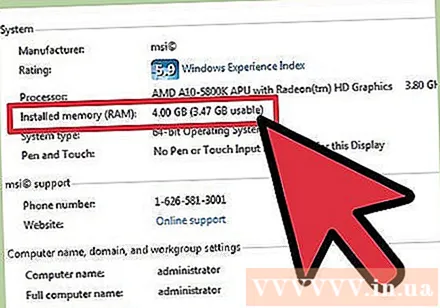
- If used Windows - Open Start, click the gear Settings (Setup), click System (System), click About (Info) and look at the number next to "Installed RAM" (installed RAM).
- If used Mac - Open Apple menu (Apple Menu), click About This Mac (Mac Information) and look at the number to the right of "Memory".
Java update. Visit the Java website at the address https://www.java.com/en/download/ and click the "Download" button located at the bottom of the latest Java version. This step helps ensure that your Java version is up to date and ready for RAM allocation.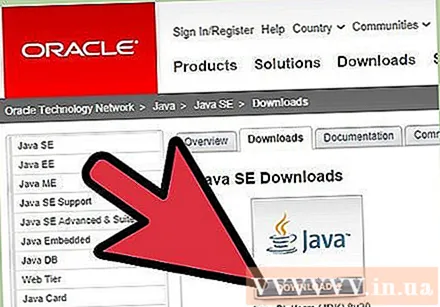
- If you are using a Windows operating system, make sure you have downloaded the correct bit version for your operating system. You can only allocate 1 GB of RAM on a 32-bit computer.
Open the server folder (Minecraft server). This is the folder containing the file you will open to start your Minecraft server. advertisement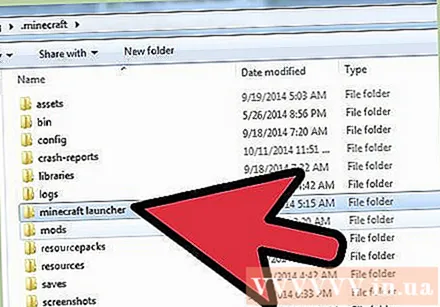
- The easiest way to find this folder is to search for the file "Minecraft_server", then navigate to the location where it is located.
On Windows

java -Xmx####M -Xms####M -exe Minecraft_Server.exe -o true
PAUSE
On OS X
#! / bin / bash
cd "$ (dirname" $ 0 ")"
java -Xms####M -Xmx####M -exe Minecraft_Server.exe -o true
On Linux
#! / bin / sh
BINDIR = $ (dirname "$ (readlink -fn" $ 0 ")")
cd "$ BINDIR"
java -Xms####M -Xmx####M -exe Minecraft_Server.exe -o true
- Change #### to the desired number of megabytes. To grant 2 GB, type 2048. To grant 3 GB, type 3072. To grant 4 GB, type 4096. To grant 5 GB, type 5120.
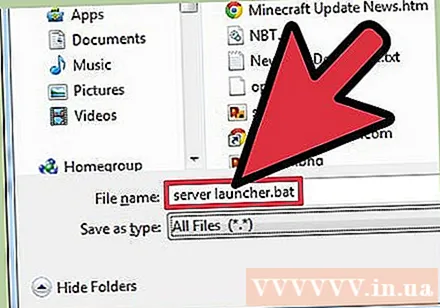
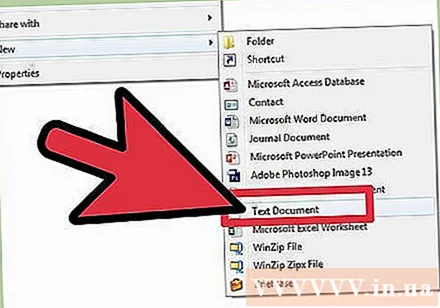
- You may have to enable file extensions in Windows to see the extension.
Advice
- A lot of space (at least one-third) of RAM should be reserved for the computer operating system.
Warning
- Be careful, do not allocate more RAM than your computer is capable of, or you will see an error stating that Java VM cannot start and Minecraft game will not run.


