Author:
Virginia Floyd
Date Of Creation:
12 August 2021
Update Date:
1 July 2024

Content
White balance can ruin, and can significantly improve the frame. This adjustment allows you to compensate for slight differences in color that occur under different lighting conditions, or to make colors warmer or colder for artistic effect. Once you figure out how to use this setting, you no longer understand how you used to do without it.
Steps
 1 Understand what white balance is and how it affects your image. Different types of lighting appear to be about the same to the human eye (although photographers can see the difference and always notice it). Our brain levels out the differences automatically, so a white object looks white in any light. However, an object in the shade takes on a slight blue tint compared to the same object in the sun, and incandescent bulbs render the object orange.
People who shoot with film should use colored lens filters or charge special film. A digital camera can alter the color information from sensors to smooth out color differences under different lighting conditions. The setting that allows you to do this is called white balance... This setting not only compensates for the difference in lighting, but also helps to make the picture warmer or colder, depending on the preference of the photographer.
Most cameras have a white balance setting. Typically, cameras provide some or all of the following modes: Auto white balance... This mode is usually designated by the letters "AWB" or "A". The camera will analyze the image and set the white balance automatically.
 Daylight... This setting is for shooting in bright sunlight.
 Cloudy... Cloudy light tends to be slightly colder (bluer) than sunny light, so this setting is used to give the photo a warmer hue.
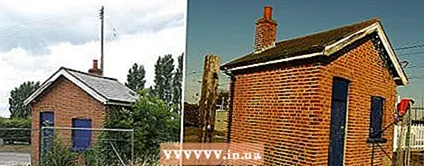
 Shadow... Subjects in the shade always appear bluer than in the sun (and even bluer than in cloudy weather), so this setting produces a very warm image. This mode can be used to change the white balance towards warmer hues even in sunny weather. (The two shots at the beginning of this article show the difference between Auto mode and Shadow mode.)
 With flash... Flash light is colder than sun light, and this setting will help make the picture slightly warmer than the Daylight setting. This only applies to situations in which the flash is the only one light source. If you are using natural and artificial lighting at the same time, the natural lighting will also need to be corrected. You can wear color filters to the flash to balance the two types of lighting, and use the white balance setting as for natural lighting.
 Incandescent lamp... Incandescent light is usually more orange than natural light, so the camera will add a blue tint to the image.
 Fluorescent lamp... These lamps give a redder light compared to sunlight (but not as red as incandescent lamps), so this setting will also make the image cooler.
 Preset White Balance... First, you need to take a picture of the subject with a neutral color, then the camera will remove all areas with the same hue. This is often the only way to get good results when shooting under energy-saving lamps. Typically, this setting will provide accurate colors in artificial lighting when compared to other similar settings.
The procedure for setting this mode depends on your specific camera, so refer to the owner's manual. You can use a gray card or exposure disc (or you can make an exposure disc yourself from the coffee filter).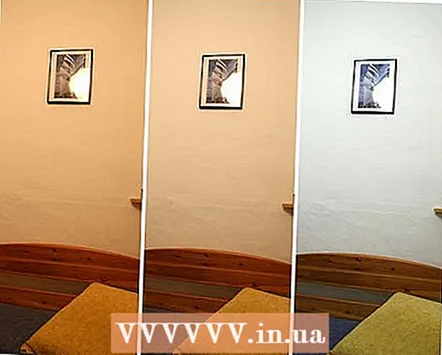
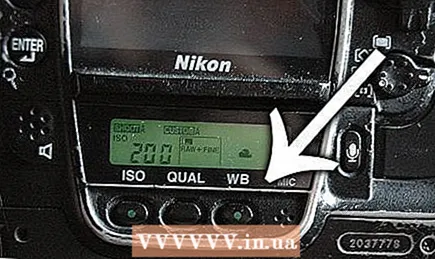
 Manual setting... This mode will allow you to select the temperature that the camera will need to apply to each frame. On Nikon cameras, this setting is indicated by the letter K. Typically, the temperature is selected by rotating the main command dial.
- Some compact cameras do not have a white balance setting because it is built into the shooting modes. You will have to figure out how such a camera works for yourself. Foliage tends to make the picture greener, Sunset and Fall foliage warmer.
- 2 Find the white balance control in your camera. Your best bet is to read the user manual, but we can give you a few hints:
- DSLR cameras usually have a button on the top or back of the camera labeled "WB". You need to hold down this button and rotate the control wheel at the same time to select the desired white balance. The cheaper DSLRs don't have these settings.
- On compact cameras, these settings are usually hidden deep in the menu, because manufacturers don't want you to be too smart with it, but you can get to them if you want to. Press the menu button and look for white balance in shooting modes, then select the desired value.
- If changing the white balance settings does not affect the image in any way, or if you cannot find these settings, it may mean that you are in automatic mode or in a preset shooting mode, which makes these settings impossible to use. Try setting the camera to a semi-automatic mode such as P.
- DSLR cameras usually have a button on the top or back of the camera labeled "WB". You need to hold down this button and rotate the control wheel at the same time to select the desired white balance. The cheaper DSLRs don't have these settings.
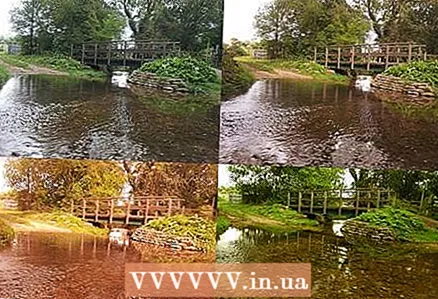 3 Shoot in natural light with automatic white balance and in daylight, cloudy, and shade modes. Most shots in auto mode will have too cold tones, and the image will come out much better with other settings. Image quality will depend on the camera; in some cameras (especially in phone cameras), the white balance transfer algorithms are terrible in some lighting conditions.
 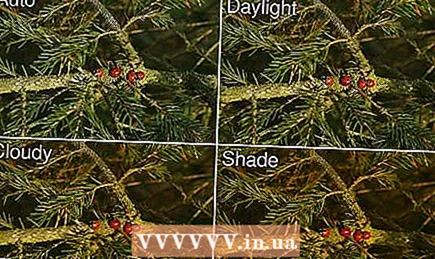 4 Try shooting with Cloudy and Shade settings, even in the sun, for a warmer shot. As mentioned above, these modes compensate for the excess blue tones, but they can also be used to simply warm up the photo. Cameras have color correction settings, not an automatic determination of the artistic value of the frame. The camera does not know what the frame is should be warm.
  5 Use white balance settings to get pleasing colors. You will notice that sometimes under certain artificial lighting, Auto mode will be able to reproduce colors. practically right, but you would have liked the cooler picture better. You might want to warm up the sunset image. With some cameras, you can even adjust the intensity of the mode to increase or decrease the color compensation effect. In all but the cheapest Nikon DSLRs, this can be done by holding down the white balance button and cranking anterior adjustment wheel. Many cameras do not have this setting.
Tips
- The white balance setting will only change the image if you are shooting in JPEG. If you are photographing in RAW, the modified mode will only tell your digital development program what the white balance should be. White balance can also be changed during JPEG post-processing, but colors can only be significantly changed in-camera when shooting or when working with RAW files.
- White balance settings may not work well with some light sources. For example, sodium lamps, which are used in street lamps around the world, produce a very narrow spectrum of light that can only be corrected by completely replacing that color. Look at a green and blue car in the orange light of the lanterns - both cars will be almost the same color. Energy saving lamps are another example of this phenomenon, although the effect is not so pronounced with them. Most (if not all) cameras have no settings that would help correct this kind of lighting.
- You can use the Incandescent setting to make your photo look like it was taken at night. This way you will not complete the illumination of the image by 1-3 stops. This is an old "night instead of day" trick that is often used in Hollywood.