Author:
Virginia Floyd
Date Of Creation:
12 August 2021
Update Date:
22 June 2024
Content
- Steps
- Method 1 of 3: Build a paneled manger with wood
- Method 2 of 3: Make a Christmas Feeder from a Cardboard Box
- Method 3 of 3: Use a real trough to feed the animals
- Tips
- Warnings
- What do you need
A creche is a container that stores food for livestock and other animals. This word comes from the French word manger, which means to eat. The feeder can be made from any material such as wood, clay, stone, or metal. The feeding trough is also associated with Christmas, as the Bible mentions that the baby Jesus, after birth, was placed in a manger. Christians today use a Christmas crèche to depict the birth of Jesus. Use these tips to make a Christmas crib.
Steps
Method 1 of 3: Build a paneled manger with wood
 1 Decide on the size of the feeder. This type of feeder is easy to make from pieces of wood that are the same size. For example, with slats that are 24 inches (60.9 cm) long and 1 inch (2.54 cm) wide, you can make a fairly large feeder that can fit a 30 cm doll (symbolizing Jesus). a smaller feeder, then take small strips, and if a larger doll will lie in your feeder, then choose larger strips.
  2 Find wood planks or scrap. Any type of tree is suitable for a feeder. Consider using a scrap you have left over from an old wooden box, a piece of furniture you don't use; For a very small feeder, you can use popsicle sticks. You can also buy wood planks from hardware vendors or home improvement stores to make a nursery.
 - Consider using already trimmed planks. You can buy packaged boards from hardware stores if you don't want to trim them yourself.
- If you can't find your boards already trimmed and don't want to trim your boards yourself, many home improvement stores will trim them for you.
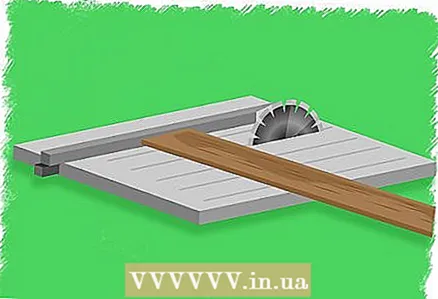 3 Cut the boards to size. Using your table saw or your preferred saw, cut the planks into 11 equal pieces. For this type of feeder, you will need slats that are 24 "(60.9 cm) long and 1" (2.54 cm) wide.
 - Before you start trimming, carefully measure the pieces so that you can be sure that all your planks are the same length. Use a ruler and pencil to mark where you want to cut.
- Place the boards on a table covered with newspaper for easier cleaning.
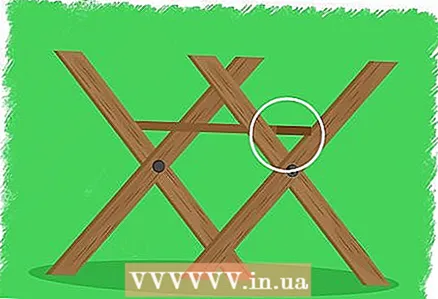 4 Make the legs of the feeder. Legs are formed in an X shape on each side of the pan to support it. The outer surfaces of the legs will be visible, so use the best of your wood for them.
 - Make a 45-degree cut at the end of each board. By cutting at an angle, you allow the legs to stand flat on the ground, ensuring the stability of the structure.
- Measure the middle of each board. Measure each plank, mark the center and drill a through hole in the center.
- Assemble the legs by folding them so that they intersect with each other in the center to form an "X". Screw the bolts into the hole, holding the legs together. Use the washers and butterfly nuts to hold them together.
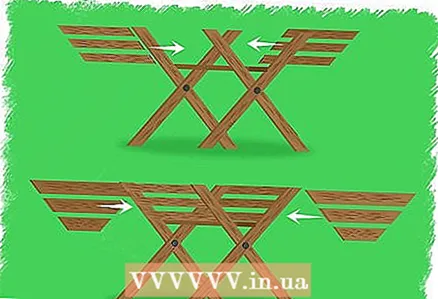 5 Build the base of the feeder. To give your feeder a batten look, start by placing one piece of wood where the legs meet to form a V. Using a hammer, nail the wooden strips on either side of the legs where they form a V. Nail in the 7 remaining wooden planks, leaving gaps between them along the top of the legs to create a feeder. Then nail in the remaining 6 wooden planks, leaving gaps between them, evenly along the legs so that they connect the groups of legs together. Nail the wooden planks to the legs to complete the base of the feeder.
Method 2 of 3: Make a Christmas Feeder from a Cardboard Box
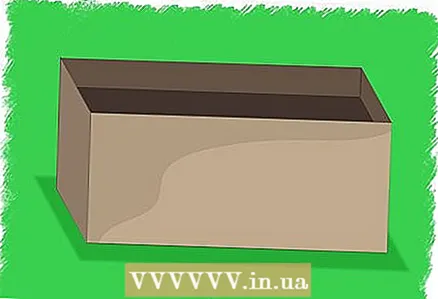 1 Find a sturdy cardboard box. Choose a box of the size you like. Boxes made from flat cardboard are best used to form feeders, but you can also use embossed cardboard.
  2 Draw the tree structure on the outside of the box. Use a marker to draw the wood texture on the outside of the box. Draw slightly curved lines throughout the entire box to create an imitation of planks. Add details that mimic the tree's swirls, knots and cracks to make it look like a tree. Draw imitation nails in each corner of the box for the final touch.
 - If you are using cardboard that has the design printed on, cover it first with brown wrapping paper or cut-off paper bags. Use double-sided tape or glue to glue the brown paper to the box and completely remove the pattern below. When the glue is dry, use a marker to draw a pattern that simulates the structure of a tree.
- Your feeder does not have to be brown. You can cover the box with light brown paper, festive red and green Christmas flowers, or any other color you like. If you are making a bird feeder with children, let them decide how to decorate it for Christmas.
 3 Add hay or straw. Spread hay or straw on the outside and inside of the box. The hay will help mask the box and make it look like a feeder.
Method 3 of 3: Use a real trough to feed the animals
 1 Find a trough for feeding animals. If you have access to agricultural equipment, then use a real trough to create a feeder. You can use a trough made of any material, including wood, metal, or plastic. Look in your local farmer stores if you are unsure where to find the trough.
  2 Wash the trough. If you are using a trough that has been used by animals, wash it with soapy water and rinse thoroughly. Let the trough dry in the sun before you start decorating it.
  3 Decorate the trough. Drape the trough with garlands, tinsel, and other decorations to signal the birth of little Jesus. Put hay on the bottom to create a realistic Christmas nursery.
Tips
- Do not forget to put the doll that symbolizes the baby Jesus in the manger. According to some traditions, it is believed that the doll should be put on Christmas Eve, while the rest demonstrate the child throughout all the days of the celebration.
Warnings
- Be careful when using tools, especially saws, hammers and nails. Keep all tools out of the reach of children.
What do you need
- Wood planks
- Saws
- A hammer
- Nails
- Construction gun
- Cardboard box
- Markers
- Feeding trough
- Hay or straw
- Doll


