Author:
Louise Ward
Date Of Creation:
7 February 2021
Update Date:
1 July 2024

Content
Hatching eggs is an incredibly rewarding experience, requiring good planning, dedication, flexibility and observation skills. Chicken eggs have an incubation period of about 21 days and can be incubated using a dedicated incubator under carefully monitored conditions of temperature and humidity, or incubating hens. Read the instructions below on how to incubate eggs using both methods.
Steps
Method 1 of 3: Choosing Chicken Eggs and Incubation Method
Find a place with chicken eggs. Chicken eggs should be obtained from hatcheries or poultry farms, with roosters in the flock to ensure that eggs can hatch into chicks if you do not keep hens that lay eggs. You can purchase hatcheries from chicken breeders on their farms. Be sure to schedule an appointment with a reputable egg vendor to get the correct breed and quantity of eggs you need. Your local extension association or extension specialist can provide you with suggestions for egg supplies.
- The eggs you see at the grocery store are not hatched eggs and cannot be hatched into chicks.
- For prevention and health reasons, it's best to buy eggs from a single source.
- If you are looking for a rare or special breed, you may need to find a specialized hatchery.

Be careful with the process of delivering eggs. Be careful if you buy eggs online and have them deliver them home, especially if this is your first time incubating eggs. Eggs transported from a distance are more difficult to hatch than eggs from chickens you raise or buy locally.- On average, eggs that have not been transported far have an 80% chance of hatching, compared with a 50% chance of an egg delivered from a distance.
- However, if the eggs are hit or shaken violently during the delivery, all will not hatch even if you do all the necessary procedures.

Choose eggs wisely. If you can choose which eggs to hatch yourself, there are many things you should know. You should get eggs from hens that are well cared for, healthy, and have already laid several litters; they easily fuse with roosters and produce high hatching eggs (about three). The laying hens should also be fed a diet suitable for the laying hens.- Discard eggs that are too large or too small, or of an unusual shape. Large eggs are more difficult to hatch, and small eggs produce too small chicks.
- Discard eggs with thin or cracked shells. Such eggs are unlikely to provide the moisture required for normal growth of the chicks. Thin or cracked eggshell also easily allow bacteria or pathogens to enter.

You need to understand that you will hatch roosters. It is important to remember that the eggs will hatch at a ratio of 50:50 rooster and hen. If you live in the city, the roosters can be a problem and raising them could be against neighborhood regulations (because they tend to crow)! If you can't keep roosters, be ready to find another place to live for them. Even if you keep them, you will have to consider housing them to avoid the males being too eager to step on the hens to injure the hens.- Understand that there is no conventional way to tell if an egg is a rooster or hen until it hatches. Although the ratio of males to females is usually 50:50, you may unfortunately hatch 7 roosters out of 8 eggs, which makes it difficult to have a nice flock.
- If you are going to keep a whole male, there are a few things you need to consider, for example, you need to make sure there is enough space in the house so that the hen does not get hurt by the hamsters. . Such hens may have their head and back feathers removed, an injured crest, or worse, a rooster can puncture the body. Also, if there are more than one rooster, they will fight for hens.
- Usually it is recommended to keep the ratio of one rooster to about 10 hens. This is also a good rate if you want your chickens to breed eggs.
Decide to use an incubator or broiler hen. You have two options when you want to incubate eggs: use an incubator or let the hen incubate. Both have pros and cons that you need to consider before proceeding.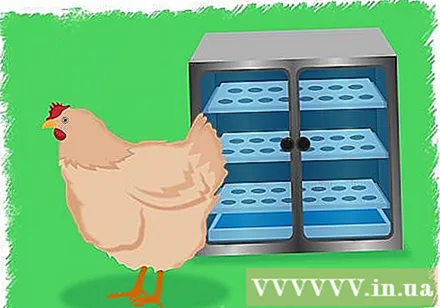
- An incubator is a cage that is controlled for adequate temperature, humidity and ventilation. With the incubator, you are the only one responsible for the eggs. It is your responsibility to prepare the incubator, monitor the temperature, humidity and ventilation in the incubator, and turn the eggs over during incubation. Small incubators can be purchased, but you can also make your own. If you are purchasing an oven, read the specifications and instructions that come with it.
- The hen can be used to incubate eggs, although it is not likely that it will lay those eggs. This is great, a natural option for hatching eggs. Make sure you choose the correct incubator breed, incubation chicken breeds include Crispy Chicken, Tam Hoang Chicken, Yellow Chicken and Curry Chicken.
Know the advantages and disadvantages of each method. Of course, both incubation methods or incubation hens have advantages and disadvantages for the person doing the incubation. Knowing these things will help you make the final decision that is appropriate for your situation.
- Advantages of incubators: An incubator is a good option if you don't have a broiler hen or if this is your first time incubating eggs. The incubator allows you to control the incubation process. It is also the best option for incubating large numbers of eggs.
- Disadvantages of incubator: The main disadvantage of incubating eggs is that the incubation process depends entirely on a reliable power source. If you experience a sudden power outage or someone accidentally unplugs the incubator, it can adversely affect the eggs, even killing the chicks. If you don't already have an incubator, you'll have to buy one, depending on size and quality, which can be very expensive.
- The advantages of hatching hens: Using a hen to hatch eggs is a practical and natural option. With a hatching hen, you won't have to worry about a sudden power outage ruining your eggs. Don't worry about correct temperature or humidity adjustment. Once the eggs are hatched, the hatching hens become the mother hen taking care of the chicks. What a beautiful sight!
- Disadvantages of hatching hens: The hen you choose may not be ready to hatch when you need it and there is no way to force it, so you may have to time it properly. You will need to invest in extra "hatchery" to protect the hens from overload or possible damage to the eggs. This can add to the costs of incubating eggs. In addition, a hen can only incubate a few eggs per litter. Larger chickens can incubate 10-12 eggs, depending on the size of the eggs, while small chickens can only hatch 6-7.
Method 2 of 3: Use an Incubator
Select an incubator site. To help the incubator maintain a constant temperature, place it in as little temperature fluctuation as possible. Do not place it near a window as it will be in direct sunlight. The sun's heat can raise the temperature high enough to kill the developing embryo.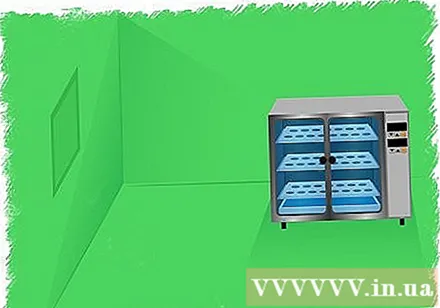
- Plug the incubator into a stable power source, and make sure that the plug will not easily fall out of the outlet.
- Keep the incubator out of reach of children and pets such as dogs and cats.
- Usually, the best place to place an incubator is one that has a flat surface that cannot be spilled or stepped on, and has a relatively constant temperature, away from places where air is drawn and direct sunlight.
Become familiar with how the incubator works. Before you start incubating your eggs, be sure to read the instructions for using the incubator carefully. You must know how to operate fans, lights and other functions.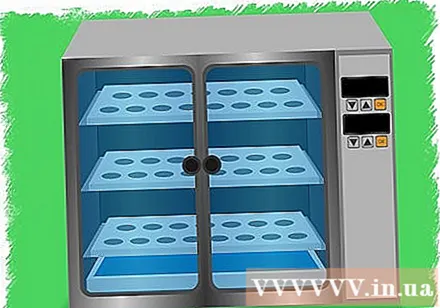
- Use the thermometer provided to check the temperature inside the incubator. You need to do this regularly during the 24 hours before you incubate the egg, to make sure it stays at the right temperature.
Adjust the conditions. For a successful incubation, the internal conditions must be at perfect levels. In order to prepare your incubator to receive eggs, you must adjust the conditions inside the incubator to the optimal level.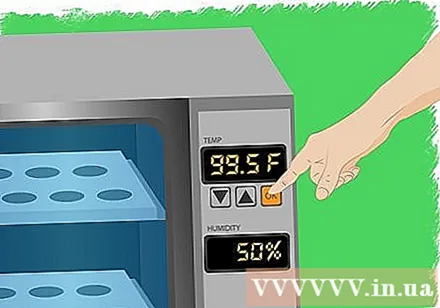
- Temperature: Chicken eggs should be incubated at a temperature between 37.2 and 38.8 degrees C (37.5 is ideal). Avoid outside temperatures between 36–39 ° C. If the temperature remains too high or too low for a few days, the hatchability of the eggs can be severely reduced.
- Humidity: The humidity in the incubator should be maintained at 50-65% (60% is ideal). Moisture is provided from a tray of water below the egg tray. You can use a wet bulb thermometer or hygrometer to measure moisture.
Put the eggs in the oven. Once the conditions inside the incubator have been properly set and monitored for at least 24 hours to confirm stability, it's time to put the eggs in the oven. Never incubate less than 6 eggs. If you only incubate 2 or 3 eggs, especially if they have been transported, there is a chance that incubation will not work and you may only be able to hatch one chicks, or not at all. .
- Warm eggs at room temperature. Warming eggs reduce the amount of heat and the time it takes to heat up in the incubator after you put them in.
- Carefully place the eggs in the incubator. Be sure to keep the egg on its side, the larger end of the egg a little higher than the small head. This is important because if the small head gets taller, the embryo may be skewed or difficult to develop, and the chicks are about to hatch it will be difficult to break the eggshell.
Lower the temperature after placing the eggs. The temperature will be temporarily lowered after you have placed the eggs in the oven, but it will be reset immediately if you have properly calibrated the oven.
- Do not raise the temperature to compensate for the difference otherwise you could damage the embryo.
Record the date. From the moment the egg is placed in the oven, you can estimate the egg hatch date. Chicken eggs take about 21 days to hatch when incubated under ideal temperature. Old eggs or eggs that have been thermally interrupted and incubated at too low a temperature may still hatch, but they will hatch later. If by day 21 the eggs are still not fully hatched, wait a few more days!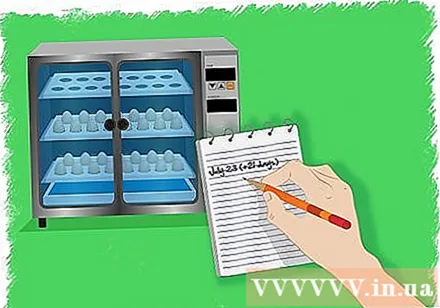
Flip eggs daily. The eggs need to be turned over and over at least 3 times a day, 5 times for the best! Some people often put an X on one side of the egg so they can easily keep track of which pods have been turned. If not, it is easy to lose track of the flipped fruits, and whether they have been turned a round or not.
- When turning eggs by hand, your hands should be washed and cleaned before handling to avoid contamination of the egg with bacteria and oil.
- Continue to flip the eggs until day 18, then stop for the chicks to position themselves for their hatching.
Adjust the humidity in the incubator. The humidity should be kept at 50 to 60% during the entire incubation period, except for the last 3 days you will have to increase to 65%. You may need a higher or lower humidity level depending on the type of egg you want to hatch.Refer to hatcheries or literature to learn more about hatching eggs.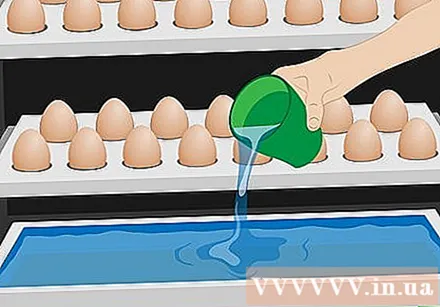
- Add water in the water tray regularly to prevent the humidity from getting too low. Always add warm water.
- Place a sponge in the water tray if you want to add more moisture.
- Measure the humidity in the incubator with a wet bulb thermometer. Read and also record the temperature in the incubator at that time. Refer to the chart in the book or online to find the moisture relationship between wet and dry bulbs.
Make sure the incubator is adequately ventilated. There are small slots on the side and the lid of the oven allows air flow, make sure at least one part is open. You will need to increase the amount of air circulating as the chicks begin to hatch.
Egg smear after 7-10 days. Egg smear is when you use a light source shining through the egg to see how much space the embryo takes up inside the egg. After 7-10 days, you should be able to see the embryo development. Egg smear allows you to remove eggs whose embryos cannot become chicks.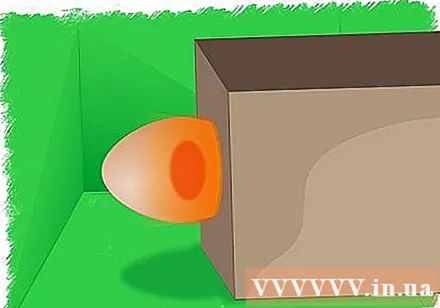
- Get an aluminum can or box that can fit a light bulb.
- Make a small hole in the end of the can (box) so that the diameter is smaller than the egg.
- Light on.
- Take a hatching egg and hold it out in front of the hole. If the light through the egg is clear, the embryo may not yet develop or the egg is not fertilized. You will see a dark spot if the embryo is developing. Closer to hatch the embryo becomes bigger.
- Remove eggs that do not have normal development from the incubator.
Be ready for the eggs to hatch. Stop turning and rotating eggs 3 days before the expected hatch date. Most normally grown eggs will hatch within 24 hours.
- Line the fabric under the egg tray before the eggs hatch. The fabric will help remove the falling eggshell and other things falling off as the eggs hatch.
- Increase humidity in the incubator by adding water or placing a sponge in the tray.
- Close the incubator until the chicks are fully hatched.
Method 3 of 3: Using a hen
Choose the right breed of chicken. If you do decide to use hens to hatch your eggs, you need to know how to choose the right chicken to hatch. Some chickens never incubate, or if you wait until your hen wants to hatch it can be very time consuming. The best brood chicken breeds are Ruffled Chicken, Tam Hoang Chicken, Yellow Chicken and Curry Chicken.
- There are many other breeds of chickens that also hatch eggs, but remember that not a hen that can hatch eggs certainly knows how to raise chicks. For example, some breeds of chickens have incubation but are not in the nest frequently, so only a few eggs hatch.
- Some hens are startled to see the eggs hatch, and they may slaughter the chicks or abandon them. If you find a chicken that can both hatch and raise a chicken, you are the winner!
Be aware of the signs of a chicken trying to hatch eggs. To find out which hen is trying to hatch eggs, look for those that lie still in the nest and stay there all night. You may also see a patch of hair under its abdomen. And when you get close, it will call loudly or peck your hand to warn you. Those are the signs that a hen can hatch eggs.
- If you have not yet trusted your chicken, before you place the eggs in the nest, try to see if it stays close to the nest all day. You can try a golf ball or an unfertilized egg - eggs you're ready to throw away. You will not be able to use a chicken and leave the nest behind while incubating.
Prepare an incubator. Putting the hens in a separate house can be used for both the hatching of the eggs and the chicks stage. Place a comfortable, ground-level nest in the room, filled with soft cushioning material, such as shavings or straw.
- The incubation place should be at least a quiet, dark, littered place isolated from the chickens, free from bugs or lice, and potential predators should be avoided.
- Leave space for the hens to leave the nest to eat, drink and travel.
Put the eggs in the nest. When you are confident that the broiler hen can hatch the eggs well and you have the hatching area ready, place the eggs in the nest. Put all the eggs at once so they hatch together within 24 hours.
- Place the eggs in the nest at night to avoid irritating the mother and prevent the mother from dropping the nest.
- You do not need to worry about which direction the eggs are placed. The mother chickens will turn them over many times during incubation.
Have food and water available at all times. Make sure the hen can eat and drink whenever she wants, even though she usually leaves the nest for food and drink only once a day. Leaving water far enough for the mother to spill it will not affect the nest and eggs.
Try not to disturb the mother hen and the eggs. The mother hen will do all the necessary things like flip and position the eggs, and the eggs will be kept moist and warmed by the mother's body. If you want to have your eggs checked, try to avoid doing it too often.
- However, you do not want health and safety problems if a cancer egg breaks. It is best to have all eggs at once on the 7th and 10th day of incubation. If you find that an egg is cancerous or has no embryos, remove it immediately.
- During the last week of the hatching process, the hen will probably stay in the nest without turning or turning the eggs. This is completely natural, so just let it go.
Take preventive measures. It can be frustrating if a hen is focused on incubating for the first 2 weeks and then quits, but don't be disappointed. If you have another brood hen or have an incubator you can still save the nest.
Let everything happen naturally. When the chicks begin to hatch, don't be curious about them or take the eggs out of the nest to see them clearly. The egg needs to be in its correct position. Don't worry if all the eggs haven't hatched yet, the hens are very good at both keeping eggs and taking care of the already hatched chicks. The hen will usually stay around the nest for 36 hours or longer to hatch all the eggs while keeping the newly hatched chicks under its wings. advertisement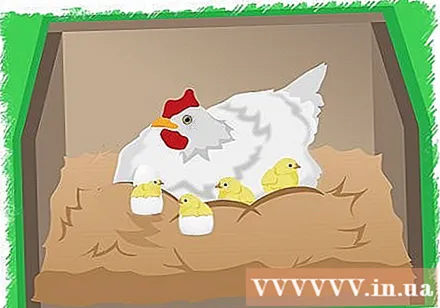
Advice
- Make sure the drinking tray is high enough so that the chicks do not fall in and the chicks are low enough to drink.
- Be careful when turning eggs by hand daily. The eggshell is very crunchy and fragile.
- Get the water and food ready when the chicks hatch.
- If the chicks haven't eaten for 2-3 days after hatching, that's okay; They get energy stored from the yolks they eat in the eggs.
What you need
- Incubator
- The eggs have been fertilized
- Universal thermometer
- Moisture meter
- or
- Brooder
- Incubation area


