Author:
Peter Berry
Date Of Creation:
15 February 2021
Update Date:
2 July 2024
Content
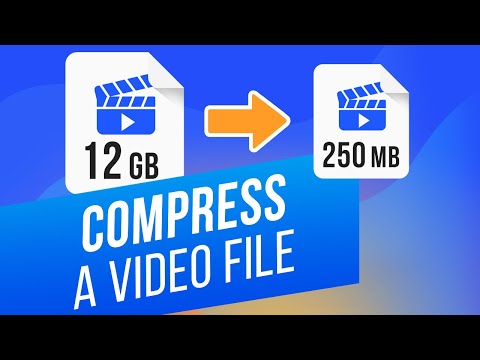
Here is an article showing you how to reduce the size of a video file without affecting the quality. Compression is essential when you want to share a video on the Internet because it reduces the amount of data required to transmit and send the video to the viewer. You can use Handbrake to compress videos or use QuickTime on your Mac if you just need to reduce the size of the video file.
Steps
Method 1 of 2: Use QuickTime
Open the video in QuickTime in the following way: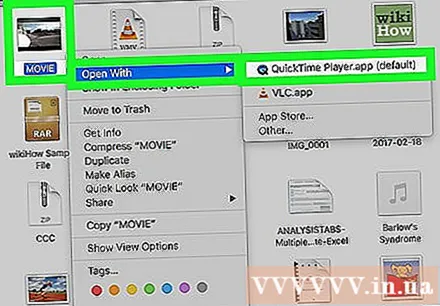
- Select video
- Click File (File)
- Choose Open With (Open with)
- Click QuickTime Player

Click File. It's the menu in the top left corner of the Mac screen. You will see a menu appear on the screen.
Choose Export (Export). This is the option near the bottom of the menu File. When you click, you will see another menu appear.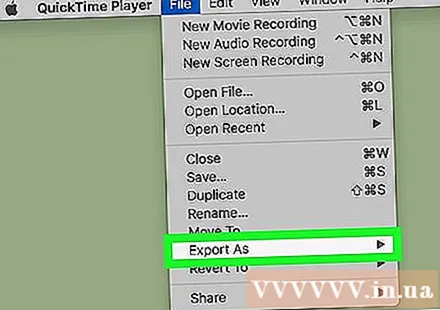
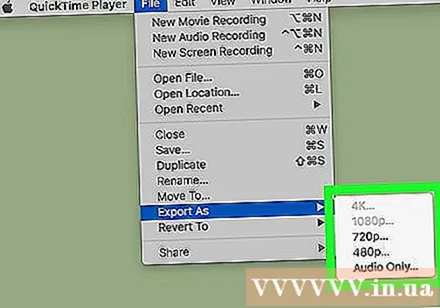
Choose quality. Click the video quality that is equal to or lower than the quality of the current video. This will open the Save window.
Gavin Anstey
Video producer, CEO of Cinebody Gavin Anstey, Cinebody CEO. Cinebody is user-oriented content software that helps brands create fast, authentic, and engaging visual content for anyone in the world. Gavin studied journalism at the University of Colorado Boulder before starting his career in software and video production.
Gavin Anstey
Video producer, CEO of CinebodyChoose the lowest resolution without damaging the visibility. This number will depend on the resolution of the original video. If the original video is 4K or 1080p, you probably don't want the option lower than 720p, as the video will be of very low quality when viewed.
Give the video a new name. Enter a name in the text input field near the top of the window.
Select a save folder. Click the "Where" drop-down box, then choose a folder (for example Desktop) you want to save the video.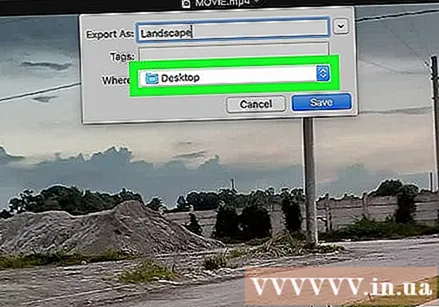
Click Save (Save) in the lower-right corner of the window. Your video compression will begin immediately.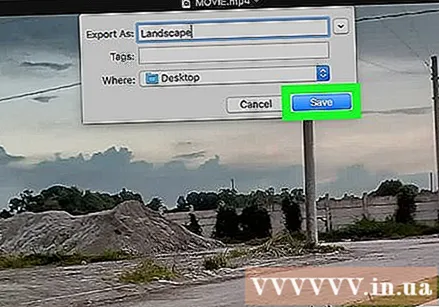
Wait for the video compression to finish. After the video is compressed, the "Export" window will disappear. Now, you can go to where to save the video and watch the video here. advertisement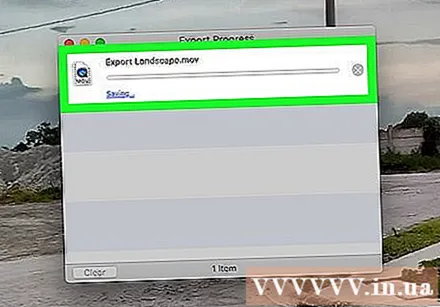
Method 2 of 2: Use Handbrake
Download and install Handbrake. Go to https://handbrake.fr/downloads.php in your web browser and click on the link Download (Download) below the name of the operating system you are using, and then install Handbrake in the following way: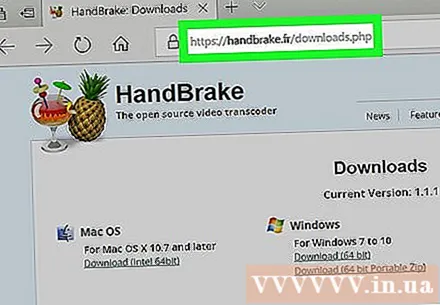
- Windows Double-click the Handbrake installation file, then follow the on-screen installation instructions.
- Mac Double-click the Handbrake DMG file, verify the download if necessary, drag the Handbrake icon into the Applications folder, and follow the on-screen instructions.
Open Handbrake. It is a pineapple symbol next to a cup of water. The Handbrake window will appear on the screen.
Click Open Source (Power On) in the upper-left corner of the Handbrake window.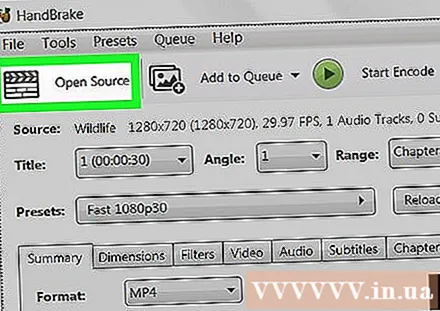
- The first time you open Handbrake, you'll have to click Open Source to open the source window.
Click File (File) with a folder icon in the Sources window.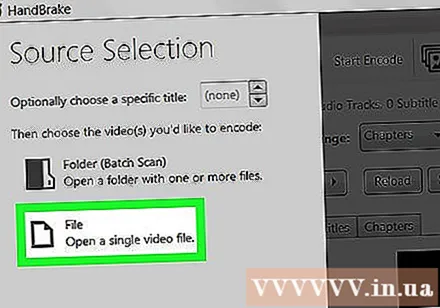
Select video. Go to the folder where the video you want to compress, click on the video and select Open (Open) to open the video in Handbrake.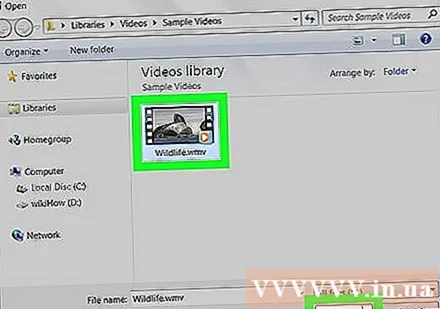
Choose quality format. In the far right-hand position of the Handbrake window, you'll click on one of the quality and frame rate formats (such as Very Fast 720p30) suitable for video.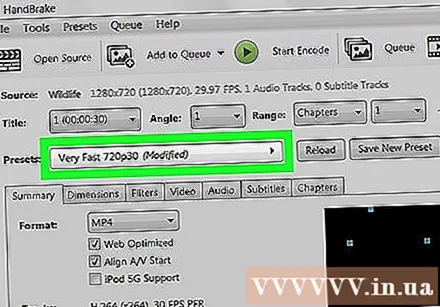
- Make sure the selected format is equal to or lower than the quality of the current video. For example, if the current quality of the video is 1080p, you'll click on select 1080p or lower; if the video is 720p, you will choose 720p or lower.
- Selection Fast (Fast) and Very Fast (Very fast) is best suited for compression.
Name the file. You need to change the filename in the center of the Handbrake page with a new one (eg compressed (compressed)).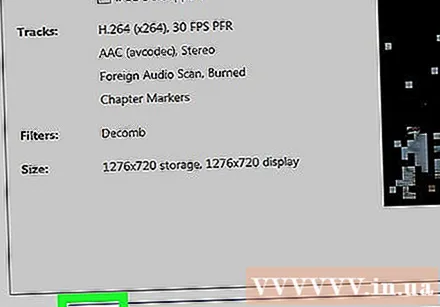
- You can also choose a new save folder by clicking Browse (Browse), select a folder, give the file a new name if needed, and click Save (Save).
Check the "Web Optimized" box in the middle of the Handbrake page. This will ensure that the video will be compressed according to web standards.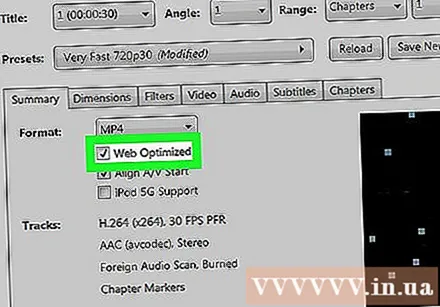
Click the card Video near below the Handbrake window.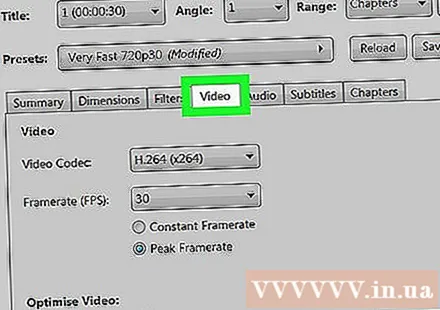
Make sure the settings here are correct. You will see the following settings below the tab Video; If the setting doesn't match, you can change it by clicking on the setting's value and choosing the correct option in the menu pane: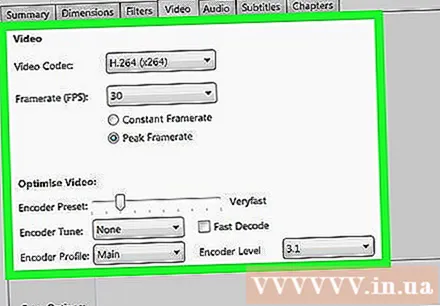
- Video Codec - This setting should be "H.264 (x264)".
- Framerate (FPS) (Frame Rate) - This setting should be "30" FPS (frames per second).
- Peak Framerate (Highest frame rate) or Peak (Highest) - This box should be checked.
- Encoder Level (Encryption level) or Level (Level) - This setting should be "4.0".
Click Start Encoding (Encoding starts). It's the green "Play" button in the middle of the Handbrake window. Your video compression will begin immediately.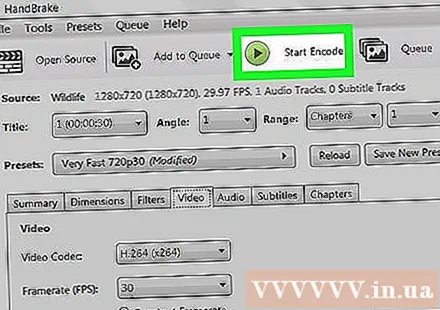
- On the Mac, you'll click Start at this step.
Wait for the video compression to finish. Video compression time can be very long, especially when the video is more than 200MB. Once the video is compressed, you can play the video from the save folder. advertisement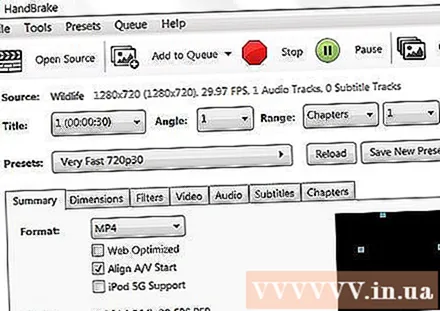
Advice
- Not all videos are of good quality when compressed to a high standard. Even many videos don't even require compression.
- Some videos, such as those shot with a mobile phone, have been compressed during playback.
- If possible, apply 2-step encryption. Although it takes longer than 1-step encoding, your video file will have better quality.
Warning
- Don't over-compress the video. The video file will lose a lot of data during compression and may lose clarity.


