Author:
Monica Porter
Date Of Creation:
15 March 2021
Update Date:
1 July 2024
Content
If you are trying to access one website but fail, while the others are still loading normally, there are many reasons. If the site is slow, you can just wait. But if you can load the web page on another computer or device, it means your computer or network has a problem. There are a few quick fixes that should fix most problems, but you have to be a little patient. Fixing the problem of restricting access to a website may require us to scan for viruses or malware, in addition, need to check browser settings or change the DNS configuration if the methods Scan does not resolve the problem.
Steps
Part 1 of 5: Basic troubleshooting

Try loading the page on a different device or network, you can try using your mobile network. Try to access the website on another phone or computer. If the website runs normally on other devices then the problem is with your computer. If the web page cannot be loaded on another device, the problem is the transmission line or the website itself.- If possible, try to download the website on a device connected to your network and another device not connected to the same network. The easiest way is to go to the website on your phone on the Wi-Fi connection that the computer is using, then disconnect from the wireless network and use the mobile network to download the website. You will be able to determine if the problem is with your connection or with the website.
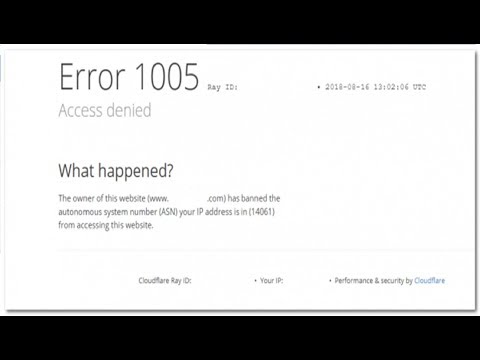
- If the website can't run on any device, no matter what network the device is connected to, the site is likely to crash. You can check by entering the website domain name into a monitoring service like "Is It Down Right Now?" ().

Restart the computer. From time to time, just restarting your computer can fix the problem you're having. Restart your computer and try to access the website again.
Try loading the page in a different browser. Some settings may be formatted inappropriately for the current browser. Use a different browser to see if the website is running properly or not.- If you're using the default web browser and don't have any other choice, you can quickly download and install a free browser like Firefox, Chrome, or Opera.
Temporarily disable your antivirus program. Antivirus software may restrict your ability to access certain websites. Try disabling the program and then reloading the web page.
- Right-click the anti-virus icon in the system tray and select "Disable" or "Turn Off". Maybe the program will warn you that it's not safe.
- Be sure to re-enable the program after checking.
Reinstall the network modem and router (router). Navigating to or from a certain website can be interrupted by the network modem and router. Reinstalling these devices can help you access the website successfully.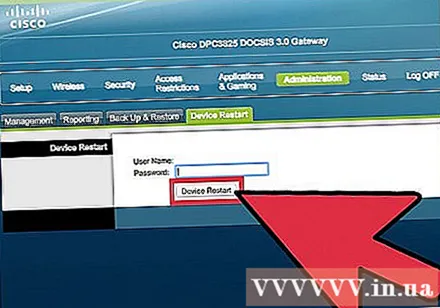
- Unplug the power cables of the modem and the router (if you have two separate devices), and wait about a minute.
- Plug the modem back in and wait for the indicator light to light up completely.
- Plug the router back in and wait for the indicator light to light up completely.
- Try to visit the website again.
Check the date and time settings on the computer. If the date or time is set incorrectly, there is a chance you will not be able to access the secure websites (). Check the clock on your computer and mobile device to make sure that the date and time are set correctly.
Make sure no parental control settings are enabled. If you use parental control software, certain websites might be blocked. Try disabling parental controls, then access it again. This process depends on which parental controls you use. advertisement
Part 2 of 5: Checking antivirus programs
Uninstall Norton or McAfee. These two antivirus programs cause quite a few problems with surfing the web. If you have one of these programs installed, consider removing and replacing them with a milder and less annoying anti-virus software.
- Norton's Cyber Security can be quite difficult to uninstall, look online for ways to completely remove Norton software.
- Read the article Uninstall McAfee Security Center for instructions on how to uninstall McAfee Security Center as it is a difficult program to uninstall.
Install another lighter antivirus instead. After removing your old anti-virus software, be sure to install a new program with the same functionality right away to protect your computer. The following free anti-virus programs are highly regarded for their professional security and do not interfere with website access:
- Avast!
- BitDefender
- AntiVir
- Microsoft Windows Defender
Make sure you have only one antivirus software installed. Having multiple antivirus programs running at the same time may cause problems. The ability to protect each other will result in users being unable to access some websites. Keep only the anti-virus software you like best and remove the rest.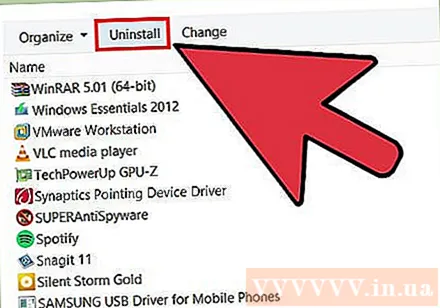
- You can find instructions on how to uninstall some popular antivirus software on wikiHow.
Part 3 of 5: Checking Browser Settings
Make sure JavaScript is enabled. If JavaScript is disabled, you will have difficulty loading many popular pages. Check your browser settings to make sure JavaScript is enabled: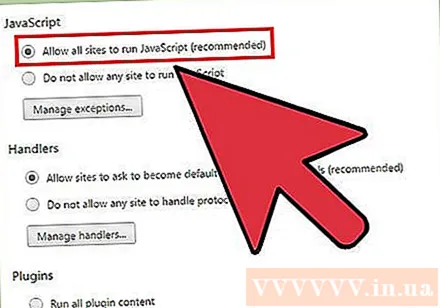
- Internet Explorer - Click the tool menu or gear button and select "Internet options". Click the "Security" tab then click the "Custom level" button. Scroll down to the "Scripting" section and set "Activate scripting" to "Enable".
- Chrome - Click the Chrome menu and select "Settings". Click the "Show advanced settings" link at the bottom, then click the "Content settings" button located in the "Privacy" section. Make sure that the "Allow all sites to run JavaScript content" line is checked.
- Firefox - Type "about: config" in the address bar and confirm that you want to continue. Type "javascript.enabled" into the search field. Make sure the "Value" value of "javascript.enabled" is set to "true".
- Safari - Click on Safari or the Edit menu and select "Preferences". Click the "Security" tab and check the "Enable JavaScript" box.
Remove unnecessary extensions. The extension can be causing problems for your browser. Disabling or removing an extension that you do not confirm or need to use can resolve the issue. The browser doesn't require an extension to work, so you can safely disable any extensions you have access to.
- Internet Explorer - Click the tool menu or the gear button and select "Manage add-ons". Select the extensions from the list and click "Disable" to disable them.
- Chrome - Click the Chrome menu and select "More tools" → "Extensions". Uncheck the "enabled" box for each extension you want to disable.
- Firefox - Click the Firefox menu button and select "Add-ons". Click the "Extensions" option in the left menu. Click the "Disable" button next to each plug-in.
- Safari - Click on Safari or the Edit menu and choose "Preferences". Click the "Extensions" tab and then uncheck the "Enable" box for each plug-in you want to disable.
Check the browser's connection settings. If your browser is set up to connect through a proxy server, you may experience connection problems. Check your connection settings and disable the proxy server to see if the issue is resolved.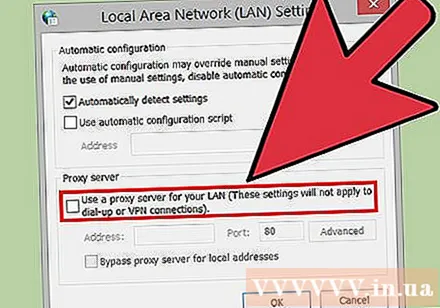
- Internet Explorer - Click the tool menu or gear button and select "Internet options". Click the "Connections" tab, then click the "LAN settings" button. Check the box "Automatically detect settings" and uncheck "Use a proxy server for your LAN".
- Chrome - Click the Chrome menu and choose "Settings". Click the "Show advanced settings" link at the bottom of the list. Scroll down and click the "Change proxy settings" button. Click the "LAN settings" button. Check the box "Automatically detect settings" and uncheck "Use a proxy server for your LAN".
- Firefox - Click the Firefox button and select "Options". Select the "Advanced" advanced options panel and click the "Network" tab. Click the "Settings" button and select "No proxy" or "Use system proxy settings".
- Safari - Click on Safari or the Edit menu and choose "Preferences". Click the "Advanced" tab and then click the "Change Settings" button. Uncheck all proxy activation settings.
Reset your browser. If you still can't connect to a website, you can reset your browser settings. This will delete all of the browser data and return it to its original format.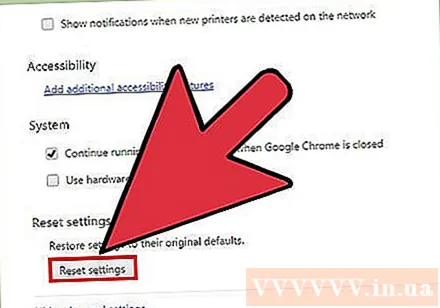
- Internet Explorer - Click the tool menu or gear button and select "Internet options". Click the "Advanced" tab and select "Reset". Check the box "Delete personal settings" then click "Reset" again.
- On Chrome - Click the Chrome menu and choose "Settings". Click the link "Show advanced settings". Scroll to the bottom of the page and select "Reset settings". Click "Reset" to confirm.
- On Firefox - Click the Firefox menu button and click the "?" Option at the bottom of the menu. Click the "Troubleshooting Information" option. Click "Refresh Firefox" and select "Refresh Firefox" again to confirm.
- On Safari - Turn off the "hot" Safari by pressing ⌘ Command+⌥ Option+Escand choose Safari from the list. Once Safari has been turned off, press the key ⇧ Shift and restart Safari again from the Dock or Applications folder. Turn off Wi-Fi and go to the website. When the website notices that the computer is not connected, turn on Wi-Fi again.
Part 4 of 5: Scan for malware
Download AdwCleaner. This is a free malware scanner that can find most of the common malware and ad intrusions. You can download it for free at.
Launch AdwCleaner after the download is complete. After confirming that you want to run the program, the software will begin downloading the necessary files for scanning. This only takes a few minutes.
Click the "Scan" button to start the scan. AdwCleaner will begin scanning your computer, which should take about 15-20 minutes.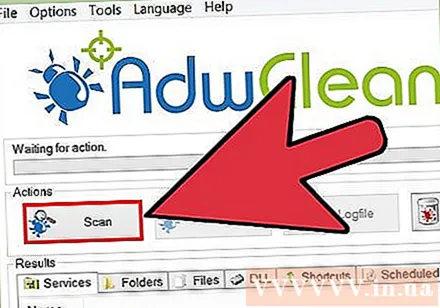
After the scan is complete, click the "Clean" button. AdwCleaner will remove all malicious files found during the scan.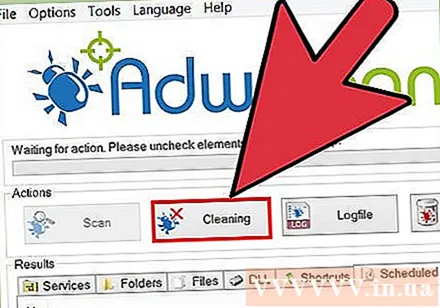
Download and install the free version of Malwarebytes Anti-Malware. The free version includes a complete suite of scanning and cleaning functions for small users. You can download it at.
- Launch the installer after downloading. Select a free certificate if asked.
- There's also a Mac version, which is also the current version of AdwareMedic, one of the more powerful anti-malware programs for Mac computers.
Launch Anti-Malware and click "Update Now". This option will download available updates that are capable of supporting Anti-Malware finding more malicious files.
Click "Scan Now" to run the scan on your computer. This is usually a bit longer than AdwCleaner's scan.
Click "Quarantine All" after the scan is complete. This option will remove any files found during the scan.
Reboot the computer and test. If the cause is because the adware prevented you from accessing certain websites, after scanning, you should be able to access normally. advertisement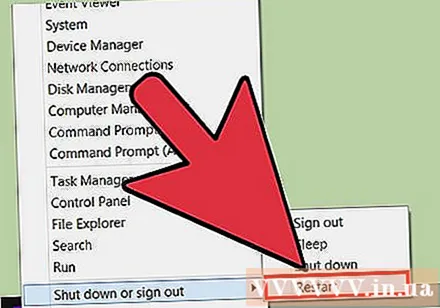
Part 5 of 5: Changing DNS configuration
Clear the current DNS settings. DNS (Domain Name System) is a service that converts website domain names into IP addresses so that you can connect to websites. If your local DNS files go down, you won't be able to load certain websites. Clearing DNS will clean up your local DNS information and download a fresh copy.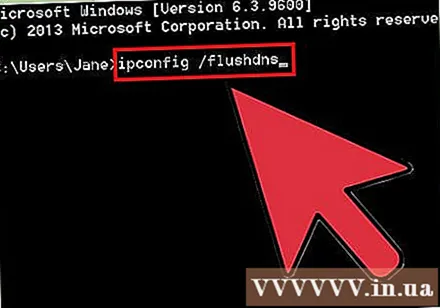
- For Windows operating system - Press ⊞ Win+R and type cmd to open the Command Prompt command line environment. Import ipconfig / flushdns and press ↵ Enter. A message will appear stating that the DNS memory has been cleared, you can now close Command Prompt.
- Mac - Open Terminal from within the Utilities folder. Type dscacheutil -flushcache and press ⏎ Return. Then, continue typing sudo killall -HUP mDNSResponder and press ⏎ Return to restart the DNS service. You will be asked to enter an administrator (admin) password.
Find a new DNS service to connect to. The user usually connects to the domain name system provided by the internet service provider, however, there are many other options. Some other DNS services even have the ability to significantly improve the web browsing speed. Search with the keyword "free DNS list" to find a list of the most popular and free DNS providers today. You can also find speed comparisons to choose from.
- There are two common DNS addresses: primary and secondary. You need to use both at the same time.
- Note: Not all DNS servers allow access to the same content. We recommend that you use Google or OpenDNS for the most outreach.
Connect to the new DNS service. After you find the server you want to connect to, you must point your computer to the new DNS.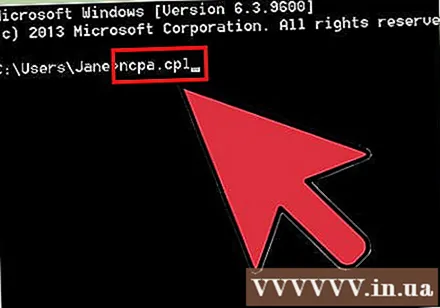
- For Windows operating system - Press ⊞ Win+R and type ncpa.cpl. The Network Connections window will appear. Right-click on the network adapter and select "Properties". Highlight "Internet Protocol Version 4" in the list and click the "Properties" button. Select "Use the following DNS server addresses" and enter the address you want to use.
- Mac - Open the Apple menu and select "System Preferences". Click the "Network" option and select your current network. Click the "Advanced" button and then select the "DNS" tab. Enter the server you want to connect to.


