Author:
Roger Morrison
Date Of Creation:
24 September 2021
Update Date:
1 July 2024
Content
- To step
- Part 1 of 4: Create a Windows 8 ISO file
- Part 2 of 4: Creating a bootable USB stick
- Part 3 of 4: Setting up the computer to boot from USB
- Part 4 of 4: Install Windows 8
- Warnings
- Necessities
If you install Windows often, you can simplify your life with a bootable USB stick with Windows on it. Then you no longer have to worry about the installation DVD getting scratched or downloading the installation files every time. Follow the steps in this article to turn a USB stick you have lying around into a device you can use to install Windows 8!
To step
Part 1 of 4: Create a Windows 8 ISO file
 Install a free program to burn with. There are several free options available. You need a program that can create ISO files.
 - If you ever received your copy of Windows 8 as an ISO file, you can skip this section and proceed to the next section.
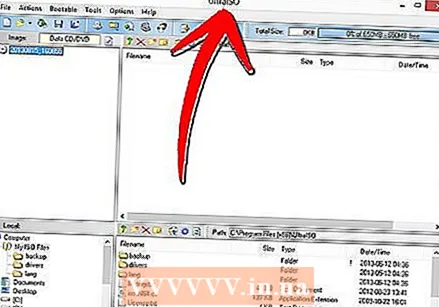
 Place your Windows 8 DVD in the CD tray. Open your new burning program. Look for an option called "Copy to Image" or "Create Image". Select your DVD drive as the source.
 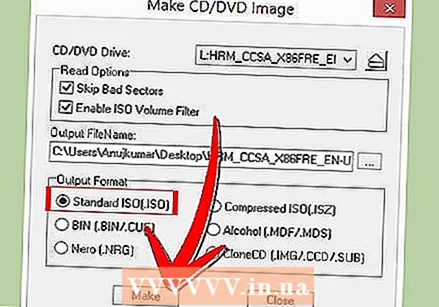 Save your ISO file. Choose a name and location that are easy to remember. The file you are going to create will be the same size as the disk you are copying. That means it can take up several gigabytes on your hard drive. So make sure there is enough space available.
 - Creating the ISO file can take a long time depending on your computer and the DVD drive.
Part 2 of 4: Creating a bootable USB stick
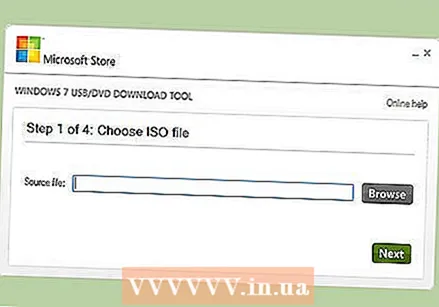 Download the "Windows 7 USB / DVD download tool" program. You can download this program from Microsoft for free and, contrary to what the name suggests, it can also be used for Windows 8. You can use the utility for almost all versions of Windows.
 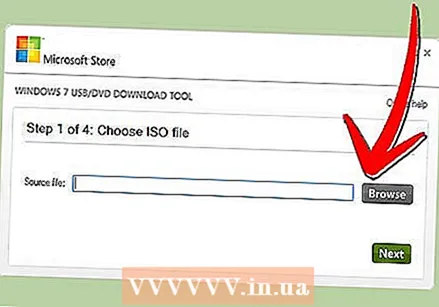 Select the source file. This is the ISO file you created or downloaded in the first section. Click on "Browse" to indicate the location of the file. When you have selected the file, click "Next".
 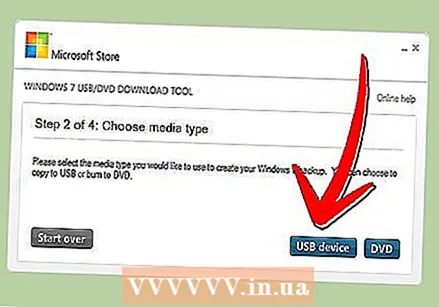 Select "USB Device". The utility allows you to create a DVD or a USB boot disk. Click on "USB device".
  Choose your USB drive from the list of connected devices. Make sure your USB stick is recognized. You need at least 4 GB of free space on your USB stick to be able to copy the Windows installation files. Click on "Begin Copying".
  Wait while the program is running. The program will format the USB stick to boot disk and then place the ISO file on the stick. The copy process can take up to 15 minutes, depending on the speed of your computer.
Part 3 of 4: Setting up the computer to boot from USB
 Enter the BIOS. To boot from USB, you need to adjust the BIOS so that it tries to boot from USB first, instead of the hard drive. Restart your computer and press the displayed key to enter the BIOS. The correct key varies by manufacturer, but usually it is F2, F10, F12 or Del.
 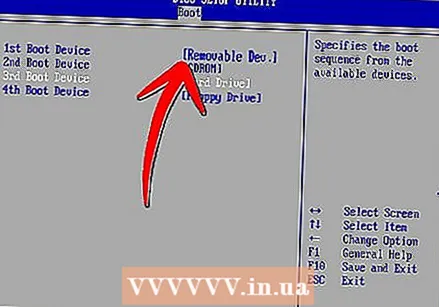 Go to the Boot menu in the BIOS. Change the first boot device to your USB stick. Your stick must be connected or you cannot select it. Depending on the manufacturer, it will be either "Removable Device" or the model number of the USB stick.
  Save the changes and restart the computer. If you have adjusted the boot order correctly, the Windows 8 installation file will load after you see the manufacturer's logo.
Part 4 of 4: Install Windows 8
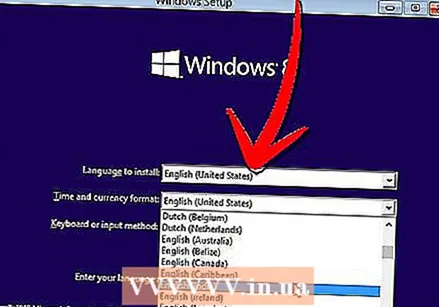 Select your language. When the installation of Windows 8 starts, you can first choose a language, time and currency format and keyboard layout. When you have selected this click on "Next".
 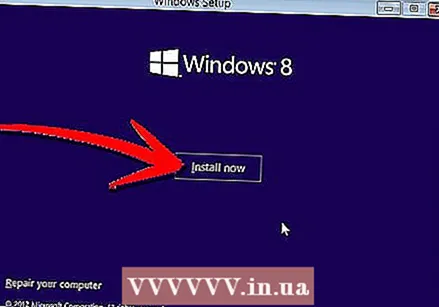 Click on "Install Now". Now the installation process begins. The other option is for when you want to repair an existing Windows installation.
  Enter the product key. This is the 25 character code that comes with your purchased copy of Windows 8. It can be found on a sticker on your computer or under your laptop.
 - You do not have to enter the dashes between the groups of characters.

- This is not an optional step. With previous versions of Windows, you had 60 days to register the product. Now you have to enter the code before starting the installation process.
- You do not have to enter the dashes between the groups of characters.
 Agree to the terms. When you have read the terms and conditions, you can tick the box indicating that you agree. Click on "Next".
  Click on "Custom". There are two ways you can install Windows. If you choose "Custom" you can perform a complete installation of Windows 8. If you choose "Upgrade", problems may arise at a later time. It is highly recommended that you perform a clean custom installation.
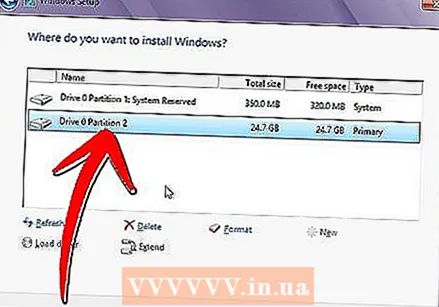
  Wipe the partition. A window will appear asking where you want to install Windows 8. To perform a clean install, you must erase the old partition and start with a clean slate. Click on "Drive options (advanced)". Here you can delete and create partitions.
 - Select the partition of your existing operating system and click the "Delete" button.
- When you first install an operating system on this hard drive, there are no partitions to erase.

- If your hard drive has multiple partitions, make sure you erase the correct partition. Data that was on a wiped partition is gone forever.
- Confirm the wipe of the partition.

- Select the partition of your existing operating system and click the "Delete" button.
 Select the unallocated space and click "Next". You don't have to create a new partition before installing Windows 8, it will be done automatically.
  Wait while Windows installs files. The percentage next to "Extended Windows Files" will slowly increase. This part of the process can take up to half an hour.
 - Windows will restart automatically when the process is completed.

- Windows will restart automatically when the process is completed.
 Wait while Windows collects data. After the computer has restarted, you will see the Windows 8 logo. Below that, a percentage indicates how far Windows is with the preparation. Windows collects information about the installed hardware.
 - When that is done, the text changes to "Almost done".
- Your computer will restart again.
 Set your personal settings. When the computer has restarted, you can set a color scheme for Windows 8.
 - You can always adjust the color later in the Windows 8 settings.
 Enter a computer name. This is the name of the computer on your network. Any other device on the network will be able to recognize your computer by this name.
 - Choose your wireless network. If you have a computer or other device with WiFi, a menu will now appear where you can choose a wireless network. If you have not yet installed the network card driver, this step will be skipped automatically.
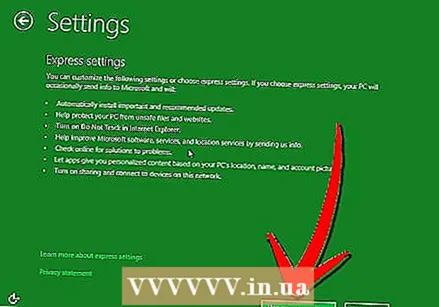
 Choose your settings. The most common option is the "express settings", which activate automatic updates, Windows Defender, send error messages to Microsoft, and other things.
 - If you prefer to determine the settings yourself, you can choose "Adjust".
- If you prefer to determine the settings yourself, you can choose "Adjust".
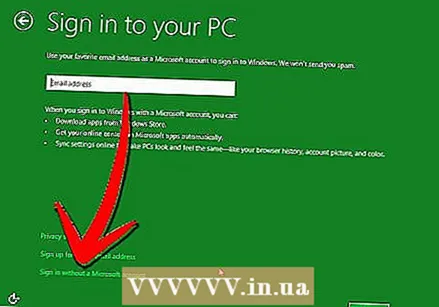
 Create an account. You need an account to log in to Windows. Microsoft recommends using a Microsoft account so that you can make purchases from the Windows Store. If you don't have a Microsoft account, you can create one for free with a valid email address.
 - If you don't have an email address, you can click on "Sign up for a new email address" to create one. You do need a working internet connection for this.

- If you prefer to sign in the old way without a Microsoft account, you can click the link at the bottom. This way you can log in in a way that is similar to previous versions of Windows.
- If you don't have an email address, you can click on "Sign up for a new email address" to create one. You do need a working internet connection for this.
 Watch the explanation while Windows starts. After you have set all your preferences, Windows will perform the final steps of the installation. While waiting you can view tips on using Windows 8. When the process is complete, you will see the start screen. You are ready to start using Windows 8.
Warnings
- Doing this will erase everything currently on your USB stick. Make sure you have a good backup of everything you want to keep.
- Installing a new version of Windows may erase your personal data such as photos, music and saved games. Make a good backup before installing a new Windows version.
Necessities
- USB stick - at least 4 GB
- ISO file or DVD with Windows 8


