Author:
Roger Morrison
Date Of Creation:
23 September 2021
Update Date:
1 July 2024

Content
- To step
- Method 1 of 4: Preparations
- Method 2 of 4: Make a simple messy bun
- Method 3 of 4: Make a messy bun in other ways
- Method 4 of 4: Accentuate the bun (optional)
- Tips
- Warnings
- Necessities
A tousled bun is suitable for all kinds of different occasions, and it is an easy way of updating your hair that you can do yourself at home. The tousled bun can be made in hair of all lengths, and it's a distinct style that you can create quickly and easily, whether you're going to a fancy wedding or just want to run to the store. You may have to try out a few ways to create the perfect bun for your hair, but remember: it's called a "messy bun" for a reason! Relax and enjoy trying out different styles. However you make the bun, you should feel beautiful and be comfortable with the end result.
To step
Method 1 of 4: Preparations
 Choose the best styling products. You probably already have the following list of items at home. Even if not, that's okay, because you can even make a messy bun with your fingers and a rubber band. You can also find the supplies at the drugstore. If you want to make a messy bun to go to an important event like a wedding, plan ahead and maybe buy some supplies from a specialty barber shop.
 - For a simple and simple messy bun, you only need 5 minutes, your fingers and a rubber band.
- If you have a little more time, find a soft brush, a wide-tooth comb, and an elastic. Preferably use an elastic without a metal piece, because it can damage your hair.
- The easiest way to create a messy bun is if your hair hasn't been washed for two days.
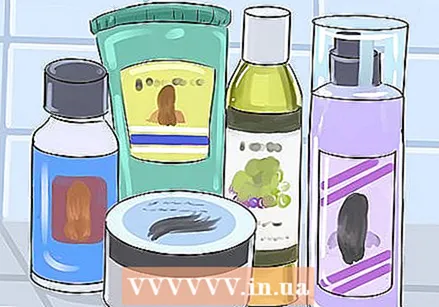 Create a slightly more stylish look. Take a lightweight mousse that keeps your hair supple and gives your hair volume. This is usually stated on the bottle. If you have very soft or fine hair, or if you want your messy bun to last for a long time, choose a hairspray that will hold your bun in place.
 - For a natural look you should take a hairspray that gives a very fine mist, as it doesn't leave a sticky layer, and you can reapply without having to wash your hair first.
- For an extremely tough look, you can use hairspray that gives your hair extra volume, without making it hard.
- If you have very soft hair, or if it has just been washed, you can also experiment with dry shampoo or a salty hairspray to add texture to your hair (optional).
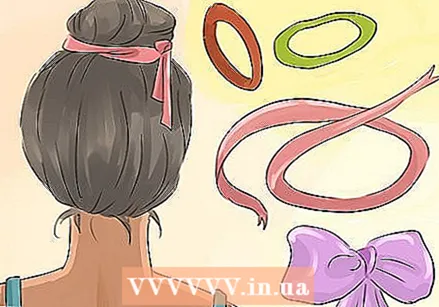
 Add some originality, glamor and sophistication to your bun. Buy some bobby pins, artificial flowers, pins with shiny stones, decorative clips, or other fun accessories for your hair. If you choose this kind of thing, try to keep it civilized and stylish (optional).
Method 2 of 4: Make a simple messy bun
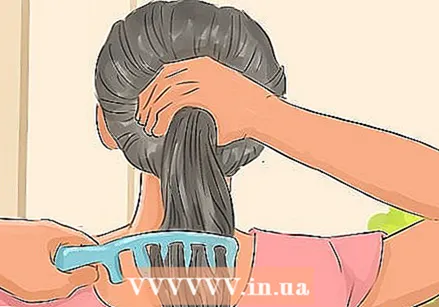
 Make a quick, simple and elegant bun. Use your fingers to comb your hair and gather your hair at the back or side of your head. Keep a rubber band within reach, or put it around your wrist from the hand you're holding your hair with. Once you have gathered your hair, wrap the elastic around it so that it is in a not too tight ponytail.
 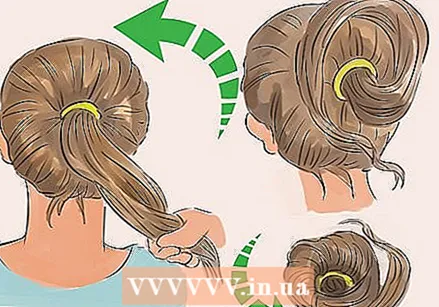 Roll up the bun. Now you can wrap your tail around itself and then wrap it around the rubber band so that you can eventually tuck the ends underneath; or the last time you twist the elastic around it, don't pull your hair all the way through, but let it hang in a loop.
 - Continue to pull the loop of hair through the elastic to make the bun larger, and / or to make the bun tougher due to some strands falling out.
- Grab the sides of the bun and widen the radius by pulling the edges out. Tugging a little on the center of the loop will give you a u-shape.
- Pull the points protruding from the bottom of the rubber band to the left and right, so that they lie flatter against your head. Put any pieces that have accidentally come out back into the rubber band. If you want, you can wrap a few loose strands around the elastic and secure with a bobby pin.
 Place the bun at different heights. For a high bun, flip your head upside down and take your hair in your hands. Then your hair will gain volume and reduce bumps. For a low bun, gather your hair back at the nape of your neck. The tail can be as high or low as you want. Remember that the bun will be placed where the tail is attached. (So a high ponytail becomes a high bun.)
Method 3 of 4: Make a messy bun in other ways
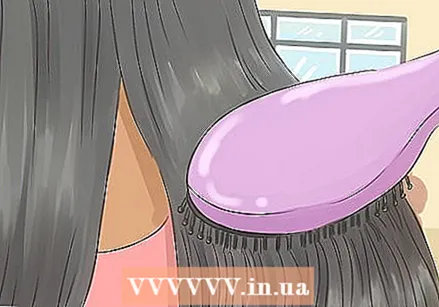 Make a stylish bun. Comb your hair with a wide-tooth comb and a soft bristle brush so that there are no knots (and no bobby pins, etc.).
 - Take some mousse and apply it in your hair from roots to ends.
- Tease your hair to give it more volume. Brush the front section of your hair down over your forehead. Then backcomb it by placing the brush somewhere in the middle of your section of hair, and gently comb back towards the roots; do this until your hair is sufficiently teased.
- Repeat on the sides of your hair, lifting a section there and combing it against the direction.
 Remove bumps. Get your hair together in a smooth ponytail, smoothing the bumps with your free hand. If that doesn't work, use your wide-tooth comb. Hold your hair in place with one hand while securing it in a bun with the other.
  Make a ballerina bun. Wrap your rubber band around your ponytail once or twice. Now wrap your hair around the base of the tail to create a ballerina bun. Hold the bun flat against your head and secure it with bobby pins, or put another rubber band around it.
 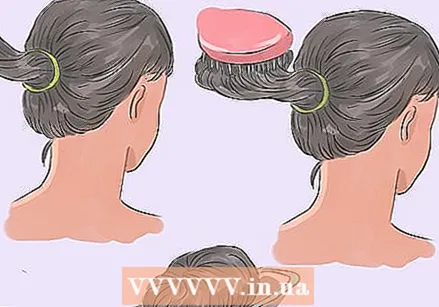 Tease the hair that you are making a bun. Using a rubber band to secure your ponytail, hold the tail up and backcomb it by combing it the wrong way with a brush. Spray it with hairspray if you want, then loop your hair using a second rubber band. Insert the loose ends through the loop, then secure the entire loop with the rest of the elastic. Leave some tufts out to get a messy bun.
 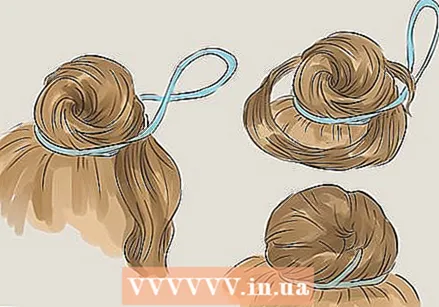 Make a bun if you have long hair. When your hair falls over your shoulders 3 to 5 cm, loop your hair and wrap your elastic band around it once. Thread the rest of your hair through the first loop, creating a second loop. Hold the ends of your hair tight so they don't slip through. (Note that the first loop will tighten as you pull your hair to make the second loop). Wrap the rest of the elastic over both loops so that they get caught in a loose bun.
 - If your hair is very long, you can also wrap it around the base of the tail, then loosely secure it with a second elastic. Loop your hair and wrap another rubber band around it.
 Finish it. When you're done, gently smooth the hair that falls over your crown and brush the outside of your hair so it doesn't look too tousled. Apply a light coat of hairspray if you want your chic, tousled bun to last for a few hours or survive a bike ride.
Method 4 of 4: Accentuate the bun (optional)
 Create more volume. Run your fingers through the front of your hair to loosen it up from the elastic and add some volume. This gives a classic look; perfect for the office.
  Put in a hair band (or two). Slide your favorite headband that matches your outfit into your hair about 5 cm from your hairline. If you have blonde hair, get two black or dark hair bands. If you have brown or black hair, choose white or light hair bands.
  Add decorative hair clips, clips or jewelry. Something that shines or something with flowers makes your hairstyle even more special. It's important not to overdo it. The tousled bun is a simple and elegant style. If you add too much, it will become garish and unnatural.
  Find out what works best for you. Play around with your hair until you find the perfect bun. Leave some peaks hanging out before putting most of it in a tail. Once you have made the tail, you can divide it in half and turn both in opposite directions, then pin them in place. Loosen some tufts at the front and side, or pull your hair back out of the bun at the back and let it fall naturally.
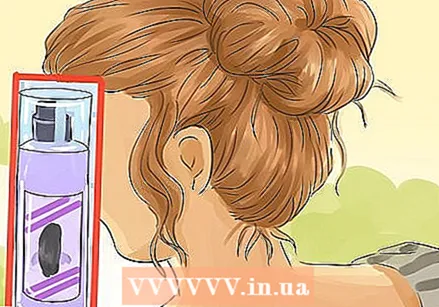
  "Apply a thin coat of hairspray all over your haircut. Make sure you keep the can 6 to 8 inches away from your head. If you're feeling adventurous, you can also use glitter hairspray for a shiny and dazzling result!
  Finish your messy bun. There are many ways to finish your messy bun. The more you experiment with your own style, the more styles you will like. The most important thing is to create a messy bun that looks natural and not overly styled. When you are done creating your messy bun, you should feel comfortable, beautiful and distinct. Once you've mastered the technique, you'll have so much control over your hairstyle that everyone will think you're blessed with the perfect locks!
Tips
- Braid your hair at night before going to bed so that it wavy the next day and makes it easier to put it in a bun in the morning. Then, if necessary, pull off a few strands. Wear the bun on its own or tie in a hair tie or hat to complete the look.
- If your hair isn't doing what you want, wet your hand a little and toss through your hair.
- If you want soft waves in the morning, bun your hair after showering at night.
- You can easily transform this look into a romantic hairstyle by curling the dangling locks.
- Remember that a messy bun doesn't have to look perfect. If it looks nice and casual, it's fine.
- Don't tease your hair too often. Then it can break off and you get split ends.
Warnings
- Do not tie the rubber bands too tightly, or your hair may break or damage.
- Be patient when you backcomb your hair. Use a flat brush for the best and fastest result.
Necessities
- Rubber bands
- Wide-toothed comb
- Soft brush
- Optional:
- Mousse
- Hairspray
- Flat brush
- Bobby pins
- Colored hair bands


