Author:
Christy White
Date Of Creation:
12 May 2021
Update Date:
1 July 2024

Content
If you like to go for a walk in nature or on uneven ground, a walking stick is very useful to have with you. A good walking stick has a number of advantages, including improving your balance, your arms will actively move while you walk and you can use the walking stick to remove bushes and small obstacles from your path. In addition, a walking stick, if you make it yourself, is not only a practical object but also something to be proud of. Boy Scouts can, and so can you.
To step
Part 1 of 2: Pick and cut
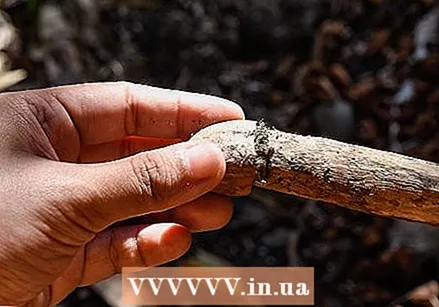
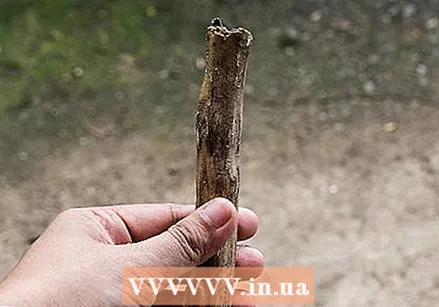 Find a good stick. Making a good walking stick naturally starts with selecting a suitable piece of wood. The quality of the walking stick in the making depends on the size, shape, sturdiness and age of the piece of wood.
 - Before a walking stick becomes a walking stick, it is usually a reasonably straight piece of wood about two and a half to five cm in diameter. Find a piece of wood that reaches from the ground to your armpit (usually between 140-165 cm); you can shorten the stick later until it is the correct length.
- Hardwood walking sticks are the strongest and easiest to use. Good choices include maple, alder, cherry, aspen and sassafras wood.
- Look for fresh hardwood but never cut wood for a walking stick from a living tree. Enjoy nature, don't damage her. If you put in a little time you will find a suitable stick that is fresh but no longer alive.
- Do not use sticks with holes or other features of insect infestation. The stick may have been weakened by insects that have bored tunnels through it, and you can unknowingly bring pests into your home.
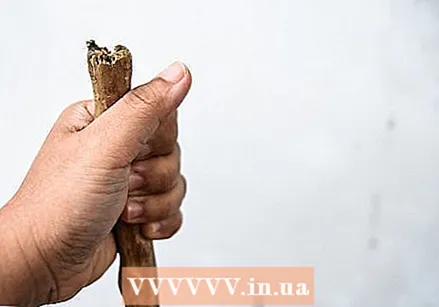
 Give the stick the correct length. If you are using the walking stick for your own use, you should place the stick on the ground in front of you, in the same way you would walk with it, with your arm relaxed at the elbow (roughly at a right angle). Mark stick about two inches above your hand (or higher, if you want to make decorative carvings at the top of the stick, for example), then trim the stick. (Note: Children or those who don't know how to use a saw should ask for help. Electric saws can cut off a finger with the snap, and handsaws can easily cause deep cuts too.)
 - If you want to measure someone with a walking stick before looking for it, you should have them hold a broom as described above. Measure the distance from the floor to a few inches above his hand. Take a tape measure or a piece of cord that is cut to size with you on your cane hunt.
- If you are making walking sticks for sale or to give to unknown people, remember that the length of 140-165 cm is a good general starting length for walking sticks.
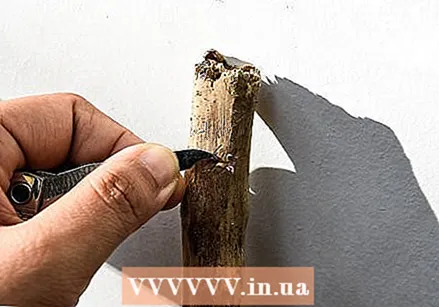
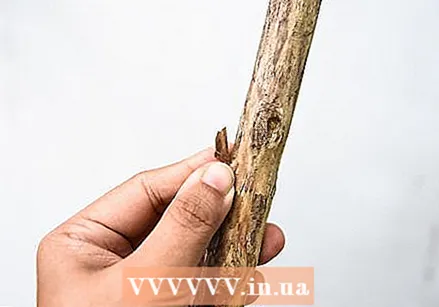 Cut away the bark. You can leave the bark on the stick if you want, but most people prefer the look and feel of a stick with the bark off and the smooth grain of the wood underneath. Either way, you'll want to cut twigs and bumps off the stick.
 - You can use a pocket knife, larger knife, or even a plane to remove the bark. Use the woodcarving tool that works best with you.
- First cut off twigs and bumps and then the bark. Do this with short, fast, shallow strokes. You don't want to cut too deep into the wood. Good and safe woodcarving takes time.
- Always cut away from your body and keep your legs away from the cutting motion. A knot of wood can cause the knife to jump and give you a nasty cut or sting. If you are not familiar with the art of woodcarving, you should seek help from someone with experience.
- Keep cutting until the clear wood underneath the bark is visible all over. Some trees have multiple layers of bark, so keep going until you see the thread of the wood.
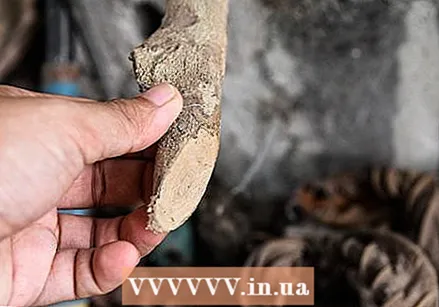
 Let your stick dry. It is better to shorten and cut fresh wood, but dry wood gives it more strength and durability. Time and patience are of the utmost importance during this process.
 - The drying time depends on a number of factors, including the type of wood, in what kind of environment you let the stick dry (a damp, dry, etc. environment) and your own idea about when the wood is dry enough. One advises to let the stick dry for an average of two weeks, while the other has it in a month.
- Let the stick dry until it is stiff but not brittle. You may, from time to time, need to flip or even secure the stick horizontally (e.g. on a flat piece of wood and with clamps) to keep it from bending.
- Wood that dries too quickly becomes brittle, so if it is very dry indoors, let your stick dry in a covered area outside, such as in a garage or shed.
Part 2 of 2: Personalizing your stick
 Give it your own twist. You may have seen walking sticks with intricate cutouts on the tops; the face of a long-haired, bearded man proves to be a popular choice. Depending on how skilled you are with a pocket knife and / or other woodworking tools, you can also try decorating the top of your stick. Don't forget that if you make a mistake you can always shorten the stick a bit!
 - If you want to make some simpler decoration, you can carve your name or initials in the stick, for example. You can also use a glass painting device for this. Whatever method you use, be careful.
- In addition, it can be practical to cut out channels where you hold the stick. For example, you can use the wavy contoured handles that many car steering wheels have as inspiration. In addition, a trench that climbs upwards in a spiral around the pole can also serve as a pleasant handle.
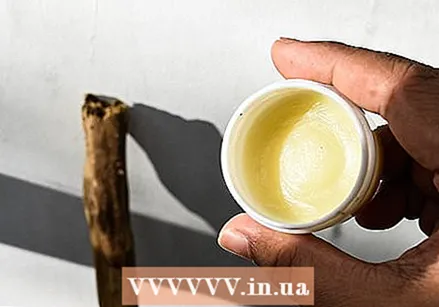 Stain the piece of wood and coat it. Once you've finished customizing, shaping, drying and cutting, it's time to protect your creation from the elements so that it will last for years to come. Varnishing and especially staining the piece of wood is optional, but recommended to improve the appearance and durability of your stick.
 - Whether or not you stain / paint the stick, you should at least make it smooth by first sanding it with coarse and then with fine sandpaper. Wipe sawdust from the stick with a tack cloth or a rag dampened with paint thinner.
- Apply stain according to the instructions on the pack. Expect to let each coat of stain dry overnight, then sand and wipe the stick a bit between coats. The more coats you apply, the darker the final product will be.
- Apply three coats (or the recommended amount, per pack instructions) of a clear polyurethane varnish. Lightly sand things with ultra-fine sandpaper and wipe clean between coats.
- Do all pickling and painting in a well-ventilated area. Always wear gloves and also consider wearing safety glasses and a face mask.
 Make a hold. If you have not already cut a handle in your walking stick (see the decorative carving step above), you can also make a handle after you have finished staining and painting. This is also optional.
 - You can make practical handles, which also look good, from strips of leather, cord, nylon or braided rope by wrapping them around the place where you want your handle and then attaching them with pins or small nails. You can also use "griptape", which is also used for tennis rackets, golf clubs and hockey sticks.
- For extra grip on your walking stick, you can also add a wrist strap if you want. Drill a hole through your walking stick (preferably before staining and painting), just above the handle. Run a strip of leather through it, or a strip of any other material of your choice, and tie it into a loop that fits snugly over the wrist.
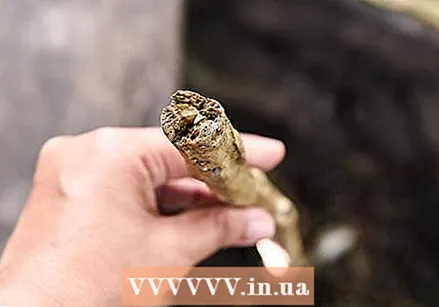
 Protect the tip. The tip of your walking stick will wear out the fastest, which can eventually crack, split, splinter or rot the wood there. You can leave the tip of the pole in its natural state and clean, sand or saw it if necessary, or you can optionally add extra protection to the bottom.
 - Rubber caps, also used for regular walking poles and walking frames, are an easy and affordable solution. You can buy them in those stores where they also sell medical devices. You can also use a large rubber cork. Drill a hole in the cork and the tip of the stick that will hold a wooden peg, attach them together and glue everything in place.
- A short piece of copper pipe can also act as an elegant protection for the tip of your walking stick. You will need a piece of copper pipe two and a half inches long and two to two and a half inches thick. Then you have to cut the tip of your stick so narrow that the piece of pipe just fits over it. Secure the length of pipe to the stick with quick-drying epoxy resin.
Tips
- You can use a glass painting device to burn your own designs into your walking stick.
Warnings
- When cutting your walking stick into shape with your sharp pocket knife, make sure that you always cut away from your body. Otherwise you could hurt yourself badly in an outlier, and if you are walking in a forest there is no medical help close by.
- Never kill a tree just to make a walking stick from one of its branches. Always use firewood.
- If you are still a child, an adult should always be around while you are working on your walking stick.


