Author:
Roger Morrison
Date Of Creation:
27 September 2021
Update Date:
1 July 2024

Content
- To step
- Part 1 of 3: Setting up a record player
- Part 2 of 3: Playing an LP
- Part 3 of 3: Making adjustments
- Necessities
Turning on a record player is an exciting process. Once you have taken the record player out of the box, it is important to read the manual and familiarize yourself with the different parts of a record player. The parts of a record player include the turntable, the tone arm, the cartridge, the balancing weight and the speed switch. Once you are familiar with these parts and have consulted the specifications in your manual, you can set up your turntable.
To step
Part 1 of 3: Setting up a record player
 Place the record player on a flat, horizontal surface. For a turntable to work properly, it must be on a flat surface and completely level. You need a spirit level with an air bubble in the center. Place the spirit level on the table or shelf where you want to place the record player. Adjust the furniture until the bubble appears in the center of the tube. As soon as you see that the bubble remains in the center of the tube, the surface is level.
 - If the table, shelf, or other surface is not completely flat, the turntable will not work properly.
- You may need to put some wood under the furniture to level it.
 Familiarize yourself with the parts of your record player. You should find a schematic of your turntable in the manual. Learn what the different parts of your turntable are called:
 - Start / stop button (depending on model), which you have to press to play or stop your record.
- Lift lever, which allows you to raise or lower the tonearm.
- Speed switch, with which you can select 33 or 45 revolutions per minute, depending on the number of revolutions indicated on your gramophone record.
- Record size switch on automatic record players. With this selector switch you can choose whether you want to play a 12- or a 7-inch vinyl record.
- Tonearm (and possibly the pickup), which reads the music from the grooves on the gramophone record.
 Adjust the balancing weight according to the manufacturer's instructions. The turntable manual or operating instructions must contain specifications for the correct balancing weight. You can see the balancing weight on the back of the tonearm. Rotate the balance weight until it aligns with the tracking weight recommended in your owner's manual. Finally, set the gauge (gauge) to 0.
 - For example, if the manufacturer recommends 1.5 grams, set the balance weight to 1.5 grams.
 Connect your record player. The record player needs electricity, so you need to plug it into a safe outlet.
Part 2 of 3: Playing an LP
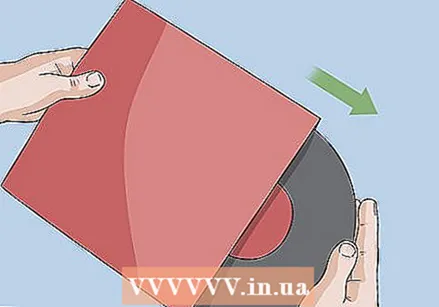 Remove the record from the sleeve. Place the palm of your right hand under the opening of the cover. Turn the cover upside down and slide the plate onto your open palm. When you see the hole in the center of the plate, put a finger in it. Then hold the plate by the sides.
 - Be careful not to handle the flat surface of the plate as it will get dirty and wear out faster.
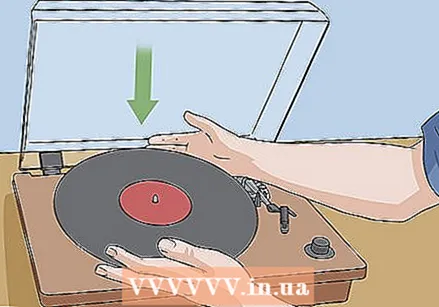 Place the record on the turntable of your record player. Place the record on the turntable of your turntable, with the pin in the center of the turntable entering the hole in the record.
  Make sure the speed is correct. In the center of your plate you would put the number; revs. Normally a twelve inch record will be played at 33 1/3 revolutions per minute and a seven inch record at 45 revolutions per minute. After determining the correct speed for the record, make sure your turntable is adjusted to this speed by setting the speed selector correctly.
 - Some 12-inch vinyl records can be set to 45 rpm.
- To adjust the speed of some manual players, you may need to remove the turntable. Then move the tire to the correct groove for 33 1/3 or 45 revolutions per minute. The correct groove must be indicated in your manual.
 If necessary, press the play button and lift the lift lever. For a manual record player, you have to press Play and then press the lift lever for the tonearm. The record will then turn and the tonearm will rise.
 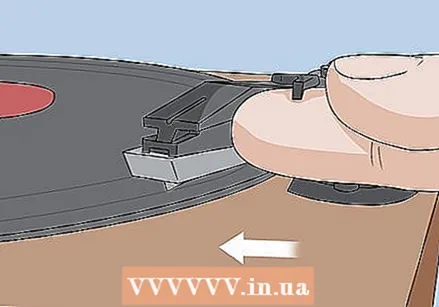 Align the tonearm with the record. Move the tone arm to the side of the record. Look over the top of the turntable to align the tone arm with the outside of the record so it can engage in the first groove of the record.
 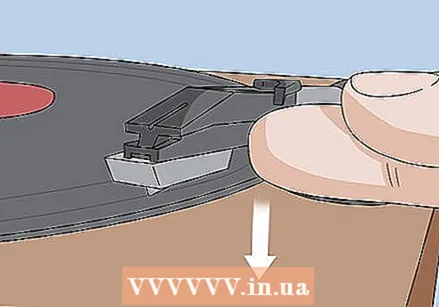 Lower the tone arm onto the record. Once the tonearm is aligned with the record, push the lever down to lower the tonearm down onto the record. The record will start playing.
 - If you lower the tone arm and miss the start of the record or the wrong number is dialed, press the lift lever to raise the tone arm again. Then try to align the tone arm with the start of the record and then lower it back down.
 Stop the music. Unlike playing an MP3 player or a CD player, you have to stop a turntable manually. You have to lift the tone arm with the lift lever. Then move the tone arm to pause and (depending on the model) press the stop button or switch.
 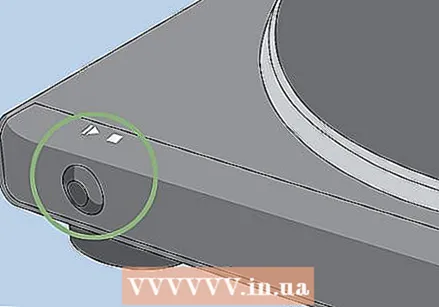 Play the music on an automatic record player. If you have an automatic record player, all you have to do is press the play / stop button. The record will play automatically. When the side of the record is ready, press stop.
Part 3 of 3: Making adjustments
 Adjust the knob for anti-skating (shear compensation). The anti-skating mechanism prevents the tonearm from shifting and skipping. If the stylus skips, turn the anti-skating mechanism until the tonearm stays in place while the record is playing.
 - It is best to set this to a quarter of a gram or less.
 Place a new element. If you recently bought a new cartridge for your turntable, you will need a small screwdriver and some patience to install it. Align the red, blue, green, and white wires with the terminals marked for these colors on the back of the element. Once the wires are in place, screw the element into the head with a hex screwdriver.
  Clean your records. To be able to turn them without a hitch, it is important to keep your records clean. Use a microfiber cloth, a record cleaning brush, or an anti-static record cleaning brush.
 - If the plates look dusty, it is time to clean them.
- If you have a record brush and manual record player, play the record without lowering the tone arm. Use the brush to remove dust while the record is rotating.
Necessities
- Hex screwdriver
- Anti-static cleaning brush for records
- Microfiber cloth
- Level
- Record player
- LP records


