Author:
Morris Wright
Date Of Creation:
27 April 2021
Update Date:
26 June 2024
Content
- To step
- Method 1 of 5: Using a website to adjust the image
- Method 2 of 5: Using Paint in Windows
- Method 3 of 5: Using Preview in Mac OS X.
- Method 4 of 5: Using an iPhone, iPad, or iPod Touch
- Method 5 of 5: Using an Android device
- Warnings
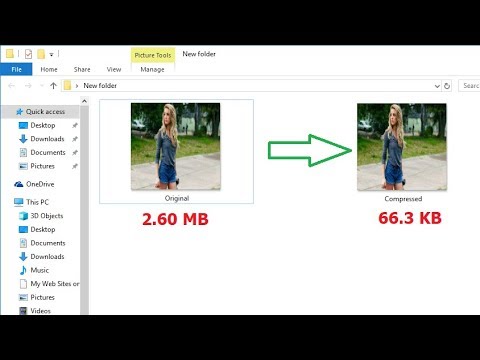
It can be useful to change the format of a JPEG file, for example if you attach a series of images to an email or upload them to a website. Resizing an image will degrade the quality a bit, and making an image larger than the original will always create blocks in the image. You can change the format using free websites, the free image editing program on your computer, or with a free app on your mobile device.
To step
Method 1 of 5: Using a website to adjust the image
 Go to a website where you can resize images. There are a lot of sites where you can quickly upload and resize or enlarge any image, including JPEGs. Search for "resize jpeg" to see the different options. Resizing on a website works best on a computer and not a mobile device. Popular websites include:
 - picresize.com
- resizeyourimage.com
- resizeimage.net
 Upload the jpeg file you want to resize. Most websites allow you to upload all kinds of image files imaginable. Click the "Choose File", "Upload Image", or "Browse" button to find the image file you want to resize on your computer.
 - If the image you want to resize is on a different website, you must first download the image to your computer before you can upload it to the format website.
 Use the Resize controls to set the size of the image. Each website does this in its own way. You may be able to drag the file into a field or use sliders to set the final size. It may also be possible to enter the exact dimensions.
 - If you make an image larger than the original, you have to expect a significantly lower quality.
 Select the compression (if possible). Some websites allow you to specify a compression level. Higher compression results in a smaller file size, but also in the quality of the image. Look for a quality slider or drop-down menu to set the final quality. You cannot set the quality on every website.
  Download the modified image. Once you've set the size and quality, you can start resizing and downloading the image. Click the "Adjust" button to load the new image. You will probably see a preview now before the image file is downloaded to your computer.
 - When downloading a modified image, be careful not to overwrite the original. Then you can always go back and try again if you are not happy with the result.
Method 2 of 5: Using Paint in Windows
 Copy the image file. Before resizing the image in Paint, make a copy of the file so you don't lose the original. This way you can repeat the process later if you are not satisfied with the result.
 - To make a copy of the image file, right click on it and choose "Copy". Right-click on an empty part of the same folder and select "Paste." to make a copy.
 Open the image in Paint. Paint is a free image editor that comes with every version of Windows. Right click on the image file and choose "Edit" to open it in Paint.
  Select the whole image. If you want to resize the whole image, you have to select the whole thing by pressing Ctrl+a to push. You can also click the "Select" button on the Home tab and then choose "Select All". You will now see a dotted line around the image.
  Click the "Resize" button. You can find it on the home tab or you can click on it Ctrl+W. to press. This opens the "Adjust and Warp" screen.
  Use the "Resize" fields to change the size of the image. You can adjust the size by percentage or by pixels. If you choose "Pixels", you can enter the exact size you want for the image. You can also enter percentages greater than "100" to make the image larger than the original.
 - By default, Paint keeps the original aspect ratio and entering a value in one field automatically changes the value of the other field. This prevents the image from being stretched or squeezed during resizing. You can uncheck "Hold aspect ratio" if you want to be able to set the horizontal and vertical fields yourself.
- If you make an image larger than the original, the result will be a blocky image.
 Click "OK" to view the image with the new size. As soon as you click "OK", your image will be adjusted based on the entered values. There is no preview available so you will need to make the changes to see the result.
 - If you are not happy with the result, press Ctrl+Z to undo the changes. You can also click the "Undo" button at the very top of the screen.
 Drag the edges of the canvas to the edges of the adjusted image. Your image has been resized, but the canvas is still its original size. Click and drag the boxes around the edges of the canvas to adjust them too and eliminate unnecessary white edges.
  Save your modified image. Once you are happy with the new format, you can save the changes to the file. Select "Save As" in the "File" tab and choose "JPEG Image". You can then name the file and choose where to save it.
Method 3 of 5: Using Preview in Mac OS X.
 First make a copy of your image file. It is always a good idea to back up your original image before resizing. This way, if something goes wrong or if you don't like the end result, you can go back to the original. Select the image file, press ⌘ Command+C., and then on ⌘ Command+V. to make a copy in the same place.
  Open the image file in the "Preview" program. Usually it will open as soon as you double-click on the file. If the image opens elsewhere, you can right-click on the file, choose "Open with" and then "Preview".
  Click on the "Tools" menu and select "Adjust size ". This will open a new screen where you can adjust the size.
  Click on the drop-down menu to select the units you want to use. You can choose "Pixels", "Percentage" and a number of other units with which you can scale the image. By choosing "Pixels" you can enter the exact dimensions of a resized image.
  Enter the length and width you want to use for the image. The two fields are linked, and a change in one therefore adjusts the other so that the proportions remain good. This prevents stretching or pressing of the image. If you want to be able to freely adjust both fields, you must uncheck "Scale proportional" to unlink the link.
  See what the new format will be. Before making the changes you can see at the bottom of the screen what the new size of the image will be. This is useful if you are resizing to meet the maximum file size for email or other online services.
  Click OK "to implement the changes. The image will be resized based on the settings you entered. If you are not happy with the result, press ⌘ Command+Z to undo the changes and go back to the original.
  Save your file. If you are happy with the new size, you can save the change to the file. Click the "File" menu and select "Save" to commit the changes.
Method 4 of 5: Using an iPhone, iPad, or iPod Touch
 Install an app that allows you to resize images. There is no built-in way to resize on iOS devices, but there are a multitude of apps out there that can do the job for you. You can download these apps from the App Store on your iOS device:
 - Resize It
- Image Resizer +
- Desqueeze
 Open the app and select the photo you want to resize. You will likely be asked to allow the app to access your photos. This is necessary for the app to be able to browse the photos on your device. Find the photo you want to adjust and tap it to open it.
  Tap the "Resize" button. Most apps have several tools to choose from, including resizing. Tap the "Resize" button to adjust the size of the image.
  Enter a new size for the image. Each app has its own interface, but usually you can choose from a range of sizes or you can specify your own. The length and width are linked so that the proportions remain intact.
 - If you don't mind the image being stretched or compressed, you can tap the chain link or padlock to enter different values in each field.
 Save the modified file to the Camera Roll. After the image has been adjusted, tap the "Save" button to save it to the Camera Roll. You can find it, like all other images on your iOS device, in the "Photos" app.
Method 5 of 5: Using an Android device
 Download an app that allows you to resize images. Android devices cannot adjust images by default, but there are tons of apps out there that can do that for you. You can find these (mostly free) apps in the Google Play Store. Popular apps are:
 - Photo & Picture Resizer
- Resize Me!
- Image Shrink
- Reduce Photo Size
 Open the downloaded app and give it access to your photos. When you start the app for the first time, you may be asked to allow the app to access your saved photos. This is necessary for the app to load photos from the device.
  Open the photo you want to resize. Use the app to navigate to the photo you want to resize. This process varies by app, but you usually need to click the "Select Photo" button in the main menu of the app to open the photos stored on your device.
  Select the resizing tool. After opening the image, you will likely need to tap the "Resize" tool. Again, the process may differ depending on the app you are using.
  Select the format you want to use for the image. You will see the original size in pixels as well as file size. Depending on the app, you can choose from predetermined sizes or specify dimensions yourself. If you enter a size yourself, the corresponding value will change accordingly.
  Save your images with the new dimensions. Depending on the app, the image is automatically saved or you have to manually tap the "Save" button. The original file is not modified.
  Find the adjusted images. Each app stores the adjusted images in a different place. In general, you can easily find images by opening the "Pictures" folder and then looking for a folder named after the app. You can then share the images just like you do with other images on your device.
Warnings
- You sacrifice a lot of quality for a larger image. It is best to only adjust the format downwards. Trying to make an image bigger will stretch the pixels and the photo will be blurry and of low quality.


