Author:
Christy White
Date Of Creation:
10 May 2021
Update Date:
25 June 2024

Content
- To step
- Method 1 of 2: Use fusible web on small moth holes
- Method 2 of 2: Darning woven and knitted fabrics
- Necessities
- Repair moth holes in t-shirt
- Large moth holes stop in woven and knit fabrics
If you notice small holes in your clothes, they could be moths in your closet. Fortunately, moth holes are easier to repair than you think. If the holes are very small, about 5mm wide or less, you can use fusible webbing to close the hole. If the moth holes are bigger, you can stop them, which means repairing the hole in the fabric by weaving over it with a needle and thread. If you follow these steps to plug your mothholes, no one will ever see they were there!
To step
Method 1 of 2: Use fusible web on small moth holes
 Turn the garment inside out and place it on an iron covered with parchment paper. Before repairing the mothhole, turn the garment inside out. You are going to place the adhesive on the hole, and it is best to do that on the inside, so that you do not see it when you are wearing the clothes. Then place the fabric on an iron. You should put a piece of parchment paper between the fabric and the iron so that the fusible web does not stick to the iron.
 - If you don't have an iron, place the garment and baking paper on another surface that is safe to iron, such as a table or floor covered with a cloth. Never iron directly on a wooden or stone surface as the heat can ruin the surface.
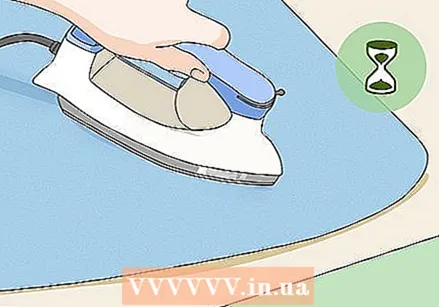 Heat the iron and push it on the hole for a few seconds. Turn on the iron and set the temperature to a setting that best matches the fabric, then place it on the hole. For example, if you're going to fix a t-shirt, set the iron to the cotton setting. Do not move the iron back and forth, just place it on the hole for a few seconds. This will heat up the garment in preparation for the fusible webbing.
 - Do not leave the iron on the fabric for more than a few seconds. Doing so can scorch the fabric, which can leave a burn that is very difficult to remove.
 Use your fingers to close the hole as much as possible. While the fabric is slightly warm through the iron, but not too hot, use your index fingers to gently push the hole closed. This will make the hole slightly small, which helps in repair.
 - Be careful when you close the hole. Do not over stretch the fabric or folds.
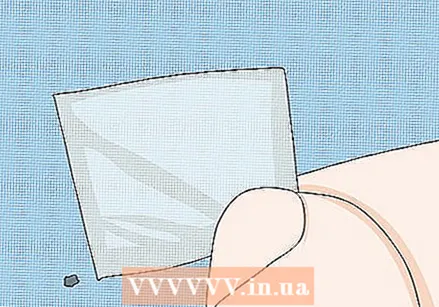 Cut out a small square of fusible web and place it on the hole. Fusible webbing is a fabricated fiber that melts when heated. It is used to attach two pieces of fabric together when placed in between. This material can be purchased in most craft stores. Cut out a square about 1/2 inch wide and place it on top of the hole.
 - Fusible webbing is available in different weights. Choose a weight that matches the fabric you are repairing. For example, use a lightweight adhesive fleece for lightweight fabric, such as a cotton blouse. If you have heavier fabrics, such as denim or canvas, you should also use a heavier adhesive.
- Make sure the clothes are still on top of the parchment paper. You don't want to bind the fusible web to the iron during the repair.
 Place a piece of lightweight fabric stiffener on the fusible webbing. Fabric stiffener is used to stabilize the fabric of your garment to prevent it from stretching or hanging. Cut out a square piece of fabric stabilizer that is slightly larger than the piece of fusible web, about 1 inch, and place it on top of the hole.
 - You can buy fabric conditioner at most fabric stores.
 Place a press cloth on top of the fabric and moisten it with water. The press cloth is used as a barrier between the iron and the fabric stiffener and fusible web. Place it on top of your garment, then use a spray bottle to spray some water on the cloth where the hole is. Do not soak the cloth with the spray bottle, but make sure it is slightly damp. The moisture improves the binding of the fusible web.
 - If you have an old cotton sheet, you can use it as a press cloth, or you can buy some cotton fabric from a local fabric store.
- When placing the cloth on top of the fabric, be careful not to slip the fusible web and the stiffener underneath. If they shift, the hole will not be closed when you are done with the repair.
 Set the iron to the wool setting and place it on the damp cloth for 10 seconds. Make sure the iron is on the wool setting so that your garment is properly attached to the fusible webbing. When you place the iron on the cloth, do not move it to avoid shifting everything under the cloth. Do not leave the hot iron on the cloth for more than 10 seconds, then remove it and set it aside.
 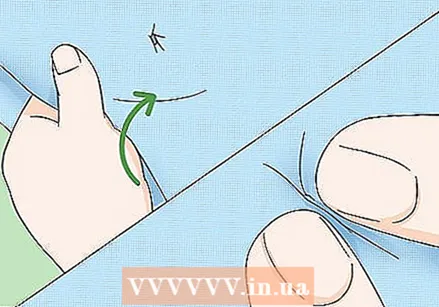 Turn the garment over and push the hole closed with your fingers. You may see a small hole in your garment when you look at the front. If so, use your index fingers again to shape and close the hole. It should bind while you do this, thanks to the fusible web and stiffener. Keep using your fingers to shape the hole until it is completely closed.
 - Make sure to work quickly during this step. Forming and closing the hole works best when the fabric is still warm.
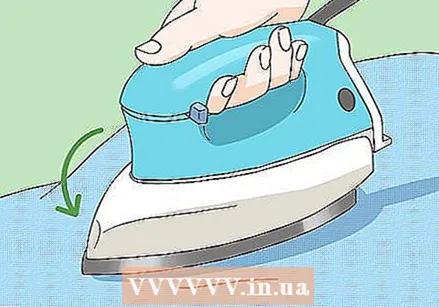 Iron the garment to close the hole completely. Staying on the right side of the garment, push the iron on the hole one last time. Since you are now working on the other side of the garment, you don't need to use a press cloth. You can place the iron directly on the hole. At this point the hole should be completely closed.
 - Place the iron on the fabric for only five to ten seconds to avoid scalding.
Method 2 of 2: Darning woven and knitted fabrics
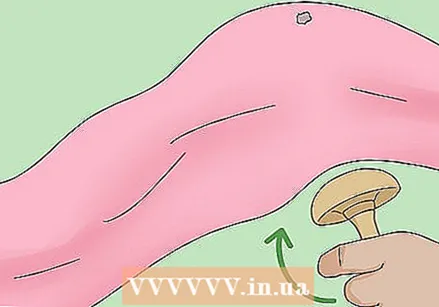 Turn the garment inside out and place a stop mushroom under the hole. Make sure the garment is turned inside out before you start to sew so you don't see the stitches on the outside when you are done. Now place a stop mushroom under the hole. A mushroom darning is a wooden, mushroom-shaped sewing tool used to hold the fabric in place during darning. The curve of the mushroom ensures that the fabric retains its natural shape and stretch.
 - If you don't have a stop mushroom, you can use another curved object, such as a light bulb or a small bowl.
 Pull the thread through the needle. Before you start sewing, you need to thread the needle. To do this, cut a piece of wire long enough to cover the moth hole. To be on the safe side, cut a piece that is at least two feet long. Moisten the thread and push the tip together so that it fits through the eye of the needle.
 - Make sure to use a thread that is roughly the same color as the fabric in question.
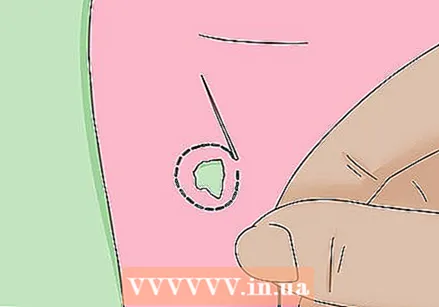 Sew a circle around the hole about one inch from the edge. Sew a running stitch around the hole. If necessary, you can use a fabric pen to draw a circle around the hole so you know where to sew. Make sure to sew about half an inch from the edge of the hole to make sure the hole is well covered. This basting stitch will keep the hole from stretching and getting worse as you mend it.
 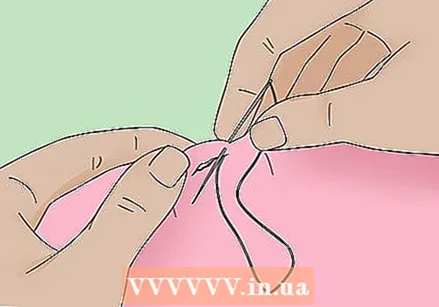 Sew horizontal stitches over the hole. Make sure the stitches are evenly spaced and start and end close to your sewn circle. If you do this correctly, the hole will be completely covered with horizontal lines on both sides, up to about one centimeter past the edges of the hole.
 - Do not pull the thread to tighten the stitches as this can cause gathering. The goal is to use your darning mushroom or some other curved object as a guide to make sure your darning matches well with the rest of the fabric.
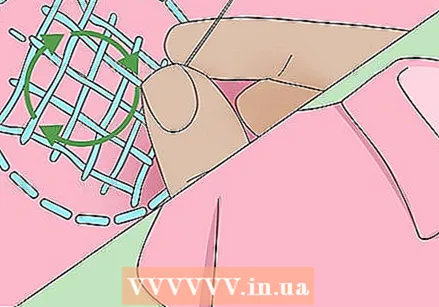
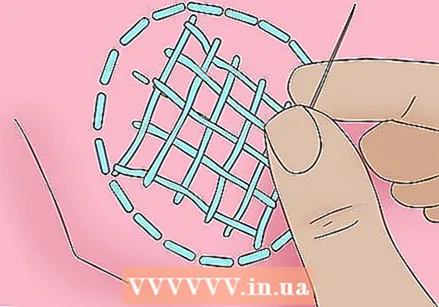 Weave stitches that are perpendicular to the horizontal stitches. After you have covered the entire hole, you need to weave stitches that are perpendicular to the horizontal stitches. To do this, use the needle to pull the thread over and under the previously made stitches. This will create a net over the moth hole.
 - Try to create the same weave tension as the garment you are darning. For example, if you put in a loose weave, the stitches should be slightly apart. When darning a dense weave, the stitches should be tight together.
 Weave the thread a few times to fix the darning. When you are done with the horizontal and perpendicular stitches, you will be left with a long piece of thread. Then weave that through the garment a few more times to make sure the thread stays in place when you're done. Make sure the thread is secure so that your repair doesn't come off when you wear the garment.
 - You can also tie a knot in the last stitch to secure the thread.
Necessities
Repair moth holes in t-shirt
- Iron
- Ironing board
- Baking paper
- Adhesive nonwoven (very lightweight)
- Fabric stiffener (lightweight)
- Press cloth
- Spray bottle
Large moth holes stop in woven and knit fabrics
- Darning needle
- Thread or wool that matches the garment
- Stop mushroom or other convex object
- Scissors
- Embroidery hoop (optional)


