
Content
- To step
- Method 1 of 3: Make a simple cloud of cotton wool
- Method 2 of 3: Create a luminous cloud
- Method 3 of 3: Making three-dimensional paper clouds
- Tips
- Warnings
- Necessities
- Simple cloud
- Luminous cloud
- Three-dimensional paper clouds
Few things are as relaxing and inspiring as clouds. Unfortunately, you can't always go out and watch them. Fortunately, you can make your own clouds using some simple craft supplies and hang them wherever you want indoors. Try making a simple cloud from thin iron wire and polyester filler. You can also get creative and make an enchanting luminous cloud out of a paper lantern or try crafting three-dimensional paper clouds.
To step
Method 1 of 3: Make a simple cloud of cotton wool
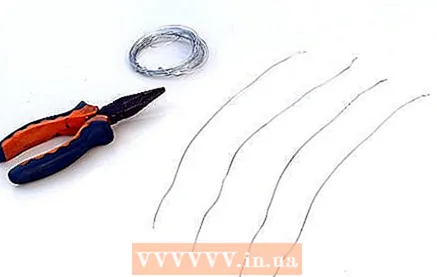 Cut four equally long pieces of thin iron wire with wire cutters. How long you make the pieces depends on how big you want to make your cloud. You will be making a ring from these pieces of wire, so keep that in mind. Make sure all pieces are about the same length.
 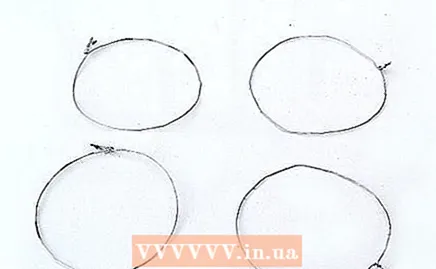 Make rings from the pieces of iron wire. Take the first piece of wire and let the two ends overlap by 2 to 3 centimeters. Twist the ends around each other to secure the ring. Repeat this step with the other pieces of wire.
 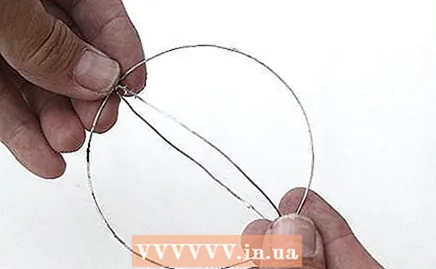 Cross the first ring into the second ring. Keep the first ring horizontal and keep the other ring vertically above it. Slide the vertical ring halfway into the horizontal ring. The two rings now form a cross.
 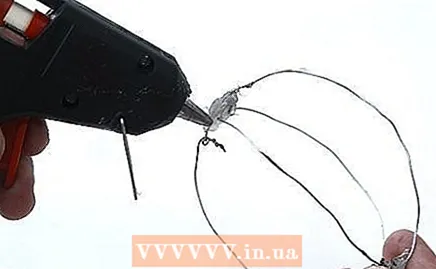 Fix the cross with glue or iron wire. You can join the intersecting pieces of wire by applying blobs of hot glue where the two rings meet. You can also tie the intersecting pieces of iron wire together with a little iron wire. Do not forget to insert all sharp ends into the "ball" of iron wire.
 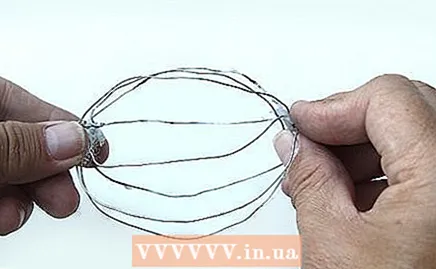 Insert the other two rings into the frame to make a second cross and finish your frame. Slide the third ring over the frame from the left. Attach the ring with glue or iron wire to the other rings at the places where the pieces of iron wire intersect. Repeat this step with the fourth ring, but slide it into the frame from the right. These two new rings should also form a cross.
 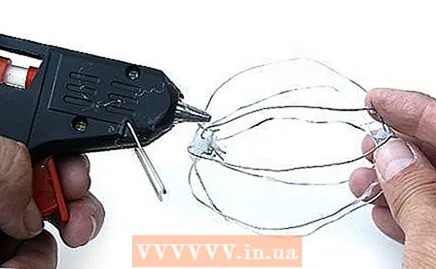 Hot glue the polyester filling material to the iron wire frame. Pull off a long strip of the polyester filling material. Apply a curl of hot glue and wrap the filler material around the frame. Make sure the filler covers at least two rings.
 - Work quickly, because hot glue dries quickly.
"It is very important to make sure that you use non-combustible filling material."
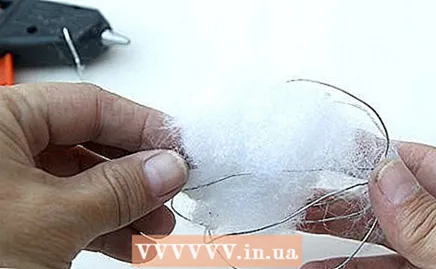 Continue to stick polyester filler material to the frame with hot glue. Continue until almost all of the frame is covered. Be careful not to wrap the filler too tightly around the frame or the cloud will become distorted.
 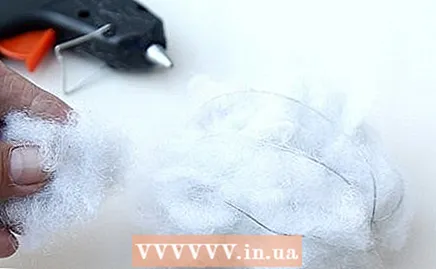 Fill the gaps with smaller tufts of polyester filler. When most of the cloud is covered, peel off smaller pieces of the filler. Apply a curl of glue to the strands and press them against the cloud.
 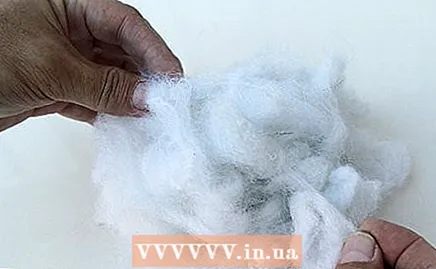 Pull on the pieces of filling material. If your cloud looks too much like a ball, pull the strands of filler here and there to make them stick out. The bulb will look lumpier and more like a cloud. However, don't pull too hard or the polyester filling material will fall apart. EXPERT TIP
 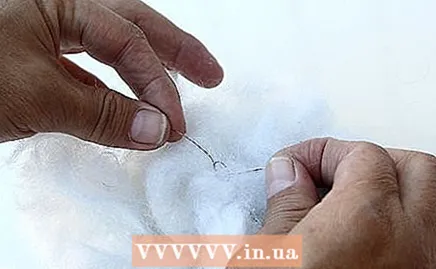 Tie a length of fishing line to the cloud. Cut a long piece of fishing line. Search the fill material with your fingers until you find a place where two rings overlap. Tie the length of fishing line to the two overlapping lengths of wire.
 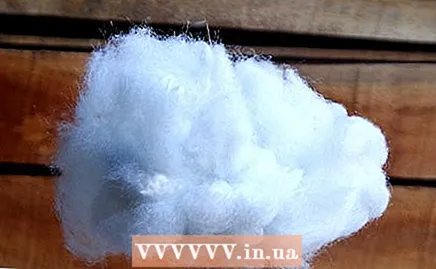 Hang the cloud from the ceiling. Grab some tape and tape your cloud to the ceiling. Screw a ceiling hook into the ceiling to make the cloud hang more securely. Tie a loop in the end of the fishing line and slide the loop over the hook.
Method 2 of 3: Create a luminous cloud
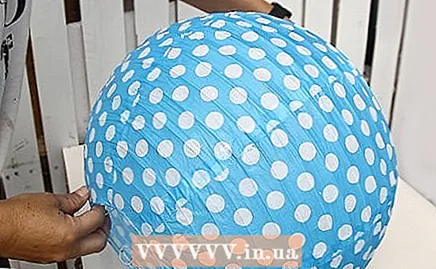 Unfold a white paper lantern. If you want to make a bigger cloud, you can glue one or two smaller paper lanterns to a large lantern with hot glue.
 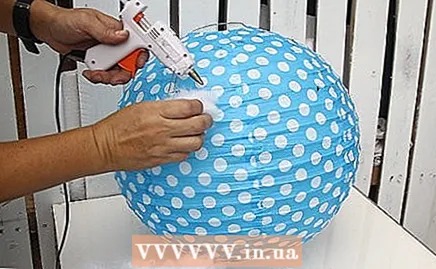 Stick a large dot of polyester filling material on the lantern with hot glue. Grab a large dot of polyester stuffing about the size of cotton candy. Apply a curl of hot glue to the dot and then press the filler material against the lantern.
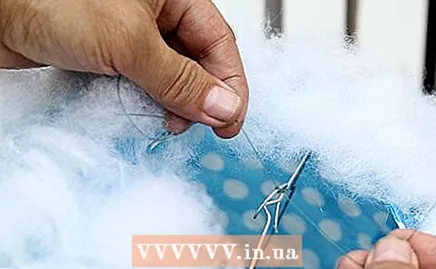
 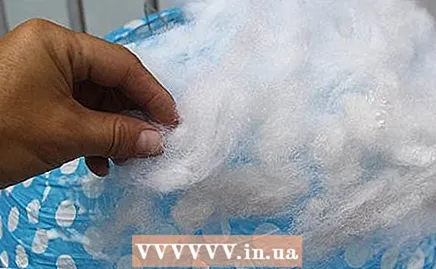 Stick more pieces of filler material on the lantern. Use large and small tufts as well as medium sized tufts. Don't forget to cover the top and bottom of the lantern as well.
 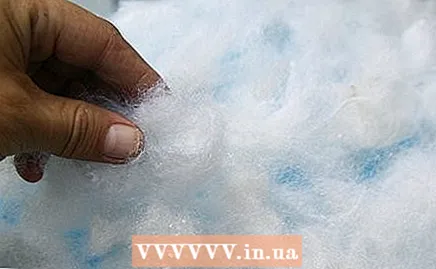 Fill in the gaps with smaller tufts of filler material. Now apply the hot glue to the lantern itself and push the filler material into the glue. If you've glued several lanterns together, don't forget to fill in the seams between the lanterns.
 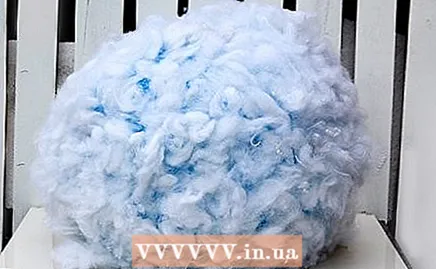 Pull on the pieces of filling material. Gently pull on the pieces of polyester filling material until you have a fluffy cloud. Attract some picks more than others. This will make your cloud look more like a real cloud.
 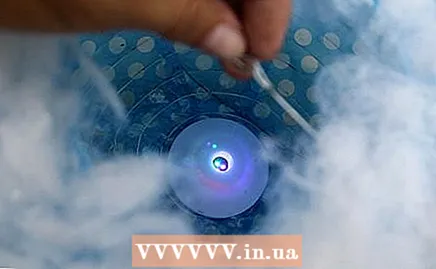 Put lights in the lantern. A quick and easy method is to plug a battery-powered LED light into the lantern. You can also put a light cord with white lights in the lantern. If you use an icicle light cord, you can even pull the different pieces of cord out of the bottom of the cloud to make it look like it is raining.
 - Make sure the lights don't get too hot and leave them never burning without supervision.
 Tie a length of fishing line to the top of your cloud. Search the fill material with your fingers until you find the piece of wire at the top of your lantern. Tie a piece of fishing line to it. If you have several lanterns taped together, make sure to tie a length of fishing line to each lantern. Cover the hole in the top of the lantern again when you are done.
 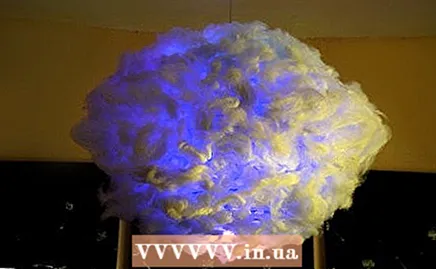 Hang the cloud. Screw some hooks into the ceiling. Tie small loops in the ends of the fishing line. Slide the loops over the hooks. You need a hook per lantern. This means that you need three parentheses if your cloud consists of three lanterns.
Method 3 of 3: Making three-dimensional paper clouds
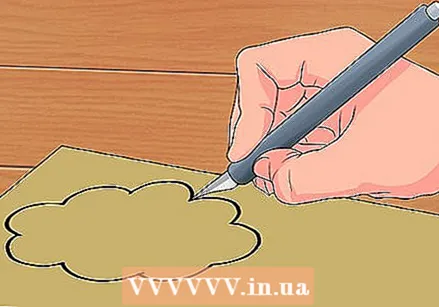
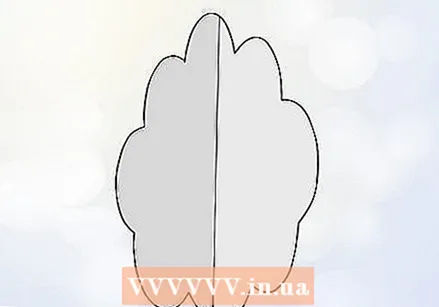
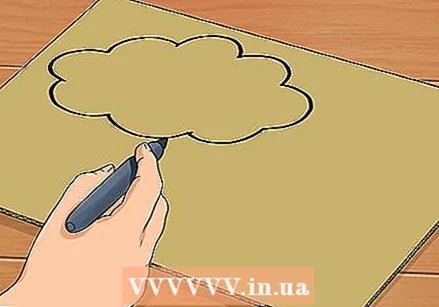 Draw a simple cloud shape on a piece of thick cardboard. Draw a simple cloud on thick cardboard with a pencil or marker. This will be your template. Make your drawing the same size as the cloud will eventually become.
 - If you need some help sketching the cloud, search Google Images for examples. Use the search term "cloud shape". You will be presented with a lot of examples to choose from.
 Cut or cut the cloud from the cardboard. Use sharp scissors or a utility knife to cut or cut along the lines you just drew. Cut out or cut out the template completely. Discard the leftover cardboard.
 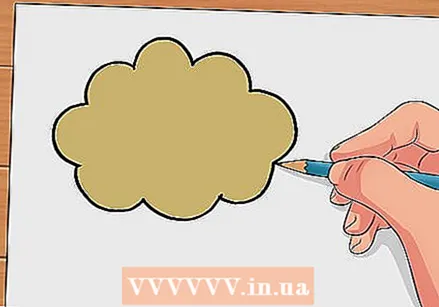 Trace the template onto a piece of white craft cardboard. Choose a sturdy piece of craft cardboard so that your three-dimensional clouds become quite sturdy. Trace the template onto two sheets of thick white craft paper. Use a pencil and make light lines so that you don't leave dark streaks on the paper.
 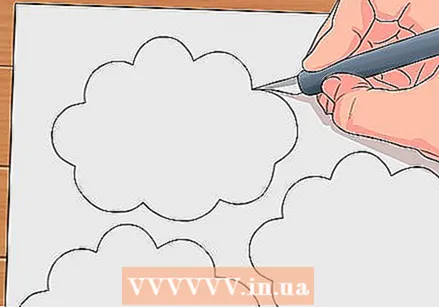 Precisely cut or cut out the white clouds. Use scissors or a utility knife to cut or cut the cloud shapes. Trim or cut just inside the pencil line so that your clouds don't have visible pencil marks along the edges.
 - Gently erase all the pencil marks on the clouds. Be careful not to bend the edges of the paper when you do this.
 Apply a thin line of hot glue in the center of one of the clouds. Let your hot glue gun heat up and place one of the cloud shapes on the table in front of you. Then apply a thin vertical line of hot glue through the center of the cloud shape.
 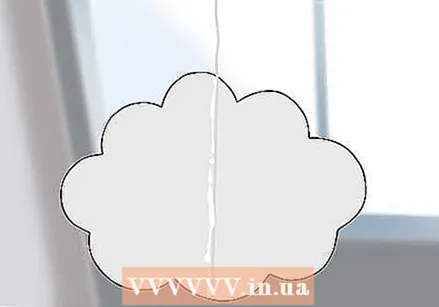 Put a piece of fishing line in the line of glue. Cut a length of fishing line long enough to hang your three-dimensional cloud. You can make the length of fishing line as long or as short as you want. 15 to 45 centimeters should be long enough. Lay the line vertically in the line with glue.
 - Make sure there is no fishing line protruding from the bottom of the cloud. The line should only protrude at the top. You will use the fishing line to hang the cloud.
- Make sure to use fishing line, which is transparent. This way it will look like your cloud is floating in the sky. Do not use iron wire.
 Fold another cloud shape in half. Set aside the cloud with the piece of fishing line attached. Get another cloud shape and fold it in half horizontally. You should get a crease in the same place as the line of glue on the first cloud - a vertical line right in the middle.
 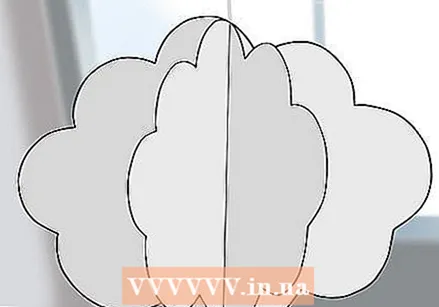 Push the folding edge into the hot glue. When you have folded the cloud over, place the folding edge of the second cloud exactly on the line of glue on the first cloud. Push the folding edge into the glue, right on top of the piece of fishing line. Push the cloud for 30 to 60 seconds to make sure the glue sticks well.
 - You may need to apply some new hot glue once the first line of glue has dried. Just apply a very thin line of glue in the same spot.
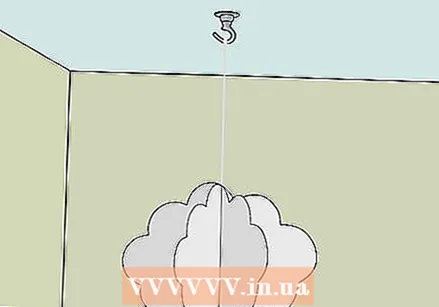 Hang the cloud on the fishing line. You can hang your three-dimensional cloud wherever you want. Tie the fishing line to a lamp, ceiling hook, ceiling fan string, or other suitable location.
 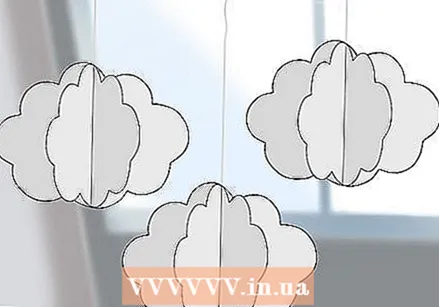 Make multiple clouds. You don't have to stop after creating a cloud. Repeat the above steps to make multiple clouds. Cut pieces of fishing line of different lengths so that the clouds are all at a different height. You can also hang more clouds on the same length of fishing line to create cumulus clouds.
 - Remember that every three-dimensional cloud consists of two white cloud shapes. If you want to make a mobile with six three-dimensional clouds, you will need to cut 12 cloud shapes from the white craft paper.
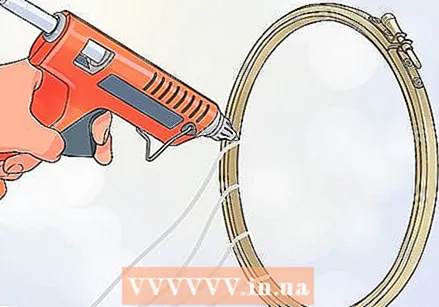 Glue the pieces of fishing line to the inside edge of an embroidery hoop (optional). An embroidery hoop is round and therefore perfect for making a mobile. Let the clouds hang at different heights, but make sure that the pieces of fishing line at the top of the ring are all sticking out equally. You use the pieces of fishing line that protrude at the top to hang the mobile.
 - When the glue is dry, gather the pieces of fishing line together at the top. Tie a knot to keep them all together. Hang the mobile wherever you want by the tied pieces of fishing line.
- If you have never seen an embroidery hoop, know that it is a small wooden hoop used in embroidery and other sewing projects. You can buy an embroidery hoop at craft stores and sewing supply stores. It also has a small metal clasp to secure the ring, but you don't need it now.
Tips
- Make some clouds when you are happy with the result. A ceiling with multiple clouds can look great.
- Consider painting your paper lantern with luminescent paint first. Your cloud will have a subtle glow.
- Don't make the cloud too fluffy. If you pull too much on the filler, it will lose its shape and fall apart.
Warnings
- Polyester filling material is flammable. Do not hang the clouds near heat sources such as lamps, ceiling lights, etc.
Necessities
Simple cloud
- Polyester filling material
- Galvanized iron wire of 0.5 mm thick
- Wire cutters
- Wire or fishing line
- Adhesive tape or wall hook
Luminous cloud
- White paper lantern
- Polyester filling material
- Hot glue gun
- Glue patterns
- Fishing line
- Scissors
- Ceiling brackets
- LED lights on batteries or a light cord
Three-dimensional paper clouds
- Thick cardboard
- Thick white craft cardboard
- Scissors or utility knife
- Hot glue gun
- Glue patterns
- Fishing line
- Embroidery hoop
- Ceiling brackets


