Author:
Clyde Lopez
Date Of Creation:
18 June 2021
Update Date:
1 July 2024

Content
1 Use a leather or waxed cotton cord. Choose a cord that is 1–2 mm thick; this is enough to tie the knot.- Choose a cord color that matches the pendant or beads you will be using to create your necklace. The pendant or beads will stand out more if the cord is darker in color.
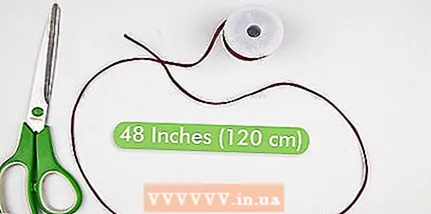 2 Make sure the cord is at least 120 cm long. The slip-knot necklace should go over your head and fit nicely around your neck. You will need a string of at least 60 cm in order for the necklace to go through your head. Add more length if you want the necklace to go lower around the neck. Then double the length of the lace so you can tie the knots.
 - Triple the length of the lace if you want the knots to sit next to each other on the necklace.
- For example, if you started with a lace 60 cm long, then double that length to 120 cm - this length will be sufficient. Or triple the length to 180cm to create a longer necklace.
 3 Place pendants or beads on the cord. Attach the pendant to the string using a cow (lanyard) or straight knot. String the beads onto a string and secure with knots or crimp beads.
 - First add any elements to the necklace and then tie the sliding knots.
- If you want to create a simple necklace, then skip this step.
 4 Check the position of the necklace. Before tying the knots, take the ends of the cord together and pass it through your head: make sure you can easily put on the necklace. Then check that it fits perfectly around your neck. Keep in mind: When you tie the knots, the necklace will be almost half as short.
 Part 2 of 2: Tying the slip knot
- 1 Place the necklace on a flat surface. Place the ends of the necklace over the cord so that there are two rows. Make sure the pendant or beads are in the middle of the cord. The ends should be above the pendant or beads.
- 2 Fold the cord in half, 10-13 cm from one end. Use your finger to roll the checkmark into the cord.
- The swoosh cord will be the main slip knot.
- 3 Place the cord in the form of a check mark on top of the straight cord. Hold both pieces with your thumb and forefinger. Place your thumb on top of the checkmark cord. You now have 1 straight lace and 2 other short swoosh laces.
- 4 Tie a knot. Take the free, short end of the folded swoosh cord and wrap it around the other two pieces. Hold the short end of the cord and loop it around the other two cords. Make sure the end of the loop formed around the two lines is facing away from the checkmark and not towards it.
- Make sure the end is tied over two cords, not one, or you will get the wrong knot.
- 5 Wrap the swoosh cord around the other laces 2-3 times. When tying the two cords, use your thumb to support the checkmark fold of the cord. Keep the straight cord taut as you loop down the length of the cord. You should have 2-3 nice tight turns.
- 6 Remove your finger and thread the free end of the cord through the loop of the knot. Remove your thumb from the fold of the cord. While holding the free end of the cord in a tick shape, tie it through the loop in a straight knot. Let the free end hang out from the first loop. Use your fingers to tighten the end of the cord to secure the knot.
- 7 Cut off the end with scissors. After tightening the knot, cut off the excess length with scissors. Cut right after the knot so that the end of the cord does not protrude beyond the knot. This will lock the knot in place and the end will not cling to anything.
- 8 Repeat the knot on the other side of the necklace. Follow the same steps to tie the second slip knot. Cut off the excess length at the end when the knot is complete.
- Make sure the knots are symmetrical on the necklace.
- 9 Try on the necklace and adjust the length as desired. When both slip knots are tied, slide the necklace over your head.Place your finger on the slip knot and slide the knot higher or lower over the necklace with your other hand to lengthen or shorten it. Make sure both knots are symmetrical and the necklace is right around your neck.
- Try wearing a necklace of different lengths, pulling the slip knots up or down. Enjoy wearing the necklace close to your neck or more loosely, according to your look and mood.
Tips
- If you are tying knots between beads, add 3 cm to the total length for each knot.
- Tighten the loops so they don't come loose before you can tie the knot.
What do you need
- Leather or waxed cotton cord length 120 cm
- Pendants or beads
- Scissors


")