Author:
Ellen Moore
Date Of Creation:
13 January 2021
Update Date:
1 July 2024

Content
- Steps
- Method 1 of 3: Tie a simple bow
- Method 2 of 3: Tie the ribbon diagonally
- Method 3 of 3: Decorating with interlaced ribbons
- Tips
- What do you need
The gift is already packed and you are ready to give it. All that's left is to tie a beautiful bow. You can always buy a ready-made velcro bow in the store, but if you make a little more effort and tie the box with a ribbon, the gift will look more elegant.Tying a bow on a box is easy. Once you have mastered the simplest bow, you can try more unusual ways: diagonal ribbon strapping or intertwined ribbons.
Steps
Method 1 of 3: Tie a simple bow
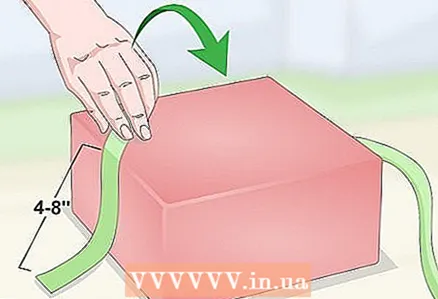
 1 Wrap the tape horizontally around the top of the box. Leave one end 10–20 cm long to hang freely on the side. Don't cut the tape yet.
 - It is better to leave a lot of tape than too little. You can always trim it later.
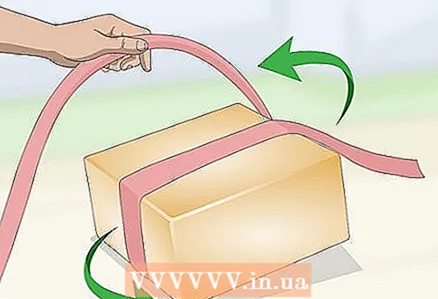 2 Pull the tape under the box and back to the front. Do not turn the box over, or the tape may slip out of place. Better to lift the box and stretch the tape behind. Place the box with the tape on the other side.
 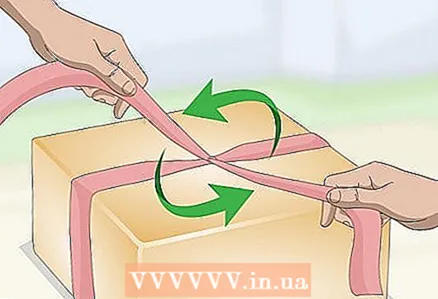 3 Twist the ends of the tape at the front of the box. Pull the tape towards the middle of the box and flatten it to the shorter end. Twist the ribbons so that they lie vertically.
 - If the tape has a front and a wrong side, then you can twist it twice so that the front is on top.
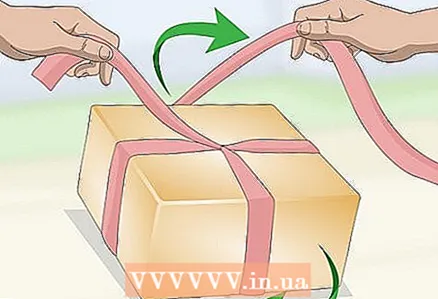 4 Wrap the box around the back and pull the tape towards the front. Lift the box again. Pull the long end of the tape behind the box and out the other side. Put the box back down.
 - Place your thumb over the twisted portion so that it does not unwind as you wrap the tape around the back of the box.
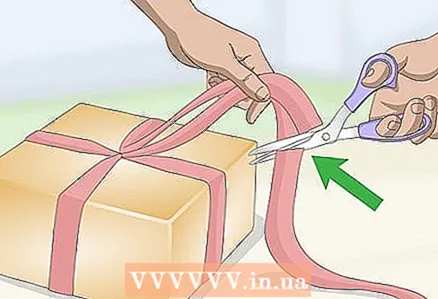 5 Compare the length of the tape with the first end and cut. Pull the tape back towards the middle of the box. Compare this to the first end of the tape and cut.
 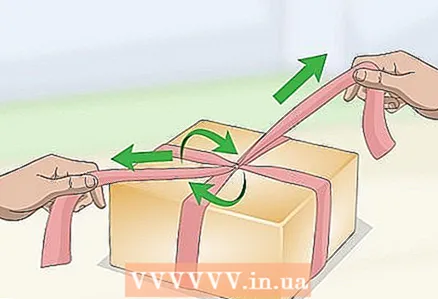 6 Wrap the twisted part underneath with tape. Pull the tape at an angle in front of the twisted part. Then, pry up the twisted piece and pull the tape out where you started from. Pull on both ends and tighten the knot.
  7 Tie a bow. Fold both ends of the ribbon into loops. Slip the left loop over the right loop to create a small loop in the middle. Draw the left loop through the small loop and tighten.
  8 Adjust the bow and cut off the excess length. Pull up the loops and ends of the tape. If you are using a tape on a wire, then you can smooth the loops nicely. For more sophistication, cut the ends of the tape at an angle or with a tick.
Method 2 of 3: Tie the ribbon diagonally
 1 Slide the tape over the top left corner of the box. Leave one end 10–20 cm long to hang freely from the left side of the box. Leave the rest of the tape on the spool and place it at the top corner of the box.
  2 Place the tape over the top right corner. Take the tape on the spool and pull it past the top right corner and down to the bottom right corner.
 - Use your thumb to hold the tape at the top left corner to prevent it from slipping.
 3 Wrap the tape around the bottom right corner and under the bottom left corner. The hinges around the box should fit nicely and tightly and not slip off corners.
  4 Pull the tape back to the top left corner. Now it would be a good idea to align the position of the tape at each of the corners. If the tape appears to be slipping, pull it further away from the corners.
 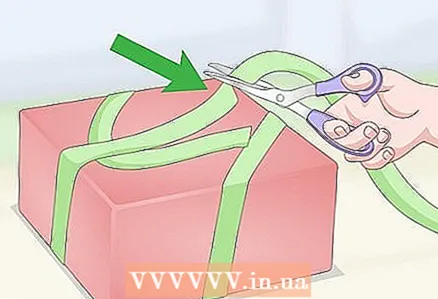 5 Cut off excess tape. Take both ends of the tape and move them towards the center of the upper left corner. Compare the tape on the spool with the other end of the tape, and cut the ends to the same length.
 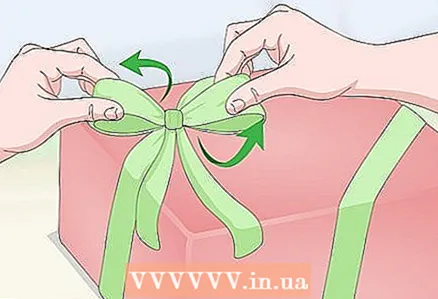 6 Cross and tie the ends of the ribbon. Place the left end over the right strap first and then underneath. Pull on both ends and tighten the knot. Fold both ribbons into loops and slide the right over the left: just like tying your shoelaces!
 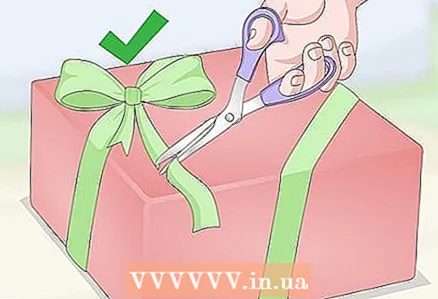 7 Cut off excess tape. When the bow is tied securely, cut off the excess ribbon at the ends. For beauty, you can cut the ribbons at an angle or curly scissors.
Method 3 of 3: Decorating with interlaced ribbons
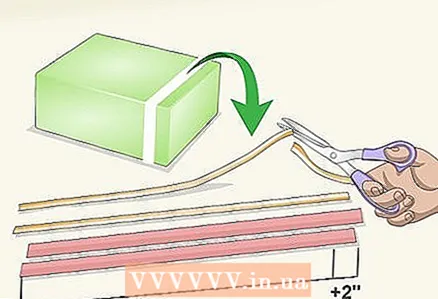
 1 Cut four pieces of tape along the length of the box. It will take four fairly long pieces of tape to wrap the length of the box, plus an extra 5cm for each.
 - For more uniqueness, use two pieces of narrow tape and two pieces of slightly wider tape. Or you can use two contrasting colors.
- Thick tape and / or wire is not a good choice. Better use a thin satin or balloon ribbon.
 2 Cut four pieces of tape to the width of the box. Use the same tape as for the previous step. This time, cut the tape just long enough to wrap the box around the width, and add 5 cm to it.
 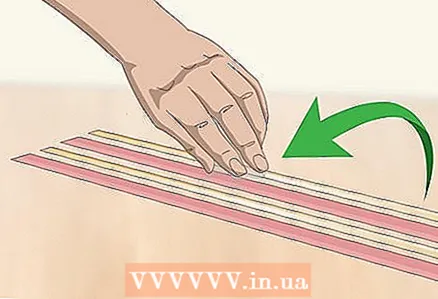 3 Lay the first set of ribbons side by side on the table. Take four long ribbons and place them on the table. Make sure they are parallel and no more than 0.6 cm apart.
 - If you use ribbons of different widths and / or colors, then alternate them.
 4 Place the box on the ribbons. Place the gift face down on the ribbons. The box can be placed in the center or slightly to the side, depending on where you want to place the ribbons.
 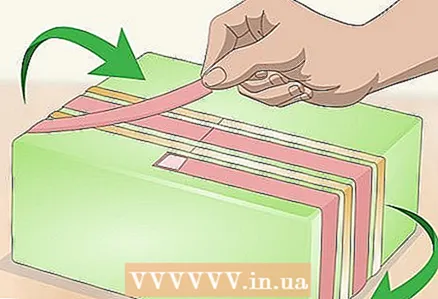 5 Wrap the tapes around the box and secure with double-sided tape. Wrap and secure one tape at a time; do not glue them all at once. Pull up the ribbons tightly so that they wrap around the box nicely and tightly. The ends of the tape will overlap approximately 2.5 cm.
 - Make sure to tape the top tape to the bottom tape. Do not stick tapes to the box.
- Instead of double-sided tape, you can use glue dots (sold in the scrapbooking section of a creative store).
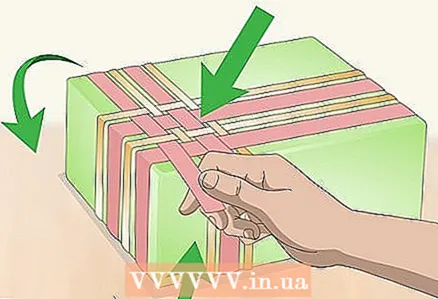
 6 Clip the second set of tapes directly over the first. Place a strip of double-sided tape over the ends of the short ribbons. Place short ribbons on top of long ones and make sure they are perpendicular.
 - Once again, place the ribbons no further than 0.6 cm apart.
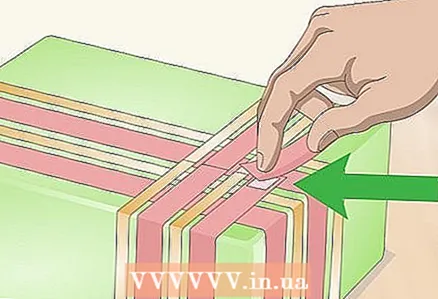
 7 Flip the box over and bind the short ribbons with the long ones. Pull the short ribbons towards the front of the box. Weave the first short ribbon through the first set of long ribbons, top and bottom. Bind the next short ribbon just the other way round: bottom and top. Continue until you have bound all four ribbons.
 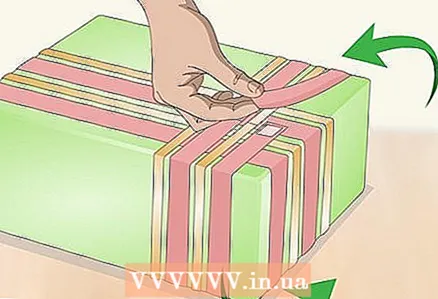 8 Attach the tapes to the back of the box. Turn the box over again. Attach a strip of double-sided tape to the end of each tape, then press one at a time to the back of the box. Make sure the ends of the bands match.
 - To make the packaging look neat, bind the short ribbons on the back just as you did on the front.
 9 Add decoration on the front of the box if desired. Interlaced ribbons are part of the decoration. If you think that something is missing, buy or make a suitable bow and attach it to the box. Fasten the bow not on the ribbons, but on the side, so that you can see how you tried.
Tips
- If the ends of the tape are easily tousled, then you can "seal" them by holding for a few seconds over the flame.
- Use tape that has a contrasting color with the wrapping paper. For example, if the paper is polka dots, then choose striped tape.
- You can achieve an interesting effect by placing a thin ribbon on top of a thicker one.
- If you like the look of the tape on the wire but dislike the wire itself, then cut the tape to the required length and pull the wire out of the tape.
- Read our article on how to tie a bow to learn more advanced bow-tie techniques.
- General rule: the larger the box, the wider the tape; the smaller the box, the narrower the tape.
- Feel free to experiment: for more brightness, use a wide ribbon on a small box.
- Satin and bodice work well for decorating gifts. But if you need to form bow loops, then you need to take a ribbon on a wire.
- If there is a pattern on the wrapping paper, choose one color for the pattern and use that color for the ribbon.
- If the wrapping paper is plain, choose a tape of a contrasting color (red tape on a green box) for more effect.
- Choose a ribbon color that matches your gift wrap. For example, a gold ribbon on a red box and a silver ribbon on a blue box.
What do you need
- Gift box
- ribbon
- Scissors
- Double-sided tape (packs with intertwined ribbons)


