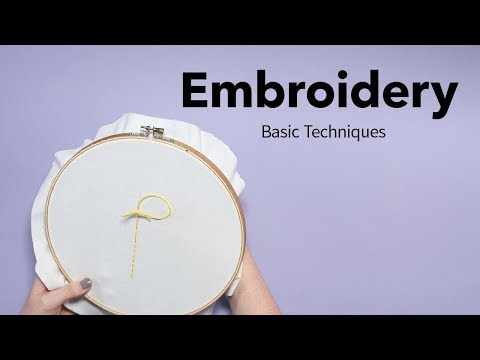
Content
- Part 2 of 4: Printing the Pattern on the Fabric
- Part 3 of 4: Getting Started
- Part 4 of 4: Improving Technique
- Tips
- Warnings
- What do you need
- Choose a fabric suitable for the item you want to embellish.
- Choose fabric that is thick enough, especially if heavy items such as ribbons or buttons will be sewn onto it.

Hoffelt & Hooper
Embroidery Specialists Hoffelt & Hooper is a small family business founded in 2016. The Hoffelt & Hooper team creates beautiful and unique pieces including embroidery and needlework kits. Hoffelt & Hooper
Embroidery specialists
Sara Slovensky from Hoffelt & Hooper adds: “I recommend taking cotton or linen fabricsince it is woven tightly and evenly... Loose weave fabrics are more suitable for cross stitching. "
 2 Select your embroidery thread. First of all, for a serious project, you need special silk threads for embroidery, and not just threads for sewing or other needlework. Unsuitable threads may be of poor quality or shedding. However, if you are embroidering a small test pattern or just practicing sewing different kinds of stitches, you can use cheap thread as well.
 - The thread thickness (number of folds) should correspond to the degree of detail in the embroidery. The more detailed the drawing you take, the thinner the thread should be. If the pattern is large, thicker threads will be needed.
- Don't think too much about what type of thread you should buy. There are many types and brands, but in general, thin embroidery threads are quite similar - the only difference is whether the finished embroidery will be shiny or matte. Since you are still learning, you shouldn't worry about that.
- Don't buy machine embroidery threads.
- Embroidery threads come in a wide variety of shades and gloss levels. There are even metallized ones.
Hoffelt & Hooper
Embroidery Specialists Hoffelt & Hooper is a small family business founded in 2016. The Hoffelt & Hooper team creates beautiful and unique pieces including embroidery and needlework kits.
Hoffelt & Hooper
Embroidery specialists
Sara Slovensky of Hoffelt & Hooper advises: “Mouline thread is usually composed of several thin strands, twisted into one, called skein... The sack can be divided into separate strands. For small embroidery is better to take fewer threads, and for a volumetric texture and large stitches - a whole lot. "
3 Choose a needle. For the first simple embroidery, you need a regular embroidery needle. To embroider on the canvas, for a start, a needle of size 12 to 18 is suitable. There are needles with a sharp end, there are needles with a blunt one; beginners should use a pointed needle for most simple embroidery. - Use an embroidery needle, not a regular sewing machine. Embroidery needles have a larger eyelet, and you can thread there in several folds or even a whole skein.
Hoffelt & Hooper
Embroidery Specialists Hoffelt & Hooper is a small family business founded in 2016. The Hoffelt & Hooper team creates beautiful and unique pieces including embroidery and needlework kits.
Hoffelt & Hooper
Embroidery specialists
Sara Slovensky of Hoffelt & Hooper advises: “Always use sharp needles. Size 5 is suitable for beginners. The needle should be large enough to be comfortable to use, but not large enough to leave behind large visible holes. "
 4 Collect other tools and materials. You will need a hoop that is the right size for your job. You will also need to choose a method for transferring the design to the fabric (discussed in the next section). There are other useful tools, such as thimbles and needle threaders, that will make your life a lot easier (and a lot of hassle!).
 Part 2 of 4: Printing the Pattern on the Fabric
 1 Select an embroidery pattern. If this is your first time embroidering, keep it as simple as possible. Give preference to simple lines, a small area filled with a drawing, and fairly large shapes. For fine work with small details, you need a certain skill. Until you have worked out it, choose simple schemes.
 - For beginner embroiderers, flowers, stars and simple line drawings are suitable.
- You can find a drawing on the Internet, circle one you have, or come up with your own.
- 2 Apply the design to the fabric. You need to choose a way to transfer the found or your own hand-made drawing to the fabric. For beginners working with simple fabrics, the easiest way is to use carbon paper. You can use thermal sketches that are ironed onto the fabric, but keep in mind that they cannot be repositioned or fixed if you are wrong. If you're brave enough, you can draw whatever you need to do by hand directly onto the fabric.
- You can try a material that dissolves in water: you copy or print a design on this temporary fabric, it is placed on top of the embroidery fabric, and you embroider directly over it.
- Stencils are also a good choice for those who are just learning to embroider, especially since they are usually simple designs.
- You can attach the drawing to the window, place the fabric on top, and trace around it with a pencil.
Hoffelt & Hooper
Embroidery Specialists Hoffelt & Hooper is a small family business founded in 2016. The Hoffelt & Hooper team creates beautiful and unique pieces including embroidery and needlework kits. Hoffelt & Hooper
Embroidery specialistsSara Slovensky from Hoffelt & Hooper advises: “Use a pencil that water soluble or disappears under the influence of an iron... This way you can correct mistakes as well as completely remove the outline when you're done embroidering. "
- 3 Decide where and what should be embroidered. Before you start, you need to understand the main points. Which parts of the drawing should be filled in? What colors? What will be in the foreground and what will be in the background? All this is very important for successful embroidery work. Starting without such a plan is like driving a car in an unknown direction without a map and expecting to get to New York.
Part 3 of 4: Getting Started
- 1 Hoop the fabric. The embroidery hoop - a must-have for embroidery - consists of two wooden or plastic rings, the larger of which (outer) has a screw for fixing. Place the fabric on the inner ring and cover the outer ring on top. The fabric should be clamped between the two rings. Tighten the screw to secure it in place.
- Make sure the fabric on the hoop is taut. This is the meaning of the hoop!
- The fabric should be stretched like leather on a drum.
- 2 Cut the thread. Cut off a piece of embroidery thread. The length of the thread depends on the size of the pattern, the type of stitch and the thickness of the thread and fabric. As a rule, the thread (before you fold it) should not be longer than your arm, as it will be inconvenient to pull it out. However, you can use longer thread if there is a large area in the pattern that needs to be sewn in one color. SPECIALIST'S ADVICE
Hoffelt & Hooper
Embroidery Specialists Hoffelt & Hooper is a small family business founded in 2016. The Hoffelt & Hooper team creates beautiful and unique pieces including embroidery and needlework kits. Hoffelt & Hooper
Embroidery specialistsSara Slovensky from Hoffelt & Hooper says: “Never cut a thread longer than your arm. When the thread runs out, cut another one and continue to embroider your design. Longer thread will get tangled».
- 3 Thread the needle. Insert the thread into the embroidery needle in the same way as a regular sewing needle. It is important to use a special embroidery needle that has a longer eye than a regular needle and can hold more than one thread.However, you do not need to completely fold the thread in half as you do when sewing. Instead, fold the thread towards the end: you have a long end that you will be embroidering with, and a short end about 8 cm long.
- 4 Start from the background, then embroider the front. Before you start embroidering, it is important to understand how the parts of the design will be positioned in relation to each other. In embroidery, it is customary to start with objects in the background and then work your way up to the front. This allows different colors and parts of the design to overlap, creating volume and depth.
- 5 Tie a knot. Before you sew the first stitch, you must take care that the thread does not slip through the fabric entirely. For beginners, the easiest way is to tie a knot at the long end of the thread. As you gain experience, you will make a temporary knot instead, as there should be no knots on the back of the professionally stitched embroidery.
- 6 Start at the right point. When you are finally ready to start, you should start from the place where the elements of the picture are connected or from the corner. This will make the embroidered pattern more natural and flowing. Find the place where the details of the drawing meet. If you are embroidering a simple shape (such as a circle), you can start from anywhere.
- Learn to correct mistakes. All embroiderers make mistakes, even professional ones. It will be helpful to learn how to neatly rework incorrectly sewn stitches.
Part 4 of 4: Improving Technique
- 1 Sew trial stitches whenever possible. Once you choose a project, you will, of course, want to tackle it as soon as possible and have fun. However, it is a good idea to start with a small swatch to look at the combination of fabric, thread, needle and stitch size. This will allow you to make sure that all the embroidery elements are selected correctly, and the final result will be beautiful.
- It is good to make such patterns when embroidering with satin stitch.
- 2 Learn to sew the same size stitches. Once you have mastered the basics, you will want to achieve a smoother, cleaner result. Stitches of the same size are a sign of a good embroiderer. This skill comes with experience; over time, it will work out for you. You just need to pay constant attention to the size of the stitches and try to make them the same.
- 3 Learn to make finer stitches. Gradually, you will want to take on more and more complex and interesting projects. They usually have a lot of fine, fine details - and matching stitches. You need to work on your technique, on the precision and detail of the stitches, to learn the kind of fine work that truly experienced craftswomen are capable of. Like the ability to make equal stitches, this skill comes over time, so it's worth the effort.
- 4 Move from simple to complex and improve. As with any needlework, it is important in embroidery to start slowly and gradually move towards more complex things. If you take on too hard work right away, you may become frustrated and decide that you will never learn, which is not true. You will do a great job: just don't give up!
 5 Ready!
Tips
- When choosing a drawing, remember that if it is not important to adhere to the proposed colors, you can change them to your liking.
- When you embroider by hand, your hands should not be rough or rough. Use a hand scrub, then apply a moisturizer. If you have smooth hands, it will be easier for you to embroider and the thread will not snag.
Warnings
- If you are embroidering on stiff fabric, remove it from the hoop during breaks. So it will not stretch or deform.
What do you need
- Natural or artificial silk embroidery threads
- Embroidery hoop
- Embroidery needle
- Sewing scissors
- Embroidery fabric or canvas
- Thermal pattern for embroidery
- Embroidery thread spools
- Craft box or thread organizer
- Drawing program
- Squared paper
- Colour pencils
- Moisturizing hand cream


