Author:
Marcus Baldwin
Date Of Creation:
15 June 2021
Update Date:
1 July 2024
Content
- Steps
- Method 1 of 4: How to change the background color of a new file
- Method 2 of 4: How to change the color of the background layer
- Method 3 of 4: How to change the background color of the Photoshop Stage
- Method 4 of 4: How to change the background color of an image
This article will show you how to change the background color of new and existing Adobe Photoshop files.
Steps
Method 1 of 4: How to change the background color of a new file
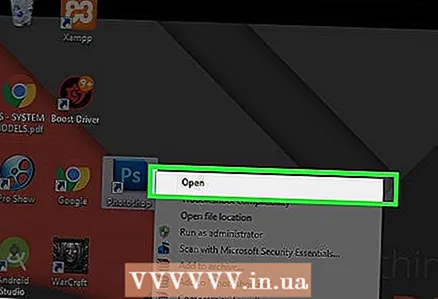
 1 Open Adobe Photoshop. To do this, click on the blue icon with the letters "Ps".
  2 Click File. This menu is on the left side of the menu bar at the top of the screen.
 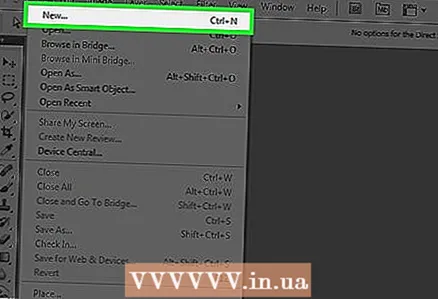 3 Click Create. It's near the top of the drop-down menu.
 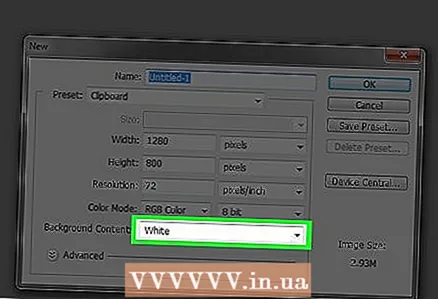 4 Click on the Background Content menu. It's in the middle of the dialog box.
  5 Choose a background color. Click on one of the following options:
 - Transparent - background without color.
- White - white background.
- Background color - background of one of the preset colors.
 6 Name the file. Do this in the "Name" line at the top of the dialog box.
 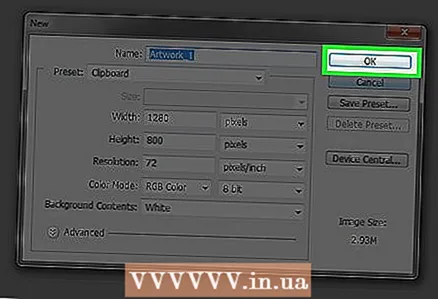 7 Click OK. It's in the upper-right corner of the dialog box.
Method 2 of 4: How to change the color of the background layer
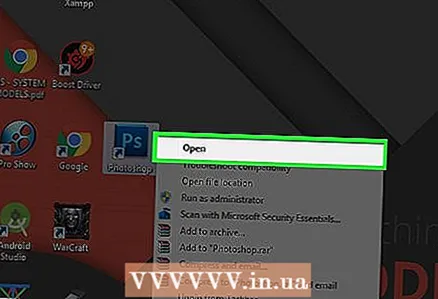
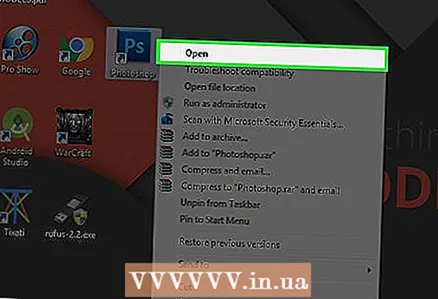 1 Open Adobe Photoshop. To do this, click on the blue icon with the letters "Ps".
 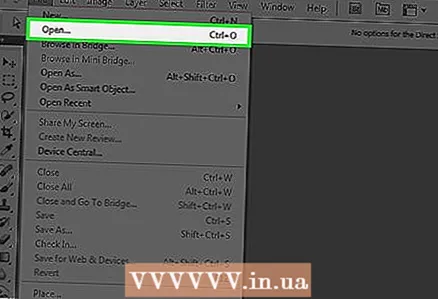 2 Open the image you want to edit. To do this, press CTRL + O (Windows) or ⌘ + O (Mac OS X), select the image you want, and then click Open in the lower-right corner of the dialog box.
 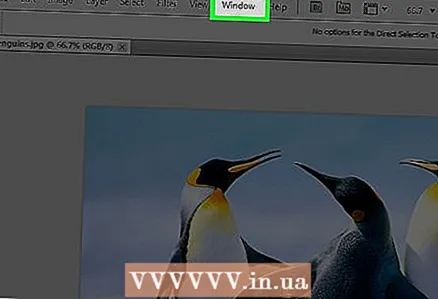 3 Click Window. This menu is in the menu bar at the top of the screen.
 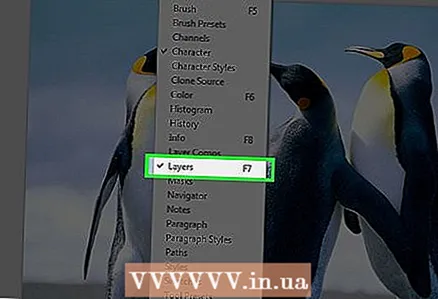 4 Click Layers. The Layers panel will open in the lower-right corner of the Photoshop window.
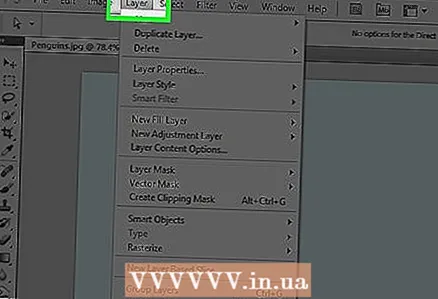
 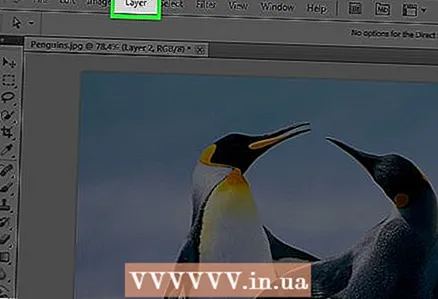 5 Click Layer. This menu is in the menu bar at the top of the screen.
 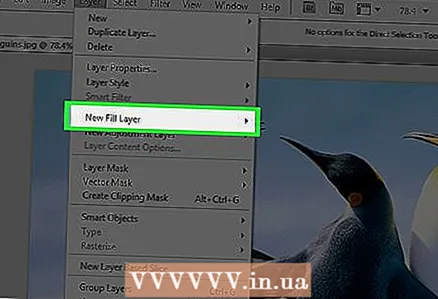 6 Click New Fill Layer. It's near the top of the menu.
 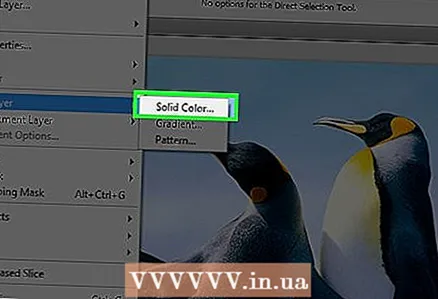 7 Click on Color.
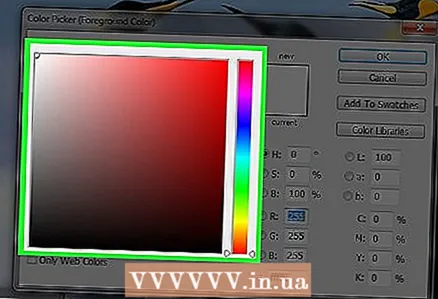
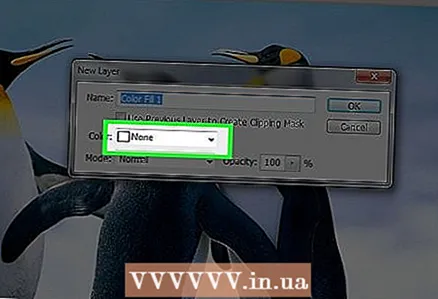 8 Open the Color menu.
 9 Click on a color. Choose a color for the background.
 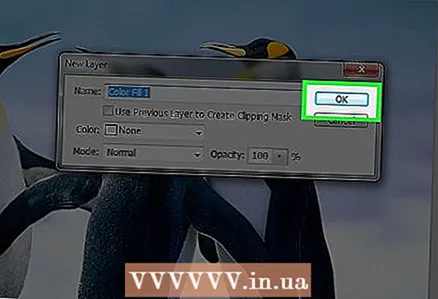 10 Click OK.
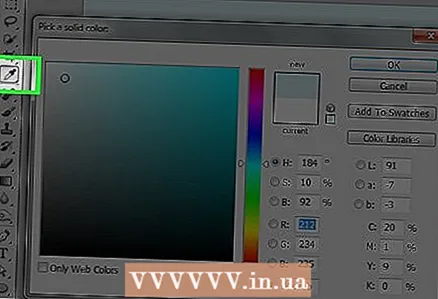 11 Refine the background color. Use the Eyedropper tool to select the shade you want.
 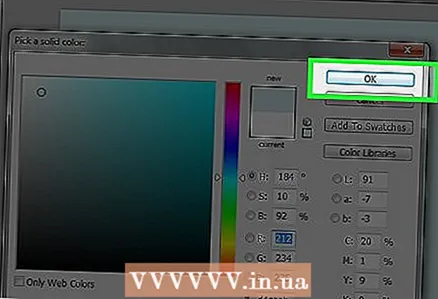 12 Click OK.
 13 Click and hold on the new layer. Do this in the Layers panel in the lower right corner of the window.
 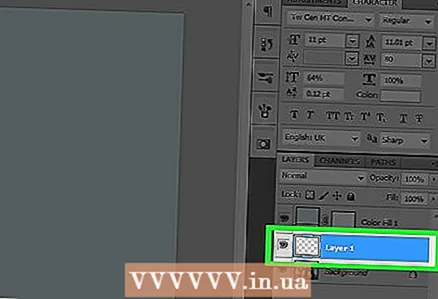 14 Drag a new layer and place it above the "Background" layer.
- If the new layer is not already selected, click on it.
 15 Click Layer. This menu is in the menu bar at the top of the screen.
 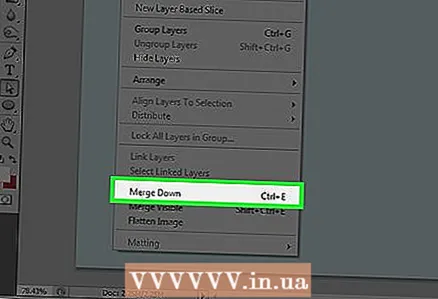 16 Scroll down and click Merge Layers. It's near the bottom of the Layer menu.
 - The background layer will be painted in the selected color.
Method 3 of 4: How to change the background color of the Photoshop Stage
 1 Open Adobe Photoshop. To do this, click on the blue icon with the letters "Ps".
 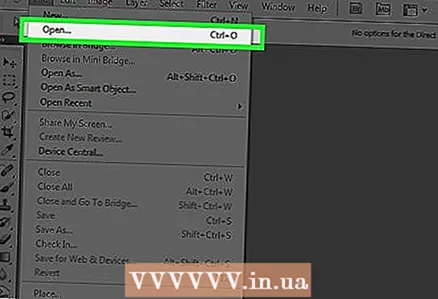 2 Open the image you want to edit. To do this, press CTRL + O (Windows) or ⌘ + O (Mac OS X), select the image you want, and then click Open in the lower-right corner of the dialog box.
  3 Right-click (Windows) or Control-hold and left-click (Mac OS X) the workspace. This is a dark frame around the image in the Photoshop window.
 - You may need to zoom out to see the workspace. To do this, press CTRL + - (Windows) or ⌘ + - (Mac OS X).
 4 Choose a color. If you don't like the primary colors, click Choose a different color, choose a color, and click OK.
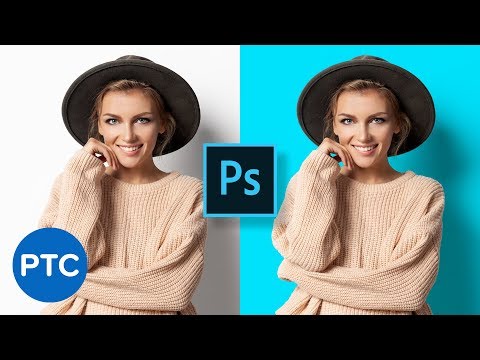
Method 4 of 4: How to change the background color of an image
 1 Open Adobe Photoshop. To do this, click on the blue icon with the letters "Ps".
 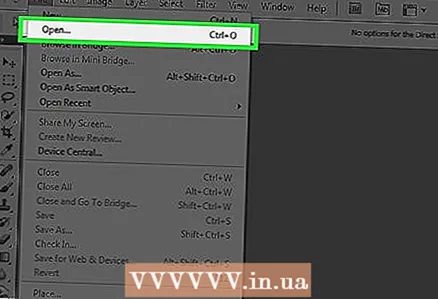 2 Open the image you want to edit. To do this, press CTRL + O (Windows) or ⌘ + O (Mac OS X), select the image you want, and then click Open in the lower-right corner of the dialog box.
 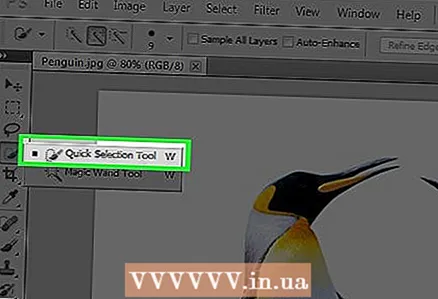 3 Take the Quick Selection tool. Its icon looks like a brush with a dotted circle at the end.
 - If you see a tool that looks like a magic wand, click and hold it. A list of instruments will open; select the "Quick Selection" tool in it.
 4 Place your cursor at the top of the image that is in the foreground of the image. Hold down the left mouse button and drag the cursor along the outlines of the picture in the foreground.
 - If the image includes several objects (for example, a group of people), circle each object, rather than trying to do it with all objects at once.
- When you have traced one object, click on the bottom of it to continue and outline the next object.
- Trace the foreground image until a dotted line appears around it.
- If the Quick Selection tool has captured an area outside the picture, click the Subtract From Selection tool in the upper left corner of the window. The icon for this tool is similar to the Quick Selection tool, but it has a minus sign (-) next to it.
 5 Click Refine Edge. It's near the top of the window.
 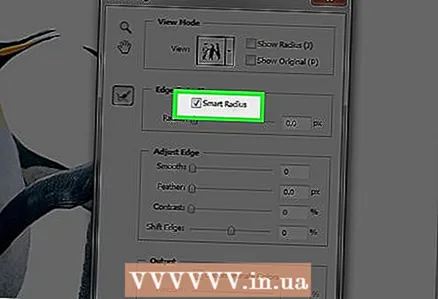 6 Check the box next to Smart Radius. It's in the Edge Detection section of the dialog box.
 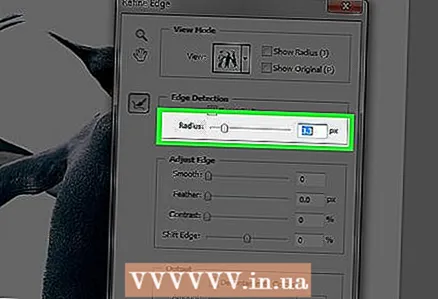 7 Move the slider under Edge Detection to the left or right. Notice how this is reflected in the image.
 - When you're done refining the edges, click OK.
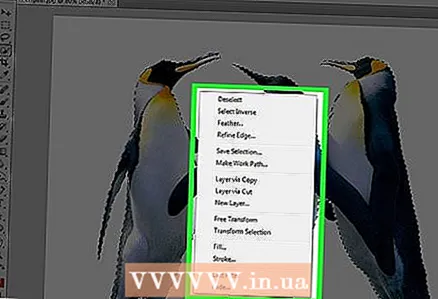 8 Right-click (Windows) or Control-click (Mac OS X) the background of the image. A menu will open.
 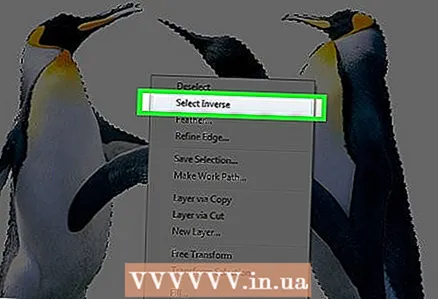 9 Click Invert Selection. It's near the top of the menu.
 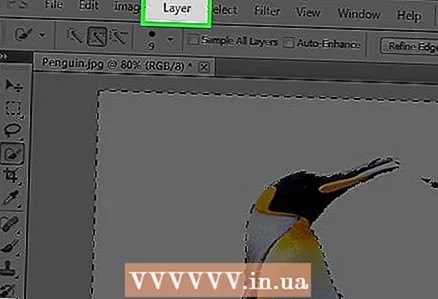 10 Click Layer. It's on the menu bar at the top of the screen.
 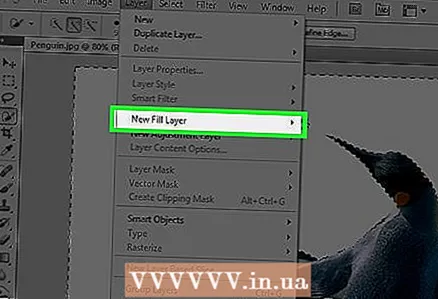 11 Click New Fill Layer. It's near the top of the menu.
 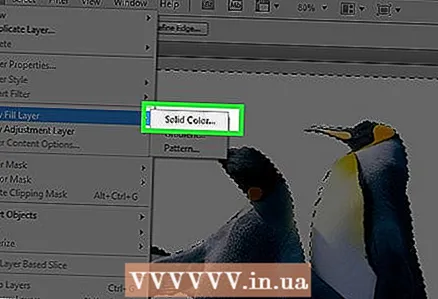 12 Click Color.
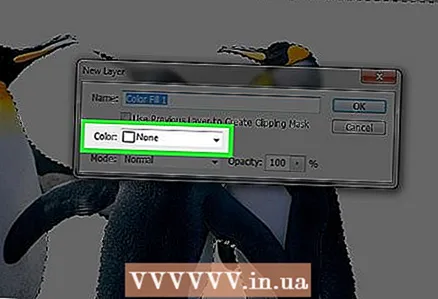 13 Open the Color menu.
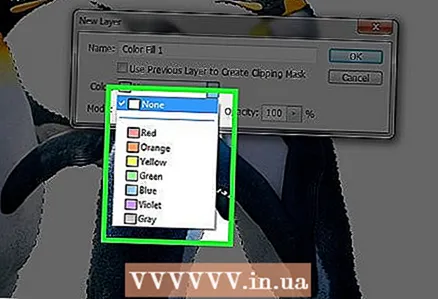 14 Click on a color. Choose a color for the background.
 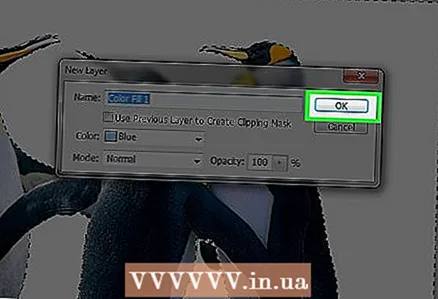 15 Click OK.
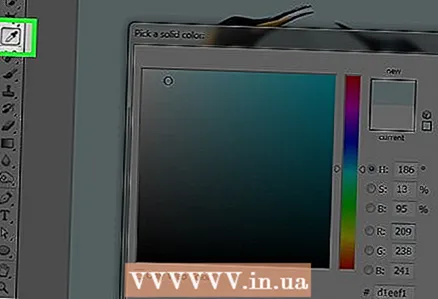 16 Refine the background color. Use the Eyedropper tool to select the shade you want.
 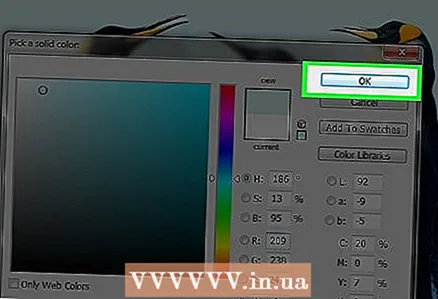 17 Click OK.
- Click File on the menu bar, and then select Save or Save As to save your changes.


