Author:
Marcus Baldwin
Date Of Creation:
13 June 2021
Update Date:
1 July 2024
Content
- Steps
- Part 1 of 5: Creating the Right Environment
- Part 2 of 5: Planting a cutting
- Part 3 of 5: Caring for the Plant
- Part 4 of 5: Pollination of Flowers
- Part 5 of 5: Harvesting Vanilla Beans
- Tips
- What do you need
Vanilla beans grow on perennial vines of the Orchid family. These plants are grown in Hawaii, Mexico, Tahiti, Madagascar, Indonesia and other tropical regions. Growing vanilla at home takes some effort and time, but it's worth it - the result is vanilla beans with a delicious flavor!
Steps
Part 1 of 5: Creating the Right Environment
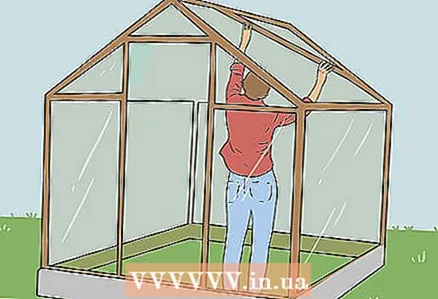 1 If you do not live in a tropical climate, build a greenhouse. Vanilla plants require tropical conditions - they need sunlight, warmth, ample space and high humidity to grow properly. Choose a spot that gets sunshine in the morning and build your greenhouse yourself or with a commercially available kit. Cover the greenhouse with UV-stabilized (i.e. UV-resistant) polyethylene or fiberglass, or use glass panels.
 - If you live in a tropical climate, you may be able to grow vanilla outdoors. Pay attention to the temperature and humidity in your area and determine if they are suitable for vanilla.
 2 Keep the temperature above 18 ° C. Vanilla grows in hot climates with daytime temperatures of 27-29 ° C. The temperature should not drop below 18–24 ° C at night. To lower the temperature in the greenhouse, you can open windows or turn on fans. You can increase the temperature using infrared lamps or a heater.
  3 Maintain humidity at 85%. Vanilla requires high humidity for normal growth. Measure the humidity in the greenhouse with a hygrometer. If it drops below 85%, turn on the humidifier. If the humidity rises above 85%, use a dehumidifier.
Part 2 of 5: Planting a cutting
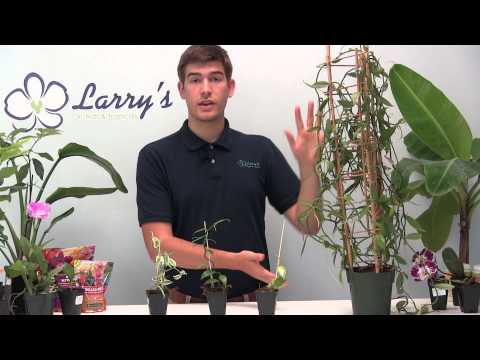
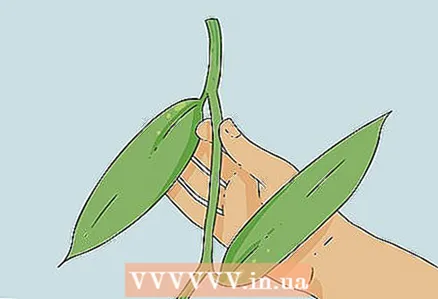 1 Buy a vanilla stalk that is 40-50 centimeters long. If you can't buy a cutting from your local gardening store, try ordering it online. The optimal cutting length is 40-50 centimeters. It is best to purchase several cuttings, as some of them may not germinate.
 - Usually, cuttings are cut from adult plants at least 6 meters high.
- If in doubt where the top and bottom end of the cutting are, ask the seller. The top corresponds to the direction of growth of the tree. The leaves should be facing the lower end.
 2 Take a small pot and fill it with a mixture of spruce bark and peat moss. This mixture is water permeable. You can also use a medium designed for growing orchids. Note that vanilla grows best in small pots rather than large pots or outdoors.
 - All of these can be purchased at a garden supply store.
 3 Check the soil pH level and make sure it is neutral. Vanilla prefers a neutral pH in the 6.6-7.5 range. Measure soil pH using a standard meter or test strips available from your garden supply store or online. If you need to change the pH level, add lime to increase alkalinity or organic matter (such as peat moss) to increase the acidity of the soil.
  4 Plant a vanilla stalk in the pot. Submerge the bases of the bottom two leaves 2–3 centimeters into the soil. Lightly tamp the ground with your hands to secure the stalk.
  5 After planting the cutting, lightly water it with distilled water. Don't overdo it, as too much water can lead to root rot. After watering, the soil should be slightly damp. Use distilled water, as the minerals in tap water are harmful to plants.
Part 3 of 5: Caring for the Plant
 1 Place the pot in a location that gets indirect sunlight for 6 hours a day. Direct sunlight burns out the vanilla plants. To prevent this from happening, choose a location in the greenhouse that is illuminated with bright, but indirect sunlight. A partially shaded area is best, where the plant will be illuminated for at least 6 hours a day.
 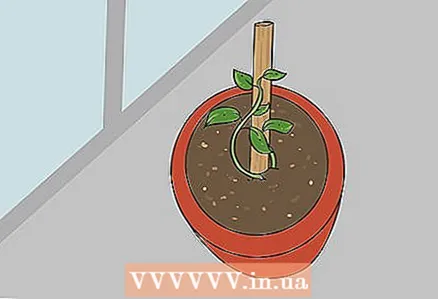 2 Place a trellis next to the plant to allow it to curl. Vanilla is a climbing vine and needs a trellis to support it. You can also place the pot near a post or tree for the plant to lean against. The vanilla must be taught to grow vertically, so carefully attach it to a trellis, post, or trunk of a nearby tree with twine or staples.
 - You can order twine and staples for plant garters online or at a garden supply store.
 3 Water the plant when the potted soil is dry, or spray it daily with water. Wait until the topsoil, 5–8 centimeters deep, is dry before watering the vanilla again. After watering, the soil should be damp, but not wet. You can also spray the plant daily with distilled water from a spray bottle. Sprinkle lightly on the soil, stem and vanilla leaves.
 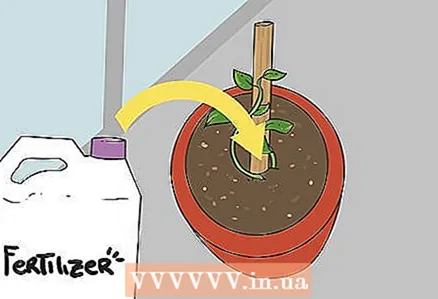 4 Add a little liquid fertilizer to the soil once a week. In order for vanilla to grow normally and bear fruit, it must be fertilized regularly. Add diluted liquid fertilizer to the soil every 7 days (its concentration should be about half that indicated on the package). When growing actively, use a liquid fertilizer with a high nitrogen content (30:10:10). At other times, use the fertilizer 10:10:10.
  5 Vanilla will grow in 2-7 years. The plant will anchor in the ground with its roots, and will also release aerial roots above the soil surface and attach them to the support. In 2–7 years, it will reach a height of 6–12 meters and begin to bloom. Be patient - your efforts will not be wasted!
 - During this period, continue to water and fertilize the plant as described above.
Part 4 of 5: Pollination of Flowers
 1 When bunches of flowers appear on the plant, pollinate them. Vanilla blooms once a year, and the flowering period lasts 6 weeks, and the life of one flower is limited to about one day! Therefore, it is necessary to carefully observe the plant and check every day if new flowers have appeared. If you find flowers, manually pollinate them so that pods will grow in their place later.
 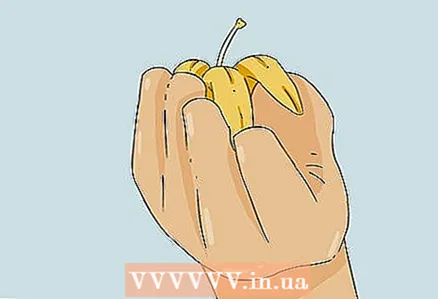 2 Pull the anther up, collect the pollen and place it on the stigma of the pistil. It is best to pollinate the flowers in the morning, at about 11 o'clock. Grab the pollen with your right thumb and forefinger. Use your middle finger to push the boot back and cover it with the petal that protects it. Place the pollen on the stigma of the pistil. Then slide the pestle back in with your left hand and cover it. Do this with all the blossoming flowers.
 - The juice of vanilla roots and flowers can irritate the skin. When transplanting and pollinating vanilla, be careful and wear gloves.
- Try to find someone who has experience growing vanilla and ask them for the first few times to help you with pollination, as this is a very delicate process.
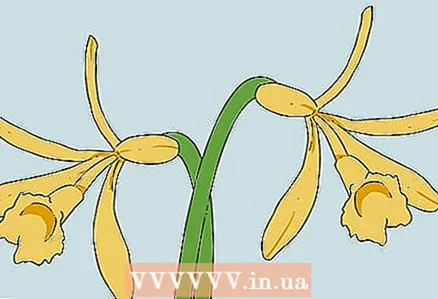 3 If pollination is successful, the stems of the flowers will drop down. Examine the plant the day after pollination. Although the flowers will not fall off, they will fade and turn dark brown. If the stem of the flower droops, then pollination was successful.If you don't notice any changes, try pollinating the flower again.
Part 5 of 5: Harvesting Vanilla Beans
 1 Collect the pods when they start to turn yellow at the base. The pods will appear within 2 months after pollination and take 6-9 months to mature. During this time, care for the plant in the same way as before. As soon as the green pods start to turn yellow, gently tear them off.
  2 Blanch the pods for 2-5 minutes in 70 ° C water. Heat water to 70 ° C in a saucepan. Dip the pods in it for 2-5 minutes, then carefully remove them from the water. This will kill germs and prepare the pods to dry.
  3 Dry the pods in a cloth-lined box for 36 to 48 hours. After blanching, transfer the pods to a box lined with heavy duty cloth. It is best to use a bamboo box and woolen blankets, although you can use something else. Let the pods “sweat” in a woolen blanket for 36 to 48 hours.
 - The heat will cause the pods to release excess moisture and make them easier to dry.
 4 Dry the pods alternately in the sun and in a duvet-lined box for 7-14 days. Spread the vanilla pods on a tray and expose them to direct sunlight for 3 hours daily. Then wrap the pods in a thick cloth or blanket and place in a box or drawer overnight. Do this until the pods are dark brown.
  5 Air dry the pods for 8–20 days at 35 ° C and 70% humidity. To remove any remaining moisture from the pods, they must be properly air dried. Hang or arrange the pods in the oven. It is best to dry them at 35 ° C and 70% humidity. When the beans are completely dry, they will soften and the skin of the pods will wrinkle and become skin-like.
Tips
- It may be worth trying other orchid plants before growing vanilla, as this can be tricky.
What do you need
- Greenhouse
- Hygrometer
- Vanilla stalk
- Small pot
- Vanilla growing medium
- Distilled water
- Trees or plant trellises
- Twine or staples for plant garters
- Spray bottle
- Liquid fertilizer
- Gloves
- Box (made of bamboo)
- Blanket or other thick fabric
- Trays
- Lime or peat moss (to regulate soil pH)
- Humidifier and dehumidifier (optional)
- Cooling and heating system (optional)


