Author:
Clyde Lopez
Date Of Creation:
17 June 2021
Update Date:
1 July 2024
Content
- Steps
- Part 1 of 3: Sprouting potatoes
- Part 2 of 3: Planting seedlings
- Part 3 of 3: Harvesting
- Tips
- Warnings
- What do you need
Potatoes can be grown indoors all year round if you have a sunlit window or plant lamps. All you need is a bucket, a glass of water, a few toothpicks, and soil. Potatoes are an excellent source of nutrients and can be stored long after harvest.
Steps
Part 1 of 3: Sprouting potatoes
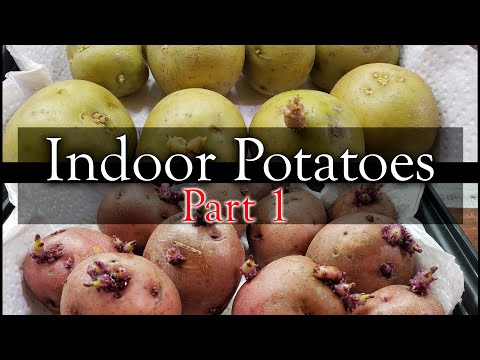
 1 Buy potatoes with lots of eyes. The eyes are small spots on the peel, from which shoots then grow. One potato with 6 or 7 eyes can produce up to 1 kilogram of potatoes.
 - You can also buy potatoes and put them by the window for a few days until eyes form on them.
 2 Scrub each potato to remove any dirt. Scrub each potato thoroughly under running water with a vegetable brush. Gently scrape off any dirt near the eyes to avoid damaging them before sprouting the potatoes.
 - This will also remove pesticide residues and growth inhibitors if you are using non-organic potatoes.
 3 Cut the potatoes in half. Place the potato long side on a cutting board so you can roll it like a rolling pin. Cut it in half as if you were going to cook round chips. Be careful not to cut the peephole when doing this, as it will germinate.
  4 Insert 4 toothpicks into the potato so that they sink into it by a quarter. Place toothpicks between the cut and the top of the potato. Place them approximately at the same distance from each other around the circumference (as a result, they should form a cross).
 - The goal is to get the toothpicks deep enough into the potato half, spaced fairly evenly, and hold it in place when you place it in the glass of water.
 5 Dip the cut of the potato into a glass filled with water. In this case, the toothpicks should lie on the edge of the glass. If the potato is uneven on the glass, move the toothpicks. Make sure that the bottom of the potato is submerged in the water, otherwise it will not sprout.
  6 Keep the potato in a sun-lit area for 5-6 hours a day until it takes root. Place a half of a potato dipped in water on the sill of a south window or under plant lamps. Long and thin whitish roots should appear in a week.
 - Change the water in the glass if it becomes cloudy. Top up with water as needed to keep the potato submerged.
Part 2 of 3: Planting seedlings
 1 Find a 10 liter pot with a drainage hole. Use a pot with a volume of at least 10 liters to get a good harvest of large potatoes.
 - Remember to wash and rinse the pot thoroughly before planting potatoes.
 2 Pour small stones into the pot so that they cover the bottom of the pot by 3-5 centimeters. Potatoes require proper drainage to grow. Cover the bottom of the pot with 3–5 centimeters thick stones.
 - Small stones or pebbles at the bottom of the pot will allow water to drain off and prevent rotting and mold formation.
- You can also make drainage holes in the bottom of the pot.
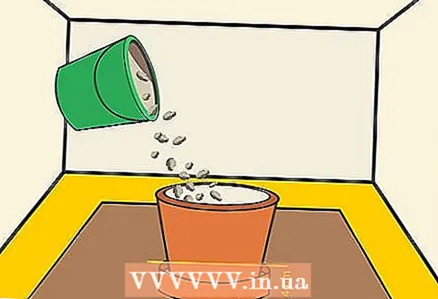
 3 Fill the pot about a third full with potting soil. Fill the pot about one third with loose, grainy loamy soil. As the potatoes grow, you will need to add more soil, so don't fill the pot to the brim at this stage.
 - An acidic sulfur soil works well for potatoes, so check the pH level to make sure it is around 5.5. If the soil pH is above 5.5, add sulfur (sometimes called a soil acidifier) to the soil.
 4 Plant the sprouted potatoes with their roots down, 15 centimeters apart. Plant the potatoes so that the roots are buried in the ground. Make sure that the longest shoot is on top.
 - Do not plant potatoes near the edge of the pot.
 5 Sprinkle the potatoes with a layer of soil 5–8 centimeters thick. For normal growth, potatoes must be protected from light, so cover them with a sufficiently thick layer of soil.
  6 Place the pot in a place that gets 6-10 hours of sun a day. Keep the pot in a well-lit place, such as near a window. You can also use plant lamps. Turn on the lamps for at least 10 hours a day to create an outdoor-like environment.
  7 Keep the soil moist at all times. Potatoes need water to grow properly, so check the soil every 2-3 days. If the soil starts to dry out, water it to keep it moist, but not too wet.
 - The soil should be as moist as a wrung out sponge.
 8 Add more soil when the plant is 15 centimeters tall. After the potatoes have grown to the top of the pot, add soil around the pot. As the potatoes grow, they will begin to release vines. The plant needs sunlight on the foliage, but not on the potatoes themselves. Therefore, you should gradually top up the soil as the plant grows until it reaches the top edge of the pot.
 - The potatoes will be ready to harvest in 10-12 weeks, or when the foliage begins to die off.
Part 3 of 3: Harvesting
 1 Harvest after the leaves turn yellow to make small young potatoes. When the leaves turn yellow or begin to dry, you can harvest. Scoop up small young potatoes as soon as the leaves begin to turn yellow or dry.
 - To harvest more mature and larger potatoes, wait another 1–2 weeks.
 2 Remove the plant from the pot and pick off any potatoes. Gently dig up the soil with a small scoop or hands and remove the entire plant from the pot. Pick each potato with your hands and peel it off the ground.
 - Be careful not to cut or damage the potatoes, as they have delicate skin that breaks easily.
 3 Wait 2-3 hours for the potatoes to dry, then wash them. Place the potatoes in a sunny spot to dry. Then scrub them with a vegetable brush and remove any dirt.
  4 Store harvested potatoes in a cool, dark place for up to five months. To prevent spoilage, keep potatoes in a cool, dark place at 7-13 ° C. Keep the potatoes in these conditions for at least 2 weeks so that their skins harden - after that they will last much longer.
 - Potatoes will last about five months if kept in a cool, dark place.
- If you don't have a cellar, you can keep your potatoes in a vegetable container in the refrigerator. However, the low temperature in the refrigerator will convert the starch in the potatoes to sugar, so be sure to use it within one week.
Tips
- Replenish the potted soil with organic compost before planting the potatoes.
- The potatoes should be watered regularly - the soil should be moist, but not too wet.
- To have a consistent crop of potatoes, plant them in pots every 3-4 weeks.
- If you don't have a cellar, just wrap the potatoes in newsprint and put them in the cupboard.
- The only pest that threatens outdoor potatoes is the Colorado potato beetle. Indoor potatoes can infect aphids, but they can be eliminated by spraying the leaves with a mixture of a mild dish soap and water. Just fill a spray bottle with water and add a few drops of detergent.
Warnings
- If you plan to plant store-bought potatoes, wash them thoroughly.Potatoes sold in stores are treated with a growth retardant, which must be washed off, otherwise the potatoes will not sprout.
What do you need
- Seed potatoes
- Deep pot
- Soil for indoor plants
- Compost
- Small spatula or scoop
- Wide-mouth glass jar (optional)
- Toothpicks (optional)


