Author:
Virginia Floyd
Date Of Creation:
6 August 2021
Update Date:
1 July 2024
Content
- Steps
- Method 1 of 2: Paint the room
- Method 2 of 2: Primer and paint
- Tips
- Warnings
- What do you need
- Additional
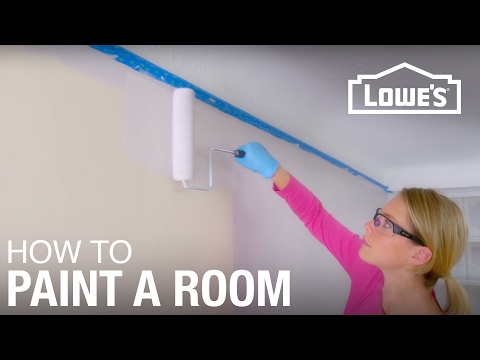
If you want to quickly update the look of a room, the easiest way is to paint it. In order for the paint to lay down as it should, and the room itself has acquired a finished and neat look, everything must be done in the right way.
This guide will be useful in all painting applications, be it ceilings, floors, wood surfaces or full scale renovations.
Steps
Method 1 of 2: Paint the room
 1 Buy everything you need for the repair (see. below). Interrupting repairs in the middle and running to the store for materials or tools is not a good idea!
  2 Remove anything that can be removed from the room and cover anything that cannot be removed. If you are painting only part of the room, then remove or cover everything only in this area. Paint has a tendency to drip down, so whatever you paint over must be safely hidden. If you move the brush too vigorously, the paint can stain the area around the work area. Cover as close as two meters horizontally from the area you are painting.
  3 Take the opportunity to line up the walls. You have a great chance to remove the bulging elements (nails, old paint remnants) and cover up all the holes in the walls. Large wall defects can be hidden with polyurethane foam, and small ones - with sealants or even furniture wax. Putty the walls, get rid of all bumps and bumps - this will prepare the walls for painting.
 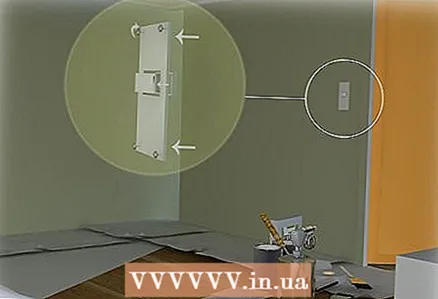 4 Remove everything from the walls - handles, sockets, switches, bells, fire detectors, and so on. You don't want to paint over them, do you? When painting, it is better to clean it up, not hide it. You can cover only what you cannot remove, or what you do not feel sorry for, as well as what will be difficult to install in its original place without damaging. Few things look quite as bad as the paint on the door hardware.
  5 Wipe the dust off the room. Dust forms bubbles on a freshly painted surface, which is very ugly.
  6 Think about what you will be painting. Remember that paint, as a rule, fades over time, especially in the sun, so you will have to paint the room all at once so that there are no areas anywhere that would differ in color.
  7 If there is mold or mildew on the walls, remove them with a 1-to-1 solution of water and chlorine bleach, then wipe again with clean water. Mold can be very dangerous and it is recommended that you wear a face shield. To prevent mold from starting up again, the room must be dry. There are paints that are resistant to mold and mildew (this is usually indicated by a special mark on the label).
  8 Prepare surfaces for painting. They should be free of dust, cobwebs, debris and moisture. Everything should be so dry that you can run it over the surface with a sponge, and there would be no liquid left on it. If there is paint on the surface, and it is already crumbling, it will have to be first removed with a spatula. Otherwise, the new paint will fall off along with the old one.
  9 If there are oil stains on the walls, it will make painting difficult. Wash stains with regular household detergent or a mild acid solution. For these purposes, sodium orthophosphate is widely used, as it effectively fights traces of dirt, grease and oil on the walls.
 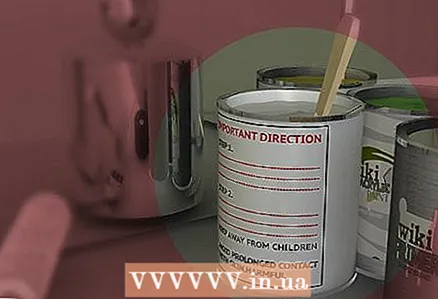 10 Read the instructions on the paint can to see how long it will dry. It is better to do this in advance, before the paint stains the outside of the jar. Plus, knowing how long the entire process will take will make it much easier to plan things out properly.
  11 Cover with masking tape anything that should not be painted (furniture, windows, woodwork, floor, ceiling, etc.).
- Make sure the tape has straight edges.Remember that the edge of the tape will be stained with paint, which can result in even the slightest mistake being very, very noticeable (especially if the paint stain is of a different color).
- Stick the masking tape securely to the surface. There should be no bubbles or lagging edges or paint will seep under the tape.
- It is better to cover everything with tape than to try to paint very neatly around the edges. Moreover, in the second case, you will surely stain something with paint, which will be much more difficult to fix than the flaws from using the tape.
- To prevent paint from flowing under the masking tape, it can be sealed with clear varnish or paint in the same color as the surface below. After that, you can safely paint over the tape with the color in which you want to paint the walls. After you remove the tape, the border will be especially clear.
- Some surfaces (like shabby concrete or old wallpaper) can be damaged by masking tape. In this case, you will have to take advantage of the fact that does not stick to the walls. For example, many home improvement stores sell special plastic tapes that are excellent substitutes for masking tape. If the surface has a pronounced texture, it is better to paint over the border freehand with a brush. One can only hope that this place will refuse where it will be difficult to notice small blots (for example, under the ceiling, in an area where the sun is shining all the time, or near the floor).
 12 Cover everything with a cloth to keep surfaces in the hazardous area well protected. Take this step seriously - then it will be extremely difficult, if not impossible, to wash the paint off. You can use masking tape to glue the fabric to the floor, but you won't be able to do this with carpet.
  13 Keep paint away from other rooms. When leaving the premises, dry your feet thoroughly. Cover the floors in the next room too.
  14 Prime the surface. It is imperative to use a primer if you apply paint to an unpainted surface (drywall, unpainted wood, metal, putty, mastic, as well as mold stains, chalk and ink). This allows you to waterproof the surface and create a layer on which the paint will later lay. Water-based or water-based paint will not take on an unprimed surface covered with oil paint. When painting light on dark, use a white primer, but if you want to apply dark paint to a light surface, you should tint the primer a darker color. If you decide to apply fresh paint over the old one and both paints are of the same type, you do not need to use a primer (the old paint should not peel off). However, if the old paint is very smooth, you will still need a primer. For glossy walls, a matting primer is suitable. When in doubt, use a primer! Some paints have priming properties on their own, which can save you time if you don't plan on applying many coats.
  15 Check if all surfaces are securely covered.
 16 Paint. Use as many coats of paint as needed. Remember that high-quality paint allows you to achieve uniform staining in 2-3 coats.
  17 Remove the masking tape when finished. Tear the tape off the walls at a right angle. If you paint more than two coats of paint, you may need to reapply the tape, because the paint may overcoat the tape and it won't come off neatly. You can wait until the paint is dry, and only then remove the tape (but if you do everything carefully, you don't have to wait). Please note that if you remove the tape when the paint is completely dry, the paint may come off along with the tape.
  18 If paint has dripped under the masking tape, it can be masked with a small paintbrush. Of course, it will not turn out very nicely, but still not so noticeable.
  19 If you have stained an area with paint of a different color, despite all the precautions, simply paint over it with the desired color. Be careful henceforth.
  20 Allow the paint to dry before removing the protective fabric from furniture and other surfaces.
 21 When the paint is dry, hang back whatever you removed from the walls. You can buy everything new, in the color of the walls. If your sockets and switches are burnt out in the sun, replace them - new ones are not expensive and are easy to install.
  22 Enjoy the result!
Method 2 of 2: Primer and paint
 1 You will have to repeat this sequence of actions once for the primer coat and as many times as you need to get the desired result when painting.
 2 Stir paints or primer thoroughly. Shake the can for 2-3 minutes before opening it, or use a paint stirrer.
 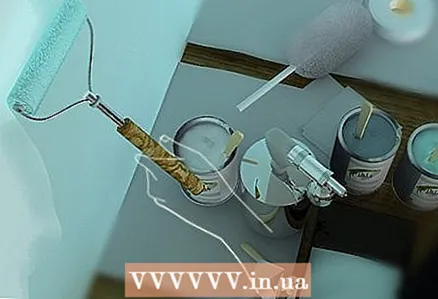 3 Open the can and start painting the walls. Paint from top to bottom, from ceiling to floor. So you will be able to get rid of all smudges in time. If you paint with a roller brush, paint most of the wall first, and then apply the edges to reduce the area where you have to brush more slowly.
  4 Paint with a roller brush like this:
- Empty the paint into a tray, fill it almost to the brim (if you need to paint a small area, pour less).
- Roll the roller over the tray until all sides are covered with paint. Move the tray if the roller does not spin well. Try not to stain the handle with paint.
- Roller brush gently over the surface to be painted to avoid paint drips. By the way, if you rotate the roller slowly, turning the handle, this will also help to avoid smudges.
- Try to apply paint in a circular motion, but not too quickly, otherwise the paint will splatter.
- Hold the handle so as not to stain it.
- If you press hard on the wrist, you can squeeze out what is in the depth of the roller. This may come in handy at the end of the painting. But remember: a roller that is too dry will paint worse
- Don't worry about the corners - you can paint them with a brush. However, the closer to them you paint over with a roller, the more time you will save yourself.
- To make the paint lay evenly, after painting any area, roll over the fresh paint in up and down movements so that each stroke is smaller than the previous one. This will distribute the paint evenly over the surface.
- Look for tutorials on how to use a roller brush.
 5 With a brush, paint like this:
- Dip the brush 1 inch (2.5 cm) into a container of paint (even the leftover paint you used for the roller brush will work). Deeper brushing will increase paint consumption and may be more difficult to clean.
- Remove excess paint from the brush by wiping it on the edge of the container or brushing off the paint.
- Move the brush confidently over the surface to be painted and rotate it slowly to avoid smudges.
- Paint from top to bottom.
- Do not hold the brush with the bristles upward - paint will drip onto your hand. If you paint the ceiling, this will happen anyway, so just don't brush up on a lot of paint.
 6 If paint spills onto clean surfaces, wipe it off immediately with a damp sponge or cloth. The paint thinner will cope with the oil-based paint, the water will wash off the emulsion paint. Don't let the spray get dirty!
  7 Carefully check the painted area for smudges before moving on to the next, and if there are any, smooth them out with a brush. Dried smudges are difficult to remove, so you need to work with them before they dry.
 - Before tackling the second wall, finish the first one. After drying, the paint darkens. If you have to repaint something, then the color will subsequently be completely different, which will only lead to unnecessary work.
 8 Remove all tools after you are finished. If this is not done, they will dry out and become useless. Wash your brush.If you used water-based or water-based paint, rinse brushes under water, squeeze out and shake off. Let the tools dry thoroughly. Take care of your brushes carefully, because then the paints will not mix with each other and with water, and you will not spoil the color and texture of the surface. If you will not be using brushes for a short period of time, wrap them in cellophane or leave them in a paint can. If you plan to use the same paint the next day, put all tools in the freezer in the evening and thaw when ready to start. Water will not be able to wash off oil paint from hands and arms - you need to use a solvent for this purpose. Several different products are suitable as a solvent, but they all smell unpleasant and are harmful to the environment.
Tips
- If you have a new roller, wrap masking tape around it before starting work to remove debris from the surface and prevent it from getting into the paint and onto the surface to be painted, and then remove the tape. You will be surprised how many things stick to the tape.
- Do not hurry. Painting walls isn't easy (at least if you don't breathe in pairs), but if you prepare well and work carefully, you will succeed. Remember that you will often look at these walls, and if your guests do not notice a small smudge behind the door or an insufficiently painted area behind the curtains, you yourself will know that everything is not in order there. Work in such a way as to be proud of the results of your labor!
- If something sticks to the paint (hair, dust), remove it immediately. It will not disappear by itself, and an ugly ledge may appear on the wall.
- Tips for choosing colors:
- Dark colors will make the room smaller, light colors larger.
- Ceilings are usually painted white to make them appear taller.
- Need some inspiration? Paint the room the color of your favorite object (painting, plate, flower).
- Don't be afraid of bright colors!
- You can save time (and protect your back) by using a mop to clean the walls. Attach a clean sponge to the mop and buy a detergent that won't leave a film on surfaces.
- Many are unaware of the problem of cracks between walls and ceilings. The walls are somewhat mobile, resulting in cracks that need to be filled with acrylic or silicone. Many people seal the crevices with cement or gypsum, which only makes the problem worse, since these materials are unable to expand. But correct filling of cracks is a very important and simple matter.
- If the brush starts to leave foam or traces of other paint on the wall, replace it.
- Try to buy paint a shade lighter than you want, because often the paint gets darker after drying.
- Keep children and pets away from the paint area.
- Consultants at home improvement stores can give you advice.
Warnings
- Dust and paint from spray cans can trigger fire alarms. Cover the alarm during the repair and remember to return it to its original state after you are finished.
- Remove masking tape after painting. The longer it is on the wall, the drier it is and the more difficult it is to separate it.
- Oil paint is highly flammable and should be stored in a fireproof cabinet.
- Do not paint smoke detectors, they will deteriorate.
- Pay attention to where the paint is, and do not put it where you can touch the container and spill everything. Puddles of paint very poorly washed.
- Chlorine bleach can form toxic chlorine fumes in combination with other bleaches. Read the instructions on the bleach bottles carefully and mix carefully!
- If you are cleaning old walls, there is a chance that small pieces of lead paint will fly in all directions, which toxicespecially for young children. Keep children away from work and protect yourself from lead poisoning (at least with a respirator).You can even ask for help from professionals who will clean the walls of old paint. Determine if the legislation prescribes a specific way to dispose of toxic waste.
- If you are using a tinted primer, apply it wherever you need to get the same color after finishing the repair. The same paint applied to different shades of primer will give different colors, and it will no longer be possible to fix it.
- Disconnect electricity or power outletswhen changing outlets and switches. Do not insert objects (screwdriver, paintbrush, fingers) into the outlet while it is energized.
- It should be painted in well ventilated area... If you are using a fan, make sure that it does not blow dust onto freshly painted walls.
- Read what is written on the paint can... It is very important. Some of the substances in the paint can be toxic, which will require you to be extra careful.
- Don't heat the paintto wipe it off. Heating produces toxic gas, which can lead to poisoning.
- If you bought multiple cans of paint of the same color, you can mix them together. The contents of these jars may be subtle, but still vary, and that's okay. If you paint the same surface in several layers, rather than paint adjacent surfaces, the difference will not be noticeable.
What do you need
- Five-in-one device... It is a multifunctional device with many applications. They can defend against burglars or open paint cans.
- Putty... It perfectly fills in wall defects (using a 5-in-1 device).
- Cleaning supplies (to prepare the room for painting) and sponge mop... The mop comes in handy for high ceilings.
- Interior primer... That's all you need. It is desirable that it is water based and compatible with the same type of paint. You should not use oil paint indoors unless you have a good reason to do so, because it has a strong smell and it will be much easier for it to get dirty. Only use a tinted primer if you are painting in dark colors. If you paint multiple surfaces with different colors, it will be easier for you to use the same primer for all of them, so you don't have to mask the primer again. Make sure you have enough paint.
- Interior paint... Emulsion paint is a water-based paint and is recommended for indoor use. Pick a color that suits you and take home paint swatches to apply to the walls and make sure the colors match. Remember that colors look different under different lighting conditions. Glossy paint is better for painting shelves and wooden furniture, as well as areas that will get wet (walls in the kitchen, in the bathroom). For walls, matte paint is more suitable, but in any case, you should familiarize yourself with the samples and manufacturer's recommendations. Pay attention to what is written on the can and buy the correct amount of paint.
- Brush. It is best to use a new and relatively clean brush. You don't want to leave traces of rust or paint of a different color on your walls, do you?
- Regular paint brush will leave a slightly grainy texture on smooth surfaces. These brushes are great for rough, uneven surfaces as they are durable and excellent at filling in uneven surfaces with paint. It is not very difficult to clear them. If the bristles of the brush stick out in different directions, it should be trimmed so as not to accidentally stain other surfaces with paint.
- Foam brushes are considered disposable, but can usually be used multiple times. They are not suitable for uneven surfaces because they wear out quickly. On smooth surfaces, they leave a fairly even mark. It is convenient to paint over corners with them due to the fact that the tip of the brush is bent. They are very easy to clean.If you are using oil-based paint, it is still better to discard these brushes rather than trying to clean them with solvent.
- Small brushes are great for fine work and curved surfaces. Medium brushes are multifunctional. Wide brushes can be difficult to fit into a paint can. If you need to paint a large area, consider using a spray paint or roller brush. Brushes are cheap, so feel free to choose what you like.
- Roller brush works well for painting a large area, say a wall or ceiling. You will also need paint tray and roller brush handle... Narrow (up to 15 cm) brushes come in handy when you need to quickly paint something small (for example, a door). However, it may be cheaper to buy a full-size roller brush and just cut it open (rinse the brush afterwards and brush off any trimmings so that nothing sticks to the paint). Rollers have different surfaces - it all depends on what surface texture you want to achieve. To reduce paint consumption, use the thinnest roller possible. Rollers are quick to paint because they cover large surfaces with an even layer of paint in just a few strokes. However, cleaning them is more difficult due to the fact that they soak up a lot of paint. Instead of a paint tray, you can use a large bucket and a metal lid (you can buy these at any hardware store)
- Spray - A more expensive alternative to roller brushes that are suitable for large surfaces. In addition, you will have to more reliably cover all objects around, so as not to stain them with paint.
- Corners... They are used to paint the edges, but still sometimes it is difficult to make a straight line without masking tape. They are relatively easy to clean and some people use them for woodworking. There are special corners for working with the ceiling.
- Special rollers for corners allow you to quickly and accurately paint over corners. But you may find it more convenient to paint them with a brush.
- Long roller brush grips are available for painting ceilings and high walls.
- Paint can... As a rule, this is far from the most profitable and convenient way to paint a room. Spray cans are quite expensive, difficult to store, paint can smudge, and vapors are highly toxic. They can be used to paint metal surfaces that need to be protected from rust, but work in a ventilated area. It is problematic to paint the ceiling from a spray can. It is not difficult to clean up after working with the cylinder, but before starting work it is important to cover very well all surfaces that should not be painted. Often, spray cans are only sold to adults because they are used for graffiti.
- Protective covers and fabric.
- Thin, clear plastic wrap is cheap and can be bought at any hardware store. Plus, it can be used many times. Choose a film that will not tear if walked on.
- A sturdy blue plastic wrap will work too, but it is heavier and noisy to rotate. In addition, in order to prevent the paint from leaking, you will have to check if there are any holes in it.
- Newspapers. They are always on hand, but large drops of paint can seep through the paper. Covering a freshly painted surface with newspaper can cause the design on the paper to be printed on the ink.
- Old sheets can be used. However, paint is even more likely to seep through them.
- An easy and simple way to protect your floors is with a plastic mat. It is easy to roll up for storage, and it will be much more convenient to fix the film on the floor with it than using masking tape. A 1-meter rug will reliably protect floors from paint and will not interfere with your work.
- Paint can opener... A flathead screwdriver is a great choice because it has a comfortable grip and many applications.But you can also buy a special device for opening paint cans.
- Screwdriver... They come in handy in order to remove sockets and switches from the walls.
- Masking tape... There are several varieties commercially available (for example, plain yellow or white tape, easy-to-remove blue tape, and heavy green). The easy-to-remove tape is more suitable for walls with a thin layer of old paint. Use a wide tape to keep the paint from leaking. Narrow tape is suitable for tight and tight spaces.
- Ladder... You will need it if you need to climb higher. You can use two ladders with a partition to keep the ladder from moving all the time (for example, when painting the ceiling and tops of the walls).
- Clothes for work... Wear something that you won't mind getting dirty, because you will get your clothes dirty anyway. First of all, you should think about your hands and buy gloves. You can use regular latex gloves, or you can buy gardening gloves because your hands will breathe in them. Wear something over your head to hide your hair. If you have long hair, tuck it up to prevent dye from getting on it. If you don't want to wear gloves, apply petroleum jelly to your palms and wrists to help the oil paint and water slide off your skin. Vaseline itself can be tricky to wash off, but at least it will help you moisturize dry skin.
- Water, sponge, paper towels, or rag... They will be required in order to wipe paint stains.
- Sinkto wash the tools. It is advisable to wash them in a sink that you do not mind getting stained with paint. However, any stains can be removed later.
Additional
- Paper cup for paint (if you need a little paint).
- A metal brush or putty knife if you need to clean the surface of old paint.
- Mixer. It can be a regular stick, but you can do without it if you shake the paint can well before opening it.
- Lightingespecially if there is no light in the room.
- Five-in-one device... It is very convenient for them to clean roller brushes, in which a lot of paint can remain after work (almost half a glass). You will be wasting a lot of paint and water or solvent if you try to rinse off the paint in the usual way.
- Fidget Spinner - Another great device for cleaning brush and roller brushes. This device dries brushes by rotating and does it quickly and efficiently, but you need to use it in a bucket so as not to stain everything around with paint.


