Author:
Virginia Floyd
Date Of Creation:
6 August 2021
Update Date:
1 July 2024

Content
Do you want to wear a rainbow bracelet without buying a loom? You can create rainbow ribbon patterns using things you have at home such as pencils and forks, you can create the same design as you would using a loom. When you put on your completed bracelet, no one will notice the difference.Read on to learn how to make three different color swatches.
Steps
Method 1 of 3: Chain
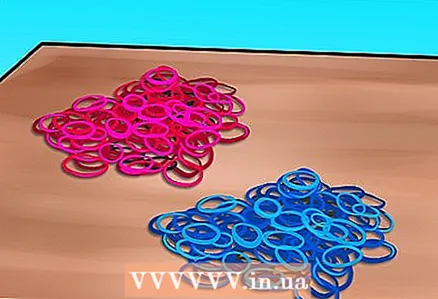
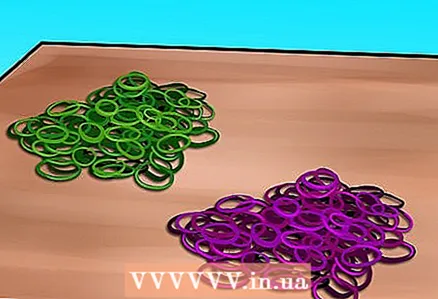 1 Choose your colors. One swatch chain makes it easy to include as many colors as you want. Decide if you want your bracelet to be the same color or if you want to make a pattern using several different colors. You can alternate colors or include all the colors of the rainbow.
 - You can count your rainbow ribbons to make sure you have enough colors that you want. If your work will show up in your finished bracelet. You will need 25 to 30 ribbons for this bracelet.
- Organize your ribbons so that you can separate them into different colors. If you don't have a ribbon sorting box, you can just as easily use a bead box or a box with lots of jewelry.
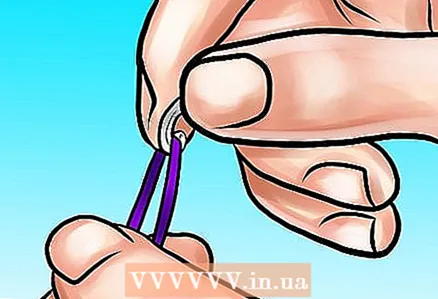 2 Place the first strip inside the C-clip. This is a small plastic clip that helps connect the ends of the bracelet. Pull the first elastic into the space labeled "C" so that it is inside the paperclip.
 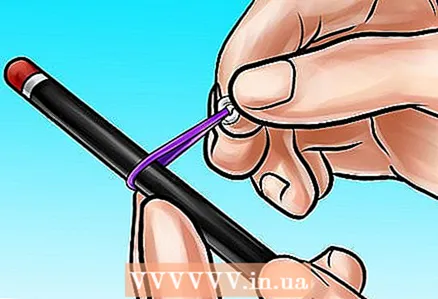 3 Wrap the tape around the pencil. Take this same tape and stretch it a little so that it can stretch to the middle of the pencil. The pencil will help you hold the pattern in place as you create it, it acts like a loom.
 - Use a pencil that is narrow enough so that the tape runs loosely around it. If the tape is too stiff, it will be difficult to wrap it around the pencil you need when creating your template.
- You can also use a popsicle stick or chopstick if you don't have a suitable pencil.
 4 Pull the second tape under the first. Place the pencil on the table in front of you with the first tape sticking out from underneath. Now pinch the second strap and pull it under the first strap. The second tape that you clamped should be perpendicular to the pencil.
 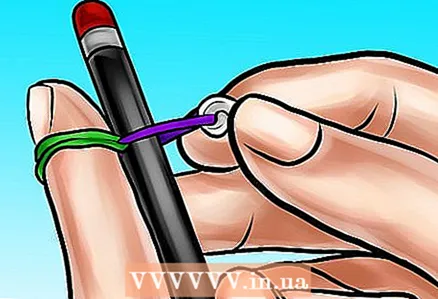 5 Wrap the ends of the second tape around your finger. When you pull on both ends of the second tape, they will make two loops that are separated by the first tape. Take these two loops and place them on your index finger.
 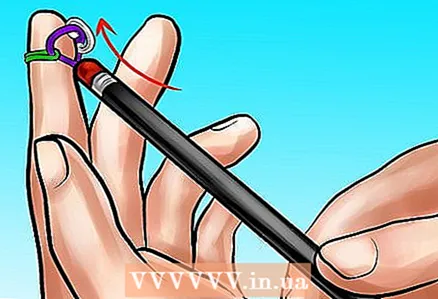 6 Slide the first tape off the pencil. It has already done its job, slide it to the right to work its way for the next piece of the sample.
 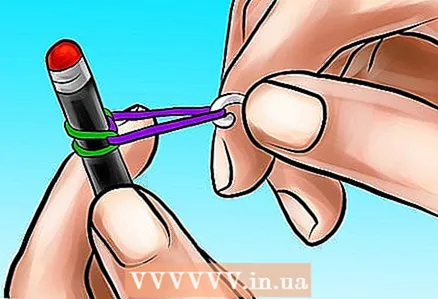 7 Slide the pencil between the two loops of the second tape. Move the loops that you are holding with your finger onto the pencil. Move them down to the middle of the pencil so that they don't fall off.
 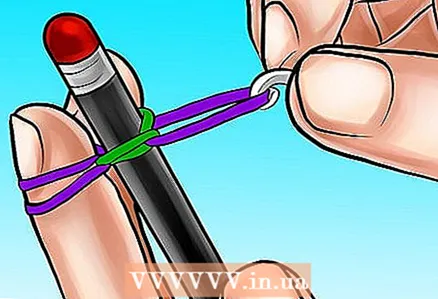 8 Place the third tape under the second tape. Take the third color you are using, squeeze the tape so it is flat, and slide it between the two loops of the second tape that is on the pencil. Take two loops of the third tape and place them on your index finger to hold them in place.
 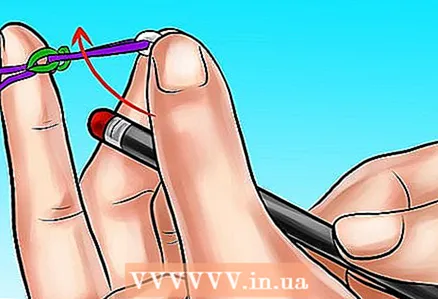 9 Slide the second tape off the pencil. Gently slide the tabs so that the second tape becomes part of the chain. Do you already see a template for creating a form?
 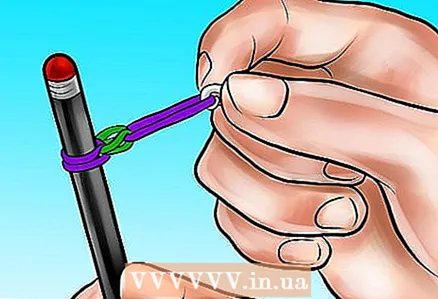 10 Place the pencil between the two loops of the third ribbon. Move the tabs that you hold with your fingers onto the pencil. Bring them down to the middle of the pencil so they don't fall off.
 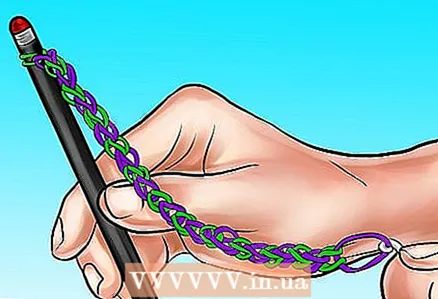 11 Continue in this fashion until you have created the chain for the bracelet. Continue making the pattern by placing the new ribbon under the eyelets of the old one, remembering to hold it with your finger, sliding the old ribbon off the pencil, and placing new ribbons on top of the pencil. As the chain grows, you will periodically wind it around your wrist (or around your finger if you want to make a ring) to see if it is long enough.
 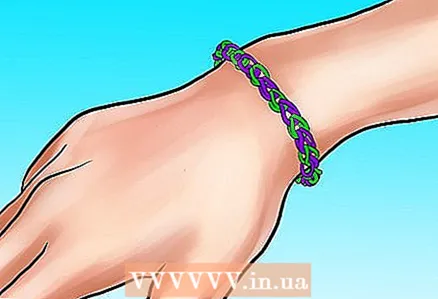 12 Complete the bracelet. Slide the last tape on the pencil and hold the loop with your fingers. Take the staples and insert the two ribbons in the center. The two ends of the bracelet are now connected together and the bracelet is complete.
 - Try it on to see if you like the size.If you want a smaller size, simply pull out the last few strips until it is the correct length, then connect the ends with a clip.
- To make a longer bracelet, move the 2 loops of the last ribbon back onto the pencil, then add new ribbons as needed.
Method 2 of 3: Fishtail
 1 Choose at least 2 ribbon colors. This model looks great with different colors, so pick your favorites. You can also make a fishtail using more than two colors if you want. Since this is a denser model, you will need about 50 ribbons in total.
 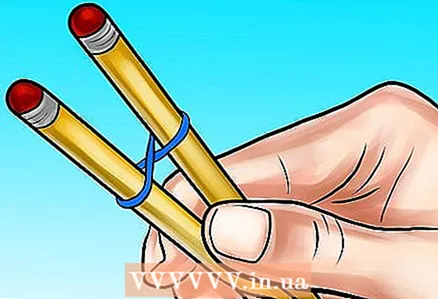 2 Place the first tape around two pencils. Hold your pencils together with the ends of the eraser facing up. Now take your first eraser and wrap it around the pencils, drawing a figure eight around them, with one loop on each pencil. Pull the figure 8 down a little on the pencil to make sure it won't slip.
 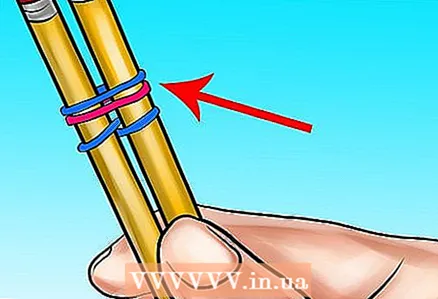 3 Place two more ribbons on the pencil. This time, don't twist them - just wind them around both pencils. You should end up with a small stack: first comes the twisted ribbon, then two more ribbons that are wrapped around the pencils.
 - Remember to alternate your colors. The third ribbon should be the same color as the first, with a different color in between.
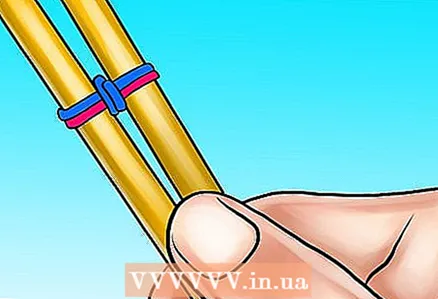 4 Place the loops of the first tape. Start by holding your pencils so they point towards you. Now use your nails to grab the desired loop of the first tape (which is twisted). Place it on top of the rest of the ribbons and the tip of the pencil, then let it fall between the pencils. Now do the same with the remaining loop first: take it with your fingers and place it over the rest of the ribbons and the tip of the pencil, then let it fall between the pencils.
 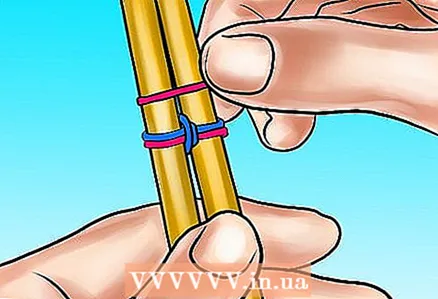 5 Place the next tape on top of the pencils. Do not twist it, just wrap it over the pencils and fold it down so that it lies on top of the previous ribbon. Make sure to use a contrasting color.
 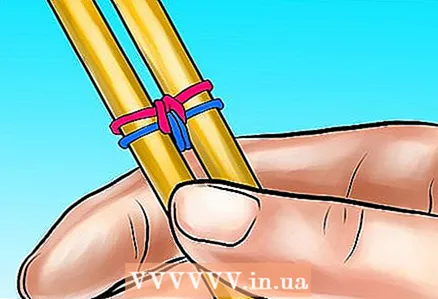 6 Place the loops of the bottom-most tape. Hold your pencils so that they point towards you. Then use your nails to grab the desired loop of the bottom tape. Place it on top of the rest of the ribbons and the tip of the pencil, then let it fall between the pencils. Now do the same with the remaining loop of the bottom ribbon: grab it with your fingers and place it over the rest of the ribbons and the tip of the pencil, then let it fall between the pencils.
  7 Continue in this fashion until the fishtail is long enough to make the bracelet. Continue to add ribbons from the top and place them in the loops of the lower ribbons. Each time you do this, another segment of the bracelet will form. Continue until the fishtail is the desired length.
 - To figure out when the bracelet is long enough, place the fishtail on your wrist. The bracelet is finished when the two ends are long enough for you to connect.
- You can also stop after you have a few segments if you want to make a ring.
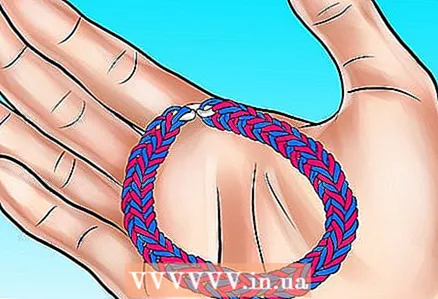 8 Complete the bracelet. When it's long enough, carefully remove the last stitches from the pencils. Use a clip to hold all the loops together. Finally, pull the first loop from the beginning of the bracelet and connect it to the other end, placing it in the clip. Your bracelet is complete.
 - If you want your bracelet to be longer, move the last few ribbons back onto two pencils. Continue adding down loops until the bracelet is longer, then secure the ends with a clip
- If the bracelet turns out to be too long, you can simply pull out the last few straps until it reaches the correct pancake, then connect the ends with a clip.
Method 3 of 3: Chevron
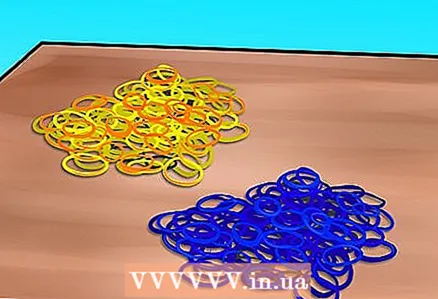 1 Choose your colors. You can make this model using just one color, but it looks very good with 2-3 colors.You will need about 50 ribbons, so check to see if you have enough with each color.
 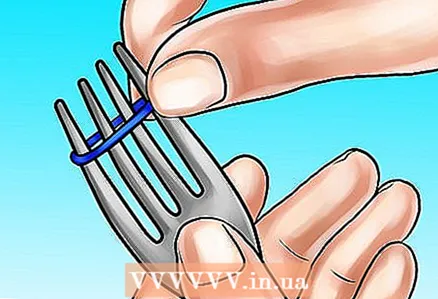 2 Wind the first tape around the tines of the fork. Hold the fork with the handle and prongs facing you. This will act like your loom. Take the first tape and wind it around the other barb. Lift it up with your finger and thumb.
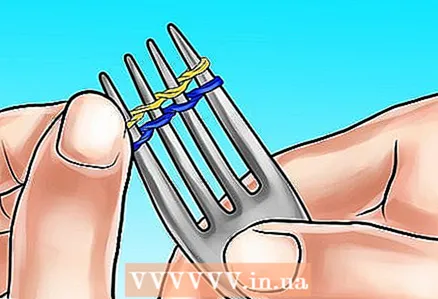
 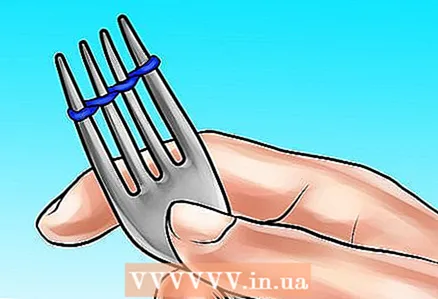 3 Twist and loop with tape across the prongs of the fork. Take a loop of tape and twist it. Place the end of the tape on the next prong. Then pull on the end, twist it, then place it on the next prong. Finally, pull it out one more time, twist it and place it on the last prong.
 - It sounds complicated, but once you adjust, you will be able to do it much faster. If you need help holding the tiny ribbon, you can use a crochet hook to help you pull and twist the ribbon.
- After the tape has been wrapped around all the teeth, pull it down a little so that all the wrapped parts are in a straight line. Pull on each tip to adjust the tape so that all pieces are the same size.
 4 Wrap the second tape around the tines of the fork. Using the same technique, add a second ribbon. Choose the next ribbon in your template, it can be the same color or you can choose a different one. Screw it onto the outer prong on the right, twist it, then place it on the next prong, twist it, then wind it on the next prong. Twist again and then place it on the last prong. Pull it down to place it opposite the first tape.
 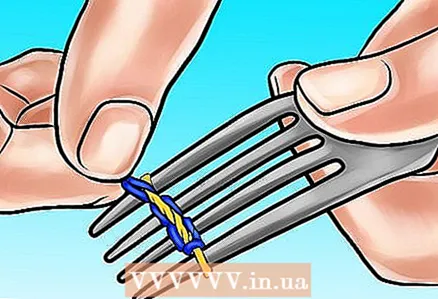 5 Wrap the loops. Place the fork with the tines facing down. Look at the outermost prong of the fork on the right: you will see a stack of two loops. Take the top loop (which is closer to the fork handle) and pull it over the bottom loop and over the tip of the prong. Do the same for the rest of the prongs: take the top tabs and pull them out over the prongs of the fork.
 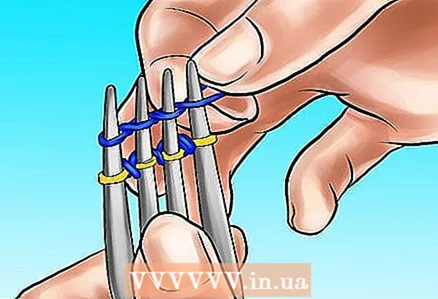 6 Wrap new tape around the prongs. Pick the next color in your template, wrap it around the outer prong on the right, twist it, then do the same on the next prongs. You now have a stack of two loops again.
 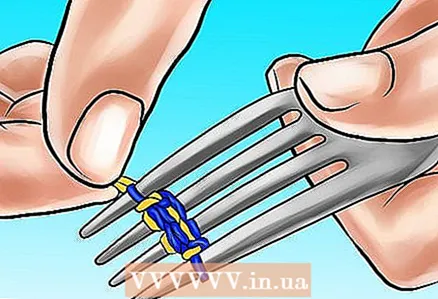 7 Wrap the loops. Position the fork so that the tines are facing downward, look at the outermost tine of the fork on the right. Take the top loop (which is closer to the fork handle) and pull it over the bottom loop and over the tip of the prong. Do the same for the rest of the prongs: take the top tabs and pull them out over the prongs of the fork.
 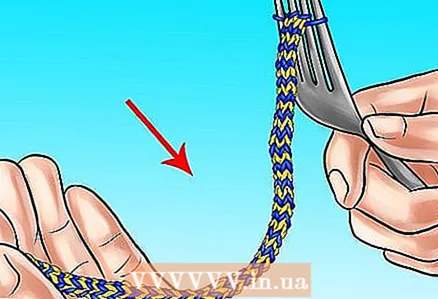 8 Continue until the bracelet is the desired length. Wind the next tape around the prongs, then twist the loops by grabbing the top loop on each prong and pulling it over the fork's prongs. Keep adding new ribbons and twisting the loops until the bracelet is large enough to fit on your wrist.
 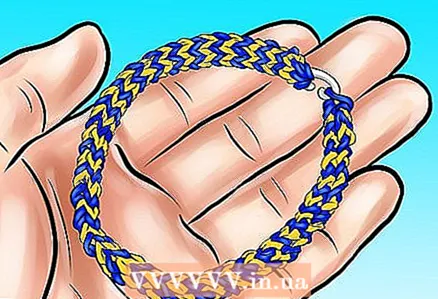 9 Complete the bracelet. Move the remaining tabs from the fork to your finger, then attach the clip to them to hold them together. Finally, pull out the first eyelet from the beginning of the bracelet and connect it to the other end with a clip. Your bracelet is ready.
What do you need
- Ribbons
- 2 pencils
- Crochet hook
- C-shaped clamp


