Author:
Carl Weaver
Date Of Creation:
27 February 2021
Update Date:
1 July 2024

Content
- Steps
- Method 1 of 3: Determining the Seat Height
- Method 2 of 3: Raising the bike seat
- Method 3 of 3: Testing the Seat Height
- Useful Tips
- A warning
The correct positioning of the bike seat not only ensures a comfortable ride, but also protects against knee injuries. There are several methods and formulas that professionals use to calculate the ideal seat height, taking into account the length of the inner seam of the trousers, shoes and bike frame. Raising the seat can be a simple task and only take a few minutes, but it will allow you to ride with ease and comfort.
Steps
Method 1 of 3: Determining the Seat Height
 1 Wear regular sneakers. Some riding shoes have thicker soles than regular ones; this may affect the calculation of the bicycle seat height. Even the smallest thickness affects the pedal control of the bike. Professional cycling shoes may have anti-slip soles that add height. This nuance must also be taken into account.
 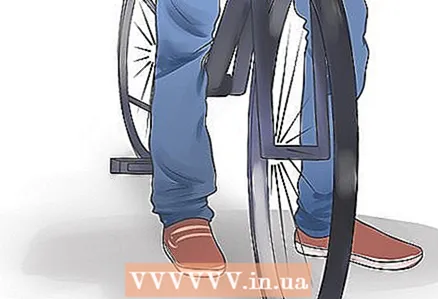 2 Stand next to the bike. Hold the bike by the handlebars and ask someone to help you to keep the bike level and not heel or wobble. Sit on the seat by yourself. Your entire weight should not be supported by the bike seat or saddle alone. The weight is distributed between the saddle, the pedals that hold your feet, and the handlebars that you hold on to with your hands.
  3 Let one pedal rotate freely. Touch this pedal with your feet. Do not tilt your bike. There are different interpretations of what the angle of the bent knee should be, but usually the knee is bent at an angle of 5 degrees (so the leg is slightly bent at the knee and the leg is not fully extended) and this is enough for you to sit on the seat and reach the pedal with your foot in its lower rotation position ...
  4 We will calculate the seat height that suits you. Professionals calculate the ideal seat height using formulas and calculations. These methods include the Greg Lemond formula and the 109% formula and others. Other professional cyclists find these formulas too straightforward because they do not take into account each person's unique body constitution, as leg length, shoe sole thickness and other factors can affect a comfortable seat height. However, calculating the formula will help you determine the approximate seat height that is right for you.Calculate with the formula and lift the seat up to that value. If you have to move your hips to reach the pedals while riding, the seat is too high.
 - Greg Lemond Formula: This formula takes into account seat height, shoe tread and handlebar angle. To calculate according to Greg Lemond's formula, measure the inside seam of your trousers - from a flat foot to the joint of the crotch and middle seams of the trousers. Do not put on shoes when taking measurements. Multiply the resulting value (in inches or centimeters) by 0.883. The result is the distance from the center of the carriage to the lowest point of the top of the seat. # *Formula 109%: When using this formula, the ideal seat height is 109% of your inner leg length. To get the value you want, measure the inside seam of your trousers - from a flat foot to the joint of the crotch and middle seams of the trousers. Multiply the resulting value (in inches or centimeters) by 1.09 to get the desired value. The result obtained is the length in inches between the top of the seat and the pedal in the lowest position.
Method 2 of 3: Raising the bike seat
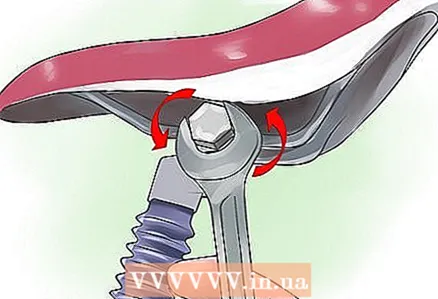 1 Loosen the bolt or saddle post arm mount. Look under the bike seat to see if there is a lever that can be pulled, or if there is a bolt that needs to be loosened with a ratchet or wrench. The saddle post folds into the bike frame and this completely loose fit is called the saddle tube. The saddle post is held in the seat tube by a locking bolt or cam clamp lever. If there is an eccentric clamp lever, then you do not need tools to lift the seat. If there is a bolt, then you will need a ratchet, wrench, or allen wrench. Most saddle posts require a 13 or 14 mm wrench or a 5 or 6 mm universal wrench. Loosen the bolt by unscrewing it to the left or counterclockwise.
  2 Use a marker to mark the desired seat height on the saddle post. Sit on the bike for a comfortable position, place your feet in the desired position and lift the seat up to a comfortable position. Ask a friend to mark a marker on the saddle post so you can fix the seat at the desired level later.
 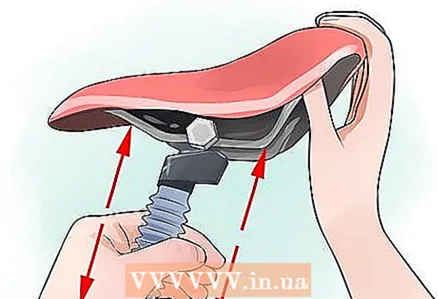 3 Raise the seat. Move the bike back and adjust the seat height to the mark. The seat should move freely up and down, although the saddle post may need to be twisted slightly. The saddle should move smoothly up and down. It is not necessary to move the saddle post from side to side as this can scratch the frame seat tube. Raise the seat to the optimum position for you.
 - The bike seat has a minimum number of tube insert marks. This is the minimum distance that the saddle post fits into the bike frame so that the seat does not rise any higher. If you need to raise or lower the seat below the limit, then this bike is not suitable for you.
- To adjust the seat height of a recumbent bike, sit on it with your shoes on. Straighten one leg and place it on the pedal, but bend slightly at the knee. Move the seat forward or backward so that there is a slight tilt at the knee as you sit in the saddle. Typically, on a recumbent bike, the lever is under the seat, which rises when you move it.
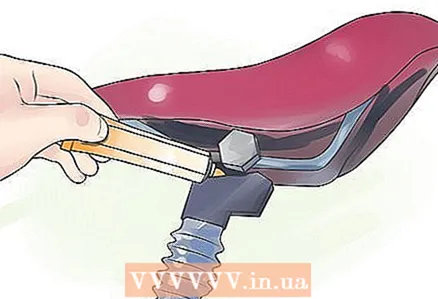 4 Lubricate the frame seat tube. If the saddle post is difficult to move due to too much friction or a tight fit inside the seat tube, then pull out the seat tube completely and lubricate the inside. If the seat tube is made of carbon fibers, use graphite powder as a lubricant, which can be ordered online from any car or home improvement store.
 - If the seat tube is stuck completely, look for the cause.It may be rusty, so you need to apply grease or any other oil to loosen the steel frame, or if the frame is aluminum, use ammonia. If the saddle post does not fit the size of the seat tube, you will need to completely pull it out with a flat head screwdriver. Rotate the saddle from side to side to help loosen it. As soon as you pull out the seat tube, either completely lubricate the holder and tube, or replace the seat tube with a new one that fits perfectly to the bike frame.
 5 Adjust the seat to the bike frame. The nose of the seat is usually parallel to the bike frame. Look at the seat from above so you can see if it is in line with the frame or not. Depending on the characteristics of each person, it may be more convenient for you to rotate the seat slightly to the left or right.
  6 Adjust the angle of the seat up or down. For men, it is more comfortable if the seat spout is slightly raised, while for women it is more comfortable if the spout is slightly lowered. This slope is negligible. Do not tilt the seat too much; even though it may seem comfortable while sitting on a bike, while riding it can create additional stress on the arms and shoulders. If the seat is tilted down too much, you will move out of it while riding. And so you will be pushing back from the handlebars, which will put additional stress on your hands as you ride.
  7 Tighten the bolt or lever. If the seat is bolted, tighten with a wrench, Allen wrench, or use a ratchet. If the seat is secured with a quick release lever, replace it. You may need to tighten the side bolt on the arm so that there is sufficient tension when lowering the arm. Use a wrench to hold the bolt while tightening the lever. After a few turns of the lever, close it and see if there is enough tightening. If you tightened too much, unscrew the bolt a few turns and test again.
Method 3 of 3: Testing the Seat Height
 1 Try cycling with a new seat height. Take a ride to see if the height is adjusted correctly. Legs should be comfortable on the pedals, but not bend or straighten too much. Adjust the height right away, since you have already got all the necessary tools.
  2 Perform minor adjustments over the next week. You may need to adjust the seat height slightly or tilt the seat angle after a week of use. The seat often feels uncomfortable if you haven't used your bike for a while and decide to go on a long ride. When your body gets used to constant driving, check the seat height again. Your ideal height may be slightly higher than you originally thought. If you raised the seat and the ride became immediately easier, then it was too low.
  3 Don't be afraid to adjust the seat height every time you cycle. The seat may move slightly while riding, especially if the bike is of poor quality or is already worn out. You can adjust the height before every ride. As you adjust, you will gradually find the fastest and easiest way that will take a matter of minutes. This will allow you to ride in comfort, especially if you are taking a long walk.
Useful Tips
- You can ask your local bike store to do a seat lift. They are aware of the bike's comfort and fit and can help you figure out the best seat height.
- If you have raised the seat and still experience discomfort while cycling, the handlebars may need to be adjusted. This will affect the angle of your back while riding, which can ease the strain on your back and arms when properly adjusted.
A warning
- Some riders, especially men, experience crotch numbness after cycling long distances. This numbness is the result of impaired blood flow in the arteries of manhood, which can lead to impotence or prostatitis. If you feel this kind of discomfort, then you need to adjust the seat by lowering it or lifting the spout of the seat up. You may also consider buying a new saddle. )


