Author:
Florence Bailey
Date Of Creation:
25 March 2021
Update Date:
1 July 2024

Content
- Steps
- Method 1 of 3: Step 1: Growing seedlings indoors
- Method 2 of 3: Step 2: Planting seedlings
- Method 3 of 3: Step 3: Caring for Planted Asters
- What do you need
Asters bloom in late summer and fall and have bright, daisy-like flowers. Some species of this perennial grow as little as 20 cm (8 in) in height, while others grow up to 2.4 m (8 ft), but despite this, the rules for caring for them are almost the same.
Steps
Method 1 of 3: Step 1: Growing seedlings indoors
 1 Prepare the seeds already in winter. If you decide to plant them indoors, you should do this about one to two months before transplanting seedlings under the open sky.
 - Seeds vary quite a bit in germination, so don't expect everyone to germinate.
- Since seed germination cannot be predicted in advance, many gardeners prefer to buy already grown seedlings from nurseries, or use shoots separated from mature plants.
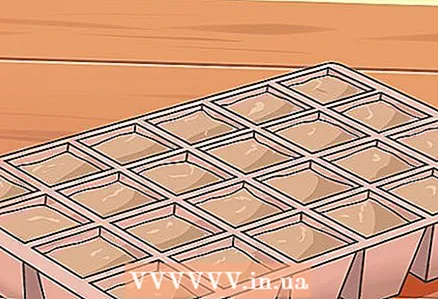 2 Fill small containers with seedling medium. Place the seedling soil in the wells of a large plastic seedling container.
 - If you do not have a special container for growing seedlings, use plastic cups, pots, or other small containers. They should be 7.5 to 10 cm (3 to 4 inches) deep.
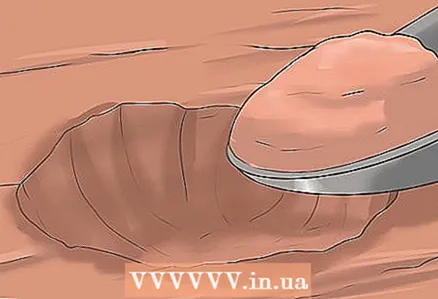
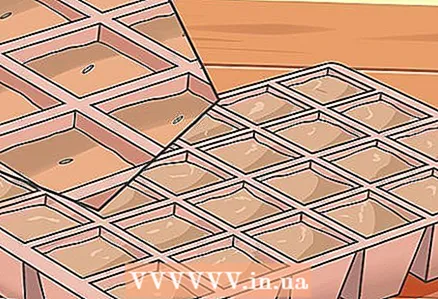 3 Plant the seeds. Place one seed in each cell (container). As you do this, press each seed into the soil to a depth of about 2.5 cm (1 inch).
 - After placing the seeds in the cells, lightly sprinkle the formed pits with soil.
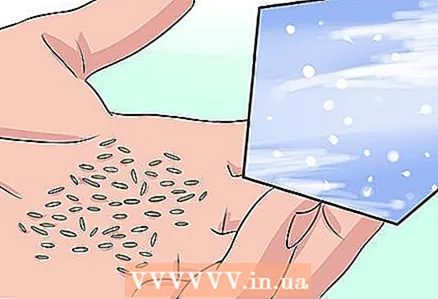
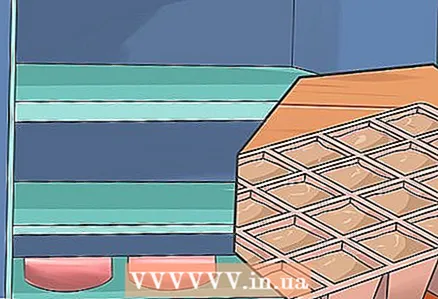 4 Place the seedling container in the refrigerator. Cover the container loosely with plastic wrap and refrigerate. Refrigerate the seeds for four to six weeks.
 - Placing seeds in the cold simulates the conditions they experience in their natural environment during the winter. Using a refrigerator in place of the frozen soil under the open sky prevents seeds from freezing and dying.
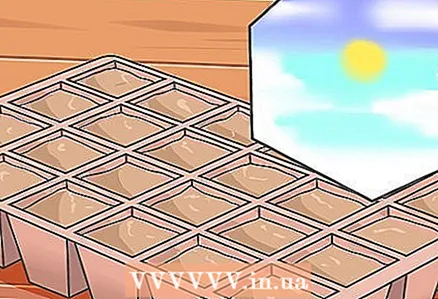 5 Transfer the seeds to a sunny location. About two to four weeks before the expected last freeze, remove the seeds from the refrigerator. Place the seed container indoors in a place with good sunlight.
 - This place should be illuminated by sunlight for at least six hours a day.
- Before you can take the seeds out into the open sky, you must allow them to form. This usually takes a short time.
Method 2 of 3: Step 2: Planting seedlings
 1 Wait for the arrival of spring. In the first half of spring, after the end of the last frost, aster shoots can be transplanted under the open sky.
 - This does not depend on whether you grew the shoots yourself indoors, purchased them in a nursery, or separated them from adult plants.
 2 Find a well-lit area with good drainage. Asters prefer well-lit or only partially shaded areas. The soil should be rich to medium quality and well drained.
 - Avoid planting asters in heavy clay soils, as they are difficult to remove moisture.
- To improve drainage, you can plant asters on a hill or on a hillside, but this is often not required.
 3 Improve the soil. If the original soil is not rich enough, some dense nutritious compost should be added to it before planting the asters.
 - Use a garden pitchfork or a heel to clear an area of 30 to 40 cm (12 to 15 inches) to accommodate a single shrub.
- Add 5 to 10 cm (2 to 4 inches) of compost. Using a garden pitchfork, mix the compost with the loosened soil.
 4 Dig a deep hole for each aster bush. The diameter of each hole should be twice the diameter of the cell or pot in which the seedlings were grown. The depth of the hole should roughly match the depth of the containers used to prepare the seeds.
 - The distance between the plants should be 30 to 90 cm (1 to 3 feet). Bushes of miniature varieties can be spaced 10 to 15 cm (4 to 6 inches).
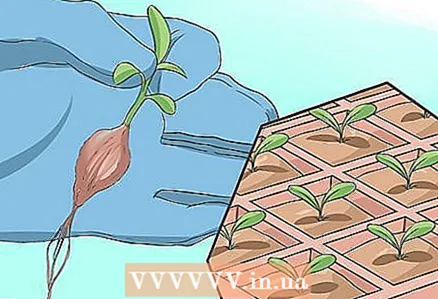 5 Remove the seedlings carefully. Pulling out each shoot, gently press on the walls of the plastic container in which it is enclosed. Start from the bottom, slowly working your way up. This will remove the seedlings along with the root ball.
 - If you are having difficulty removing the seedlings from the containers, moisten the soil in them with water. This will compact the soil and make it easier to remove.
- If you are not able to press on the walls of the container when taking out the seedlings, take it by the upper edge and carefully slide it along the wall of the scoop. Then rotate the scoop in a circle, moving it along the side of the container. Having described a circle with a scoop, you can gently shake out the soil along with the seedlings and root ball enclosed in it.
 6 Place the seedlings in the previously cut hole in the soil. Place one seedling unit at the center of the appropriate hole so that the top of the root ball is flush with the surrounding soil.
 - Carefully fill in the remainder of the hole around the root ball with soil removed from the hole earlier in the excavation.
- Rub the soil gently with your hands at the planting site.
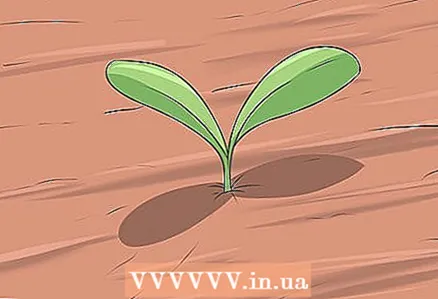
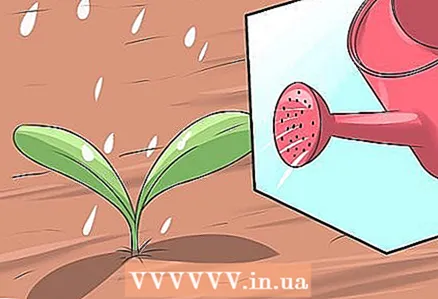 7 Water the seedlings well. After placing the seedlings in the soil, thoroughly water them with water to compact the soil and allow the seedlings to take root in their new location.
 - There should be no large puddles on the surface of the soil, but the soil should be noticeably moist.
Method 3 of 3: Step 3: Caring for Planted Asters
 1 Place humus on the soil. Immediately after planting and every spring after planting, surround the asters with a 5 cm (2 in) layer of humus.
 - Before placing new humus in the spring, remove all traces of the old one.
- Humus cools the soil in summer and warms in winter. It also inhibits the growth of weeds.
 2 Water the plants as needed. Monitor the amount of rainfall every week during the growing season. If there is less than 2.5 cm (1 inch) of rainfall in a week, the soil should be additionally watered.
 - Asters are sensitive to the amount of moisture and usually weaken if there is too much or too little of it.
- In the event of a lack of water, plants lose flowers and leaves.
- Excessive moisture can cause plants to turn yellow and dry out.
 3 Enrich the soil with the correct amount of fertilizer. At a minimum, a thin layer of compost should be added to the soil every spring before starting a new growth period.
 - For best results, mix a balanced general-purpose fertilizer into the soil once a month. When doing this, follow the instructions on the fertilizer package.
 4 Prune your plants twice a year. Prune lightly in the spring and more thoroughly in the fall.
 - Pinch young shoots in the spring so that the bushes grow wide. This will make the plants thicker.
- Once the foliage is dead before winter, prune the bushes. Cut off any branches and shoots that are sickly, unhealthy, or cut off all stems 2.5 to 5 cm (1 to 2 inches) above ground level. For most types of asters, both options are equally good. Cutting the entire trunk can improve the growth of asters over an extended period, but will delay the onset of flowering by several weeks.
- If you live in colder climates, you may need to do a thorough circumcision in the spring rather than in the fall. Untouched plants are more likely to survive the harsh winter.
- To improve the overall appearance of asters, you can regularly remove dried buds from them, but this does not affect the health of the plants. When removing old, dried buds, be careful not to damage the nearby young buds.
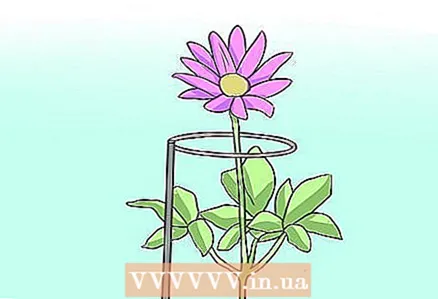 5 Support tall plants. Many types of asters can grow without props, but if you are growing one of the taller varieties and the bushes begin to tilt downwards, set up props and tie the stems to them.
 - The support should be about 30 cm (12 inches) above the bush for which it is intended.
- Drive a post into the ground about 5 to 7.5 cm (2 to 3 inches) from the main stem of the plant.
- Gently tie the branches of the bush to the post using woolen yarn or nylon stockings.
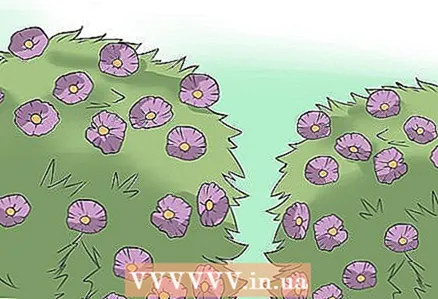 6 Divide the bushes every two to four years. As the plants grow thicker, splitting can help better utilize their potential for further growth. As a result, the bushes will retain their vitality, and their flowering will remain lush.
 - Wait until spring comes before dividing.
- Gently dig half to two-thirds of the intended bush. Save the rest in the same place.
- Divide the portion you dug into two or more portions. Each of them should contain from three to five shoots.
- Divided parts can be planted in another part of your garden, or in a friend's garden. After replanting them properly, care for them as if they were newly planted seedlings.
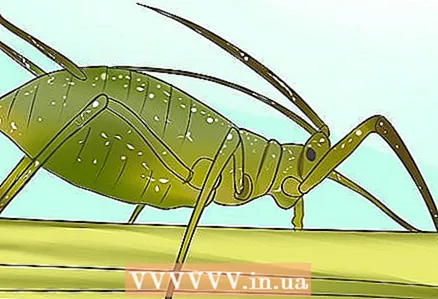 7 Watch out for possible diseases and pests. Usually asters are not too vulnerable to them, but some species can fall prey to powdery mildew, rust, white smut, leaf spot, bark cancer, aphids, tree mites, slugs, snails, chlorosis, nematodes.
 - Preventing a disease is easier than curing it. Therefore, it is better to choose a variety of asters for the garden, which have a high resistance to diseases.
- For plant diseases, use appropriate pesticides and fungicides to treat them.
What do you need
- Aster seeds, shoots or separated plant fragments
- Plastic containers for seedlings
- Soil for growing seedlings
- Compost
- Garden pitchfork or sapka
- Spatula or scoop
- garden hose
- Humus
- General purpose fertilizer
- Gardening scissors
- Supports for plants
- Pesticides (if necessary)
- Fungicides (if necessary)


