Author:
Joan Hall
Date Of Creation:
5 July 2021
Update Date:
1 July 2024

Content
- Steps
- Method 1 of 4: Pulp paperwork
- Method 2 of 4: Burn the documents
- Method 3 of 4: Shred your documents with a shredder
- Method 4 of 4: Know How to Destroy Electronic Documents
- Tips
- Warnings
Every month you receive documents with confidential information. These can include bank statements or credit card statements, payment slips, and checks. Also, you may be working for a government organization or a private company that deals with classified information. If you just throw confidential documents in the trash can, unauthorized people may gain access to them. To protect information from illegal or unethical use, such documents must be completely destroyed.
Steps
Method 1 of 4: Pulp paperwork
 1 Place your documents in a large trash can. Make sure the bucket is tall and wide enough to fit easily all the documents and liquid you use to destroy them. In addition, the bucket should be made of a material that is strong enough so that it will not deteriorate or lose shape when it comes in contact with bleach and water. You will need about 22 liters of liquid to dissolve the documents, so the bucket should be at least 30 liters. In this case, you will have enough space to jumble the documents. A plastic bucket will work that can handle the diluted bleach.
 - A large plastic bucket can be purchased at a hardware store, supermarket, or online.
- Remove documents from envelopes and folders.
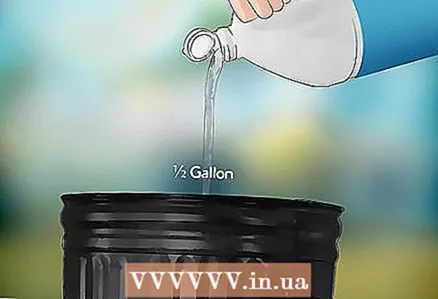 2 Pour in 2 liters of bleach. There are 8.25% all-purpose bleaches on the market that are perfect for your needs. The bleach will help spread the paper out. It is often used to recycle used paper. In addition, the bleach destroys the dyes used in the ink. With its help, you can more completely destroy confidential information contained in documents.
 - Bleach is a hazardous chemical that can cause serious health problems if used improperly. Be careful not to get the bleach on your skin or eyes and do not swallow it. Only dilute bleach with water. If mixed with other substances such as ammonia or toilet cleaner, toxic and life-threatening fumes can be released.
- When handling bleach, it is recommended to wear long sleeves, trousers and closed shoes, and to protect your eyes.
- If you accidentally swallow the bleach solution, drink a small glass of water or milk immediately and call 103 for the emergency room.
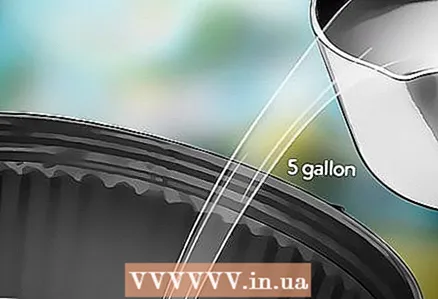 3 Add 20 liters of water. While bleach is the more potent (and harmful) ingredient in the mixture, plain water will do the job. When the paper is thoroughly saturated with the solution, you can grind it into a mushy mass.
 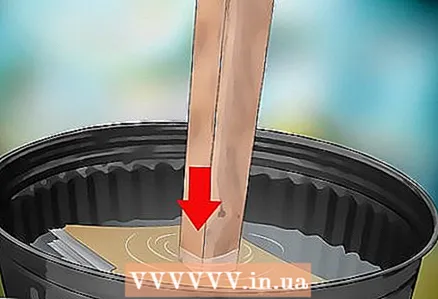 4 Submerge the documents in the bleach and water solution. It is necessary to completely immerse all documents in the solution so that they are properly wet and decomposed. If the liquid does not completely cover the paper, there are two options: you can destroy documents in smaller portions, or you can use a larger container. If you chose the latter, add the same proportions of water and bleach.
 - Do not push documents into the solution with bare hands, as this can cause serious damage to the skin. Use a paint mixer or mop for this, or wear long rubber gloves.
- Let's say you have a 30-liter plastic bucket with 22 liters of solution. If you have too many documents and this volume is not enough, you can purchase a 90 liter bucket, in which case you will need to use 6 liters of bleach and 60 liters of water.
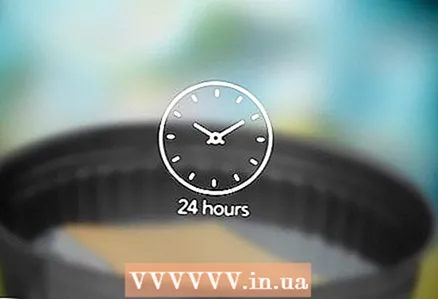 5 Soak the documents in the solution for 24 hours. In 24 hours, a mixture of bleach and water will destroy confidential documents, and you can easily make a mushy mass out of them. If you are in a hurry and need to shred the papers faster, try the other methods below.
 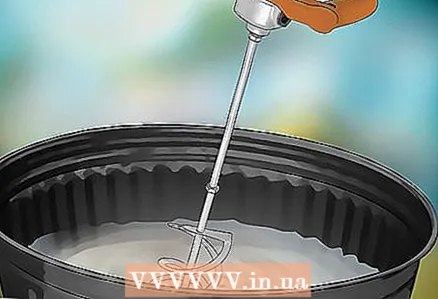 6 Stir the papers with a paint mixer. In 24 hours the documents will soften and fade. Stir them using an electric mixer to get a smooth, mushy mass.
 - If at any time you want to check the contents of the bucket, be sure to wear rubber or nitrile gloves so that the mixture does not get on your skin.
- You can also use a mop, broom, walking stick, or other long-handled tool. Any object that you can use to stir and tear the paper will do.
- Check carefully if there are any large lumps left in the resulting gruel.If you find scraps of paper from which you can extract any information, tear them up by hand and thoroughly mix what is left of the documents.
 7 Place the resulting mixture in the sun to dry. If you put the pulp directly into the trash bags, it can leak out and the garbage collectors will refuse to collect them. Instead, spread a tarp and pour the pulp directly onto it. Wait until the pulp is completely dry before discarding it.
 - The dry pulp can be used as mulch in the garden or vegetable garden. However, in this case, it is best not to add bleach to the water when preparing the pulp.
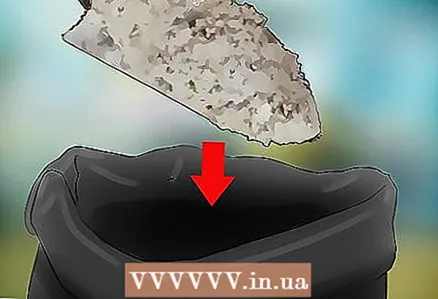 8 Discard the pulp. Transfer dry pulp to trash bags and discard. Anyone digging through your trash will have a hard time pulling anything out of the recycled paperwork. The pulp can also be used as compost.
Method 2 of 4: Burn the documents
 1 Set up a fire pit outside. A fire bowl is perfect for burning documents - it is above the ground and can be covered with a lid. This will provide better airflow, which will burn the documents more completely. In addition, in this case, it will be more difficult for the papers to fly out of the flame.
 - Please note that in many countries and regions it is forbidden to burn garbage within the city. Sometimes this requires permission. Find out what regulations are in place in your area.
- You can also use a waste incinerator. These stoves are specially designed for outdoor incineration of garbage.
- A metal barrel will work as well. For making fires, steel barrels with a volume of 200 liters are often used, such a barrel will well hold burning documents. Note, however, that metal drums release toxic substances when heated.
- Individual documents can be burned in a cast iron bath. Make sure there is nothing on the bottom of the tub (eg rubber mats). In this case, if something gets out of control, you can extinguish the burning paper with water from the tap.
 2 Light a fire. It is usually easier to start a fire if you start with small pieces of wood and scraps of paper. Even destroyed documents can be used to start a fire. After the fire is on, add larger and larger pieces of wood until you get a stable flame.
 - Take precautions: there should be no dry bushes, paper and other flammable materials near the fire. To prevent the fire from spreading outside the fire, sprinkle sand around the perimeter. It is also advisable to surround the fire with stones.
- If you find it difficult to start a fire, use firelighter fluid. Be careful not to drop the bottle into the fire or to spill too much liquid, as this can cause an explosion or a flash of flame, which could result in burns. Stay away from fire when spraying the lighter fluid to avoid scalding your face, chest and hands.
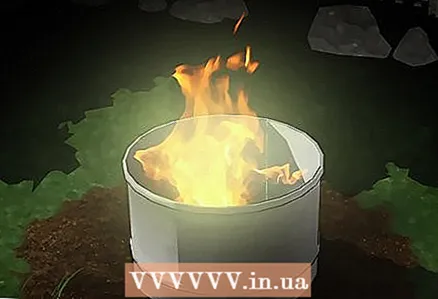
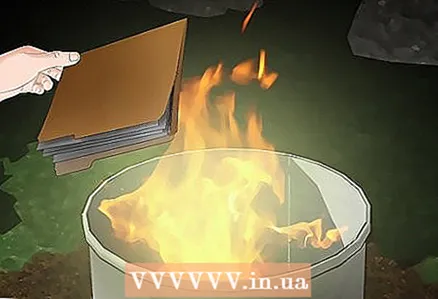 3 Put confidential documents on fire. Do not throw them all at once, otherwise separate fragments may fall out of the fire. Take the documents with metal tongs and burn them one at a time to completely burn them out. After a while, the fire will begin to give a stable flame near the central burning coals. Then you can put more papers on the fire.
 - Take care of good ventilation: this is important not only so that you do not inhale the smoke, but also to maintain a normal combustion. To ensure adequate ventilation, use an open wire rack and do not load too many documents at a time.
- Make sure that fragments of documents do not fly out of the fire. Even small scraps can be valuable.
- Burn confidential documents along with unnecessary waste paper. Unless something accidentally burns out, foreign papers will confuse anyone who tries to read the remains of important documents.
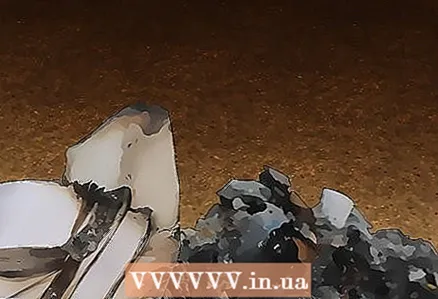 4 Check the ash. After everything burns out and the fire goes out, sort through the ashes and check if there are any surviving pieces of paper.The easiest way to find the remaining white paper in the ashes is. However, pay attention to the gray fragments on which you can still make out the text - they also need to be burned to the end.
 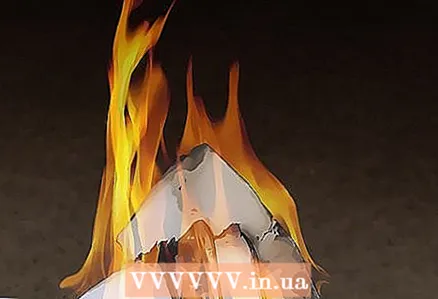 5 Burn the surviving fragments. Collect all the remains of the documents and light the fire again. Use heat-resistant gloves or long metal tongs to place them in the center of the fire.
 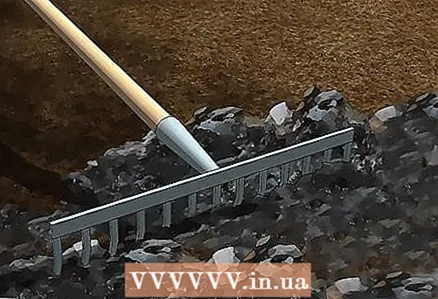 6 Scatter the ash. Wait for the fire to go out and the ash to cool down to normal temperature. Then collect the ashes in a sturdy bag. If you have a garden plot, spread the ash evenly over it.
 - A small amount of ash can also be added to the compost (if you have not used firelighter fluid).
- Dusting ash around your garden plants will scare away slugs and snails from them.
- It is also useful to dust the ground around deciduous trees with ash.
Method 3 of 4: Shred your documents with a shredder
 1 Access the cross cut shredder. For shredding confidential documents, a cross-cut shredder should be used rather than a common strip shredder as it cuts the paper into smaller pieces. Thus, you will protect yourself from potential information thieves and prevent them from recovering the destroyed pages from separate pages. Choose a shredder that produces strips no wider than one millimeter and cuts them across into 1-1.5 centimeter pieces.
 - Paper shredders are sold at office supply stores. By secrecy (the degree of paper shredding), they are divided into six classes. The first class corresponds to the roughest, and the sixth to the smallest fragments. For the destruction of important documents, we do not recommend using shredders that cut paper into pieces larger than 1.5 × 15 millimeters.
- Most fairly large firms have shredders and document shredding services. Please consult your office manager on this matter.
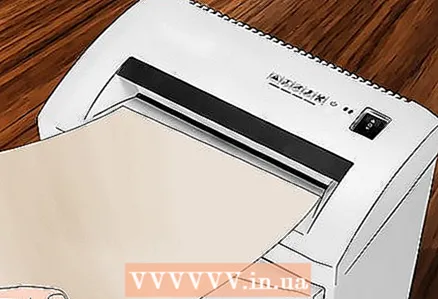 2 Shred documents in a shredder. Choose a suitable shredder, turn it on, and start feeding paper into the inlet. Continue until you have shredded all the paperwork. If there are more documents than the shredder can handle at one time, turn it off when it is full and remove the cut paper before proceeding.
 - Do not touch the inlet of the shredder. Hold the edges of the paper so there is some distance between your fingers and the inlet. Release the paper as soon as the shredder picks it up. First of all, take care of safety.
- Conventional paper shredders cut the paper into strips from which the sheets can then be reassembled. However, you should not tear documents with your hands either (for example, an important number may remain on a scrap about two centimeters long).
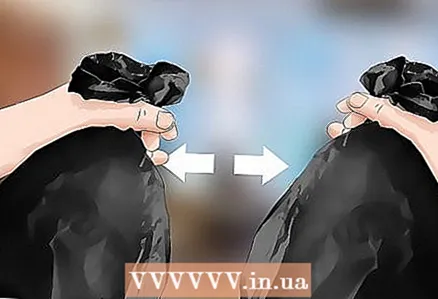 3 Divide the pieces of paper into separate bags. This is an additional security measure besides cutting documents into small pieces. Place the remainder of each document in a separate bag. In this case, to recover documents, thieves will have to sort through scraps not from one, but from several packages, which will greatly complicate their task.
 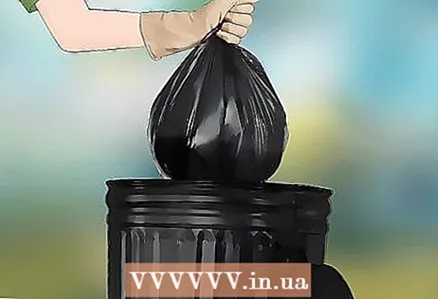 4 Throw away the leftover documents on the appointed day. If your home or office gets trash on a Tuesday, don't throw it away on Wednesday. Try to take out the trash so that it can be picked up immediately. It is best to keep it until the scheduled day and take it out just before the garbage truck arrives.
Method 4 of 4: Know How to Destroy Electronic Documents
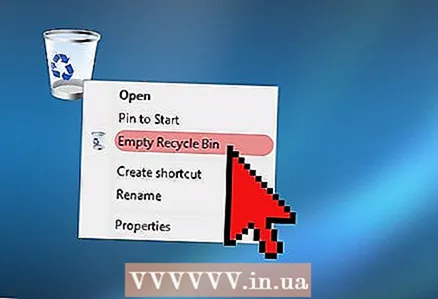 1 Delete documents. Find all sensitive files on your hard drive. Right click on them and delete them to trash. Empty the trash. This simple method is fine if no one is going to use more advanced methods to get your data. However, “deleted” files are fairly easy to recover, and various file recovery programs are available commercially.
 - Do not use this method if there is a risk that others will try to recover confidential information.
- Do not use this method if someone might use confidential information to harm you.
 2 Rewrite your hard drive. All information on the hard disk is represented in binary numbers 1 and 0. This is a computer language. Rewriters found on the Internet replace all the information on the hard drive with random strings of ones and zeros. If you decide to use this method, please note that data recovery will most likely fail.
 - Most rewriting programs make several "passes". In many cases, three passes are considered sufficient.
- Save the information you need to an external hard drive.
- Some programs, such as Eraser, allow you to manually overwrite individual files.
 3 Degauss the hard drive. This exposes a magnetic device (such as a hard disk) to a strong magnetic field that erases data. Ideally, this method allows you to completely demagnetize the device and make it impossible to use it further. The demagnetizer is quite expensive, but it can be rented. You can also contact a company that provides such services.
 - Once overwritten, data can sometimes be recovered, while demagnetizing damages the disk and the data cannot be recovered. Be sure to save all the information you need to an external hard drive or cloud storage.
- Do not use a demagnetizing device with a pacemaker, otherwise it could damage this medical device.
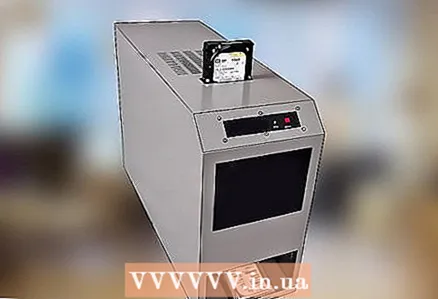
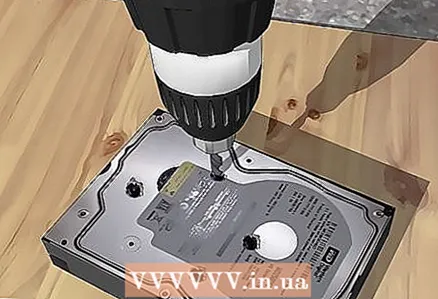 4 Physically destroy the hard drive. The most reliable method is to physically destroy the disk. You can destroy the disc with a hammer or drill, or heat it to high temperatures. Whichever method you choose, first remove the hard drive from the external case. If you are using a hammer, hit the blade firmly, or if you are using a drill, drill several holes directly into the drive. If you heat the disc (for example with a burner), melt it completely.
 - If you are using a blowtorch, wear heat resistant gloves and a face shield. For safety reasons, it is best to work on the ground or sand to avoid fire or explosion.
- Before using a hammer or drill, wear protective gloves and a mask to protect against flying debris.
- You can also shoot the hard drive with a pistol. Do not use firearms unless you are authorized to do so.
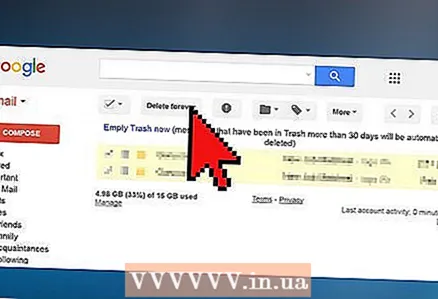 5 Don't forget to delete emails. Select emails that contain sensitive information and click delete or move to trash (depending on your email program). Many mail services on the Internet, such as Gmail, retain deleted messages for 30 days, and only then they become unavailable to users. After you delete the selected emails, open the Deleted Messages or Trash folder and see if they are still there. If you find messages in these folders, delete them from there.
 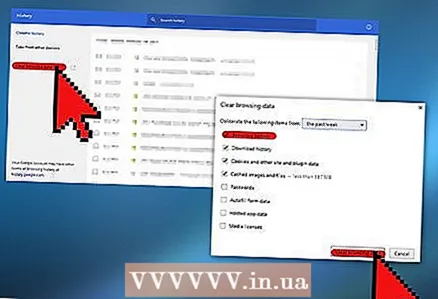 6 Clear browser history. You might not want others to know which sites you visit. Many browsers like Chrome, Firefox and Internet Explorer have an option to clear history. Go to the menu, find the history of visited sites and clear it.
Tips
- If you find yourself frequently shredding confidential documents, consider purchasing a cross cut shredder. Although it is more expensive than a conventional shredder, it will save you time.
- It is possible to burn documents on the barbecue grill, however this requires two people. To keep the fire burning, light it every 10-15 minutes and add paper. You will burn a whole garbage bag of paper in about 15-25 minutes.Transfer the paper with a metal stick to completely burn all documents. Prepare a garden hose just in case - if something catches on fire, the second person can pour water on the fire. When you're done burning the documents, have your assistant pour plenty of water over the ashes to make them black and sticky.
- Another way is to store the documents in a safe place and burn them once a year, or rent a shredder for a small fee. You can also find a company that shreds paper documents, as well as CDs, magnetic tapes, and even hard drives.
Warnings
- As with other things, be careful with fire.
- Do not burn plastic as its smoke is toxic.


