Author:
Helen Garcia
Date Of Creation:
13 April 2021
Update Date:
1 July 2024
Content
- Method 2 of 4: Sculpting from ribbons (harnesses)
- Method 3 of 4: Plastic sculpting
- Method 4 of 4: Modeling with a potter's wheel
- Tips
- Warnings
 2 Use a stiff wire to cut the clay in half and inspect the cut for bubbles and cracks.
 3 After kneading the clay, use one of the methods below to make your own pot.
Method 2 of 4: Sculpting from ribbons (harnesses)
- 1 Once the clay is warm and pliable, take a handful of clay and roll it into a long rope (ribbon). The diameter of the tape will determine the thickness of the walls of the pot. For your first pots, roll out the ribbons until they are slightly thicker than a pencil and 30 to 60 cm long, and keep them evenly thick.
- When rolling, thin and weak spots can form on the belt. Try to avoid their occurrence, but if this problem cannot be avoided, simply tear the tape at the weak point, set one part aside and finish off the other.
- 2 Make the bottom. Starting at one end, wind the tape in a spiral until you have the right size bottom. For example, if you are using ribbons about 0.6 cm in diameter, the base may be 8 cm in diameter.
- You can also make the bottom by rolling out some clay to about the same thickness as the ribbons. After that, you will need to cut off the excess with a knife, using a cup or plate as a template.
- 3 Prepare the clay and get started. Scribble along the edge of the bottom, backing about 0.6 cm, and moisten with water or slip (a liquid mixture of clay and water). Continuing to work, do the same with the bottom of the ribbons. This will strengthen the adhesion of the clay and make your pot stronger. Place the first tape on top of the base. Start wrapping it around the base to create a wall.
- 4 Strengthen the pot. To make the pot more durable, strengthen the grip of the clay by flattening the inside of the pot from top to bottom, forcing the clay from the overlying tape into the seam below it.
- To maintain the shape of the pot, support the outside while smoothing out the inside.
- If you wish, you can smooth both the inside of the pot and the outside.
- 5 When making a pot, shape it. Create the shape of the pot by adjusting the placement of the ribbons and shaping the clay as it smooths and strengthens.
 6 Complete the pot. Add any decorations or glaze if desired. Depending on the clay you choose, you can air dry the finished pot, bake it, or burn it in the oven. Follow the manufacturer's instructions to select the correct method.
Method 3 of 4: Plastic sculpting
- 1 Shape the ball. Roll the clay into a ball and make sure it is damp.
- 2 Make a hole. Stick your thumb in the middle of the ball at a distance, but do not pierce through: the bottom should remain about 0.6 cm thick.
- 3 Make the walls. Pinch the clay with your thumb and forefinger and lift it up.Work around the perimeter of the bottom, pinching the clay with each pass and pushing upward until the pot is the desired shape.
- 4 Level the bottom. Press the bottom against the inside of the table you are working on to keep it smooth and even.
- 5 Smooth the inside of the pot to the desired degree. Decorate. Follow your clay supplier's instructions for firing your pot.
- 6 You can also read our article "How to make a clay pot with your own hands".
Method 4 of 4: Modeling with a potter's wheel
- 1 Beat off the clay with your hands. Firmly toss the clay from one hand to the other to create a ball.
- 2 Dry the circle. This will help the clay ball stick to the circle as it spins. The last thing you need is a clay ball flying around the apartment.
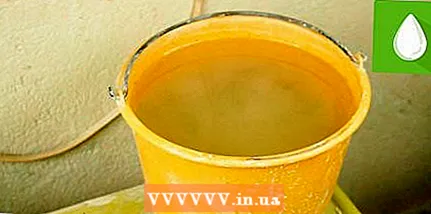 3 Have some water on hand. Place the bucket of water where you can easily reach it with your hands while working.
 - 4 Throw in the clay. Drop the clay ball as close to the center of the wheel as possible, then push it in to form a cone.
- 5 Start spinning the circle. After speeding up the rotation, moisten the clay and, with one hand on the side of the clay and the other on it, roll the piece in the center of the circle. Hold the clay with your hand on top to keep the clay from flying away.
- The clay will be centered when it doesn't stop wobbling and sits motionless on the spinning wheel. Don't stop spinning.
- 6 Wet your hands. Then make a cone out of the clay, and then squeeze a thick disk out of it. Repeat this step several times. This process is known as "hand clay preparation" and it helps to bring the clay to the desired condition. Make sure the clay is centered.
- 7 Stick your thumb into the center of the rotating mass, submerging it 1.5 cm from the bottom.
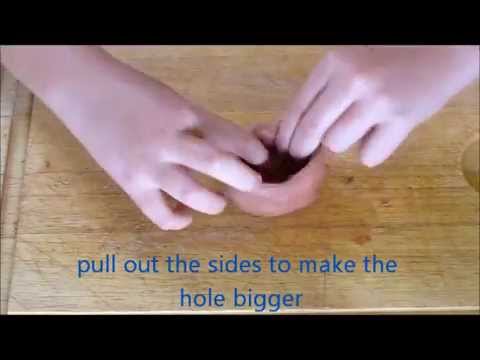
- 8 Lower 4 fingers into the hole and expand it to the size you need. Continue expanding the hole using your other hand outside the pot to shape it.
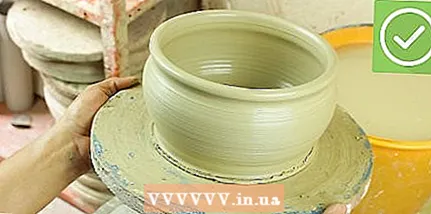
- 9 Work slowly. Gradually lift the clay, applying even pressure, until you reach the desired height.
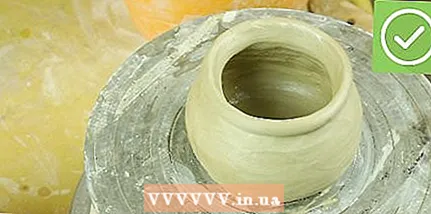
- 10 Expand the top. If you want the pot to be slightly wider at the neck, simply pull it back with the fingers of your hand in the pot. Don't put too much effort.
- 11 Remove the completed pot from the circle. Wet a circle (not a pot) and using a stiff wire or fishing line, hold it with both hands, pull it towards you to separate the pot from the circle.
 12 Follow the manufacturer's instructions for finishing and firing your clay pot.
Tips
- Do not knead the clay with your fingertips.
- A great way to avoid air pockets is to keep the clay in a ball shape without flattening it more than halfway. And all the time toss the clay in your hands. You can also throw clay onto a hard surface (such as a table) multiple times.
- If your pot breaks while rolling the tape, just knead the air bubbles out of the clay and start over.
- If you bought clay baked in the oven, then bake it on a glass surface. This will allow the clay to lag. An upside-down plate will also work.
Warnings
- Follow the instructions for baking the clay carefully unless it is an air-cured clay.
- Follow the directions for handling materials. Some clays stain wood.


