Author:
Carl Weaver
Date Of Creation:
22 February 2021
Update Date:
1 July 2024

Content
Water can seep through bathroom walls and cause significant damage to your precious home, unless you take protective action on your bathtub.
Steps
 1 Examine the connection between the bathroom and the wall. Clean off any old sealant, mold, and soap suds from the rim of the tub. Be careful not to scratch the surface of the tub. Rub with denatured alcohol to cleanse and remove moisture from each seam. Alcohol contains oil that leaves a residue (to keep your skin from drying out) and cannot be used to cleanse.
 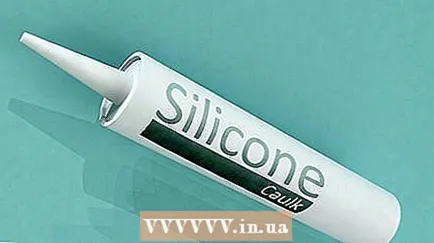 2 Use a sealant designed for the bath surface. There is a large selection in color and price. As you know, more silicone costs a lot of money. An antifungal agent is added to the kitchen and bath silicone sealant.
 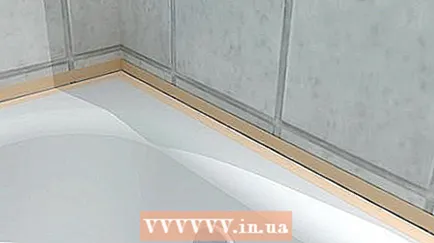 3 Apply duct tape on either side of where you will be making the new sealant collar, with the edges of the tape adhering exactly where you want the collar to end. This method is used by professionals to ensure the perfect looking side for a long time. There should be about one-eighth of an inch between the two pieces of tape.
  4 Load the sealant tube into the sealant gun. Using a sharp knife, cut off the tip of the applicator at the mark. The hole does not have to be very large to form a collar. The hole should not be so small that you have to apply a lot of pressure to the sealant tube. Most tubes have a thin baffle inside to prevent drying. Pierce the barrier by inserting a wire, nail, or sharp object into the tip.
  5 Hold the sealant gun off the ground and trigger the sealant to fill the tip. The sealant should flow out, not splash or drip. Release the hook to relieve the pressure in the tube.
 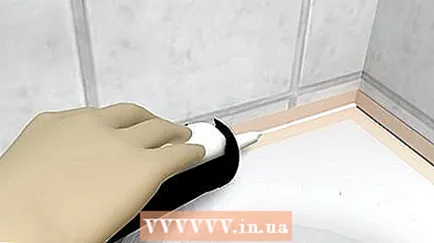 6 Aim the tip at the seam. The tip should be slightly above the surface, almost touching it. As soon as you squeeze the hook, watch the sealant flow out. Move the gun along the seam line in one steady motion, creating an even bead. Before the jet ends, quickly release the hook and repeat the process again, creating an even bead along the entire length of the seam. Don't stop until you reach the corner.
  7 Repeat these steps for each seam line, usually three walls.
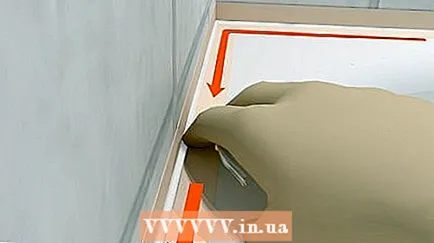 8 When you stop, remember to release the trigger to relieve the pressure in the tube, otherwise the sealant will continue to leak.
 9 Smooth out the sealant between the two pieces of tape by pressing inward in the corner with your fingers as you work the length of the sealant and remove any excess sealant. Keep a few paper towels handy to dry your finger on.
 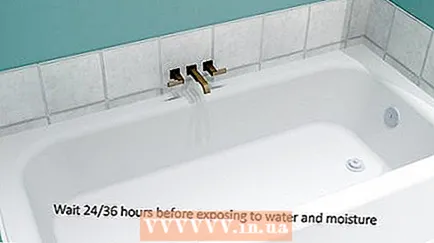 10 Remove the adhesive tape before the sealant begins to dry. The collar should look neat and even, but you may need to peel it back a little with your finger for perfect quality. The sealant should dry 24/36 hours without being exposed to water or moisture.
Tips
- When smoothing out the sealant, start at a corner and go 1/2 or 3/4. Then start at the opposite corner and join in the middle. After joining the segments, smooth them, slightly lifting the device with which you smooth it so that a tubercle does not form.
- After removing the tape, smooth the edges that were near the tape, ensuring a smooth transition to the surface. Otherwise, dirt will collect on the edges.
- The edge should completely fill the seam between the bathtub and the wall. The side must adhere evenly to the bathroom and the wall along its entire length, otherwise there may be leaks.
- To remove silicone from your hands, simply wipe them with a plastic bag. This will instantly cleanse them and allow you to use your fingers to finish applying the silicone without worrying about sticking.
- A bit off-topic, but when you tile the inner corner, always use a sealant instead of mortar. The grout will crack and leak in the corners, while the silicone will remain flexible as it dries. If you have wide cement joints you can always find colored, cementitious grout in the same color as the grout, but this is not always a good choice for bathrooms and showers.When using this type of application, make sure to use a silicone-containing grout, or pure silicone.
- Fill the tub three-quarters so it flexes slightly while the silicone dries for 24 hours. Otherwise, the tub will bend when you sit in it and pull out the seam, because thermal destruction and rupture of the seam are possible.
- Have a large trash bag handy to throw away waste (like masking tape) because there is silicone on it and you won't have silicone all over the place.
- To completely stop flow from the silicone gun, pull back the plunger each time the gun is pushed down.
- If you haven't completely used the sealant tube, you can plug the tip with something like a wooden peg or nail and wrap it with tape or plastic. The sealant will last for a short time.
- Cleaning and smoothing is easy with paper towels and Formula 409 or other household cleaners.
- Lay a rag to put the silicone gun on so you don't drip.
- The silicone sealant is very sticky and won't leave your fingers so easy. Therefore, when applying, wear rubber gloves.
- Use a small paper cup half full of water, add 2 or 3 drops of dish soap and gently stir with your finger to dissolve. You don't want foam. Using this will make it easier for your finger to wash off and the silicone will not stick to it.
- Be sure to remove all traces of mold and old sealant before applying new - yes, even areas that you don't think will fall off.
- You can smooth the sealant with a damp finger, a plastic spoon, or a rounded ice cube.
- The process can be very similar to decorating a cake.
- A sharpened flathead screwdriver can work well for removing old sealant (make sure not to damage the surface underneath).
- Do only one wall at a time because the silicone runs out pretty quickly.
- Stubborn mold stains can be removed in advance by soaking paper towels in a bleach solution and spreading soaked paper over problem areas. Leave the white towels on for a while until the stains disappear. After removing the paper, the surface takes time to dry before you start removing the silicone. This can be done while the old silicone is still in place, so start doing it the day before.
- Here's a good tip on how to get a straight line using duct tape. Buy a long piece of window molding. Cut 3 pieces of a long piece that exactly matches the length and width of the tub. Put them on the tub. Stick the tape on the wall while you slide the tape over the molding. Then flip the molding over onto the wall and glue the tape to the tub, pressing it against the molding as you roll it out.
- To prevent the tape from staying in place for too long, leaving unwanted seams in the silicone, cut it into lengths - one length per wall - with a knife. This way you can apply the silicone one section and remove the smoothing tape without breaking the tape in the next section. However, be careful with the knife when working in the bath
Warnings
- Do not use the bath while the sealant is drying. Read the exact instructions on the silicone tube.


