Author:
Janice Evans
Date Of Creation:
1 July 2021
Update Date:
1 July 2024
Content
This article will show you how to reduce the size of a video file without losing quality.Compress the video file if you are going to publish it on the Internet, as this will reduce the amount of data required to stream or send the video to the viewer. You can use Handbrake or QuickTime (on a Mac) to do this.
Steps
Method 1 of 2: Handbrake
 1 Download and install Handbrake. Go to https://handbrake.fr/downloads.php in a web browser and click on the Download link under your computer operating system, then install Handbrake by following these steps:
 - Windows - double click on the downloaded installation file, and then follow the instructions on the screen.
- Mac - double click on the downloaded DMG file, allow to install third-party programs (if necessary), drag the Handbrake icon to the shortcut of the “Programs” folder and follow the instructions on the screen.
 2 Start Handbrake. Click on the pineapple and glass icon.
  3 Click on Open source (Open source). It's in the upper-left corner of the window.
 - If this is your first time launching Handbrake, you may not have to click on "Open Source".
 4 Click on File (File). This option is marked with a folder icon.
  5 Select a video. Go to the folder with the desired video, click on it and click "Open". The video will open in the Handbrake window.
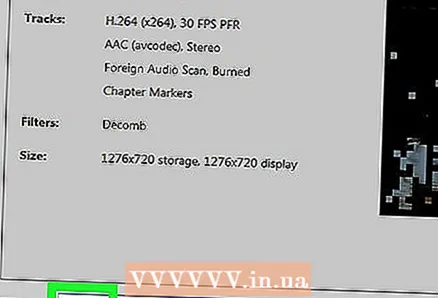
  6 Select the video quality. In the right pane of the Handbrake window, select one of the available quality options, for example "Very Fast 720p30".
 - Select an option that matches the quality of the video or is lower than its current quality. For example, if the current video quality is 1080p, select the option “1080p” or lower; if the video is 720p, select “720p” or lower.
- The Fast and Very Fast options are best for compression.
 7 Enter a name for the file. Replace the current filename that appears in the middle of the Handbrake window with a new name (for example, [video name] compressed).
 - To select a different folder to save the video, click “Browse”, select a folder, enter a file name (if necessary) and click “Save”.
 8 Check the box next to "Web Optimized". It's in the middle of the window. In this case, the video will be compressed using web standards.
 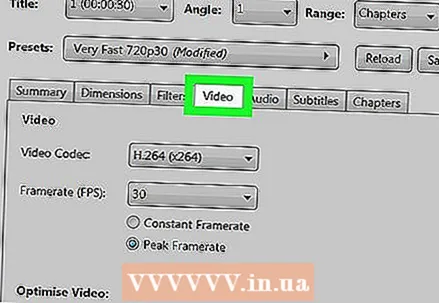 9 Click on the tab Video (Video). It is at the bottom of the window.
  10 Make sure all values are correct. There are a number of settings on the Video tab - if they are incorrect, change them. To do this, click on the value and select another from the menu:
 - Video Codec (Video Codec) - Select "H.264 (x264)".
- Framerate (FPS) (Frame rate) - select "30".
- Peak framerate or Peak (Restrict) - check the box next to this option.
- Encoder Level or Level (Level) - select the value "4.0".
 11 Click on Start Encoding (Start coding). This button, marked with a Play icon, is at the top of the window. The video compression process will start.
 - On your Mac, click Start.
 12 Wait for the compression to complete. This can take a long time, especially if the video is over 200 megabytes. When the process is complete, find the video in the selected folder and play it.
Method 2 of 2: QuickTime
 1 Open the video in QuickTime. For this:
 - Select a video.
- Click "File".
- Select "Open With".
- Click "QuickTime Player".
 2 Open the menu File. You will find it in the upper left corner.
  3 Please select Export. It's at the bottom of the File menu. A pop-up menu will appear.
  4 Select the video quality. Select a quality equal to or lower than the current video quality. The "Save" window will open. SPECIALIST'S ADVICE
Gavin anstey
Video Producer, Cinebody COO Gavin Anstee is Cinebody COO. Cinebody offers custom content creation software that allows brands to quickly create original and engaging video content by working with creators from all over the world. Prior to pursuing a career in software and video production, Gavin studied journalism at the University of Colorado at Boulder. Gavin anstey
Video Producer, Chief Operating Officer, CinebodyReduce the export resolution. Gavin Anstey, Producer, recommends: “If you are compressing a large video file such as 4k resolution, reduce the export resolution. For example, export video in 1080 MOV format to reduce the file size and resolution, that is, to compress the file. "
 5 Enter a new name for the video. Do this in the text box at the top of the window.
 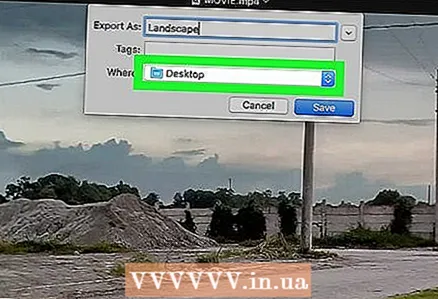 6 Select a folder to save the file. Open the Where menu, and then click the desired folder (for example, the Desktop folder).
  7 Click on Save. It's in the lower-right corner of the window. The video compression process starts.
  8 Wait for the compression to complete. When this happens, the Export window will close. Now find the video in the selected folder and play it.
Tips
- Severe compression can adversely affect the quality of some videos. There are also some videos that do not need to be compressed at all.
- Some videos, such as those recorded with smartphone cameras, are already compressed.
- Use two-step video encoding if possible. It will take longer than one-step encoding, but you will end up with better quality video.
Warnings
- Don't compress the video too much. In this case, the picture may be distorted beyond recognition.


