Author:
Janice Evans
Date Of Creation:
27 July 2021
Update Date:
1 July 2024

Content
- Steps
- Part 1 of 5: How to Prepare to Create a Server
- Part 2 of 5: How to Create a Server on Windows
- Part 3 of 5: How to Create a Server on Mac OS X
- Part 4 of 5: How to set up Hamachi
- Part 5 of 5: How to Connect to the Server
- Tips
- Warnings
In this article, we'll show you how to create a Minecraft server on a Windows or Mac OS X computer using the free Hamachi software. Keep in mind that the described process can only be applied on a computer - it will not work on Windows 10, mobile devices, and game consoles.
Steps
Part 1 of 5: How to Prepare to Create a Server
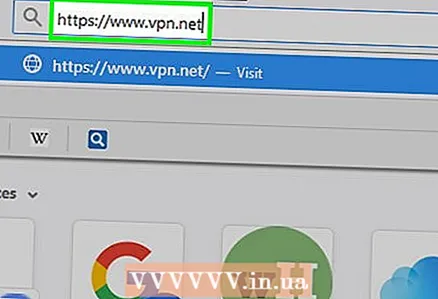 1 Download Hamachi. Go to https://www.vpn.net/ in your computer's web browser and then click on the green Download now button in the middle of the page. The Hamachi installation file will download to your computer.
 - If you have a Mac computer and have a file for Windows ready for download at VPN.net, click Mac under the Download button to download the file for Mac OS X.
 2 Install Hamachi. This process depends on the operating system:
 - Windows: double click on the downloaded file, select the language, click "Next", check the box next to "I have read (a)", click "Next", click "Next" again, and then click "Install". Click Yes if prompted during the installation process, and then click Finish.
- Mac: Open the zip file, double-click the Hamachi installer, click Open, allow install programs from unknown developers, check the box next to “I have read” and click Install. Enter your password if prompted, then click Finish.
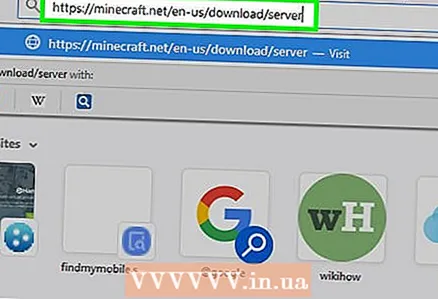 3 Download the server file (JAR file). Go to https://minecraft.net/en-us/download/server in your computer's web browser, and then click on the "minecraft_server.1.13.jar" link in the middle of the page.
 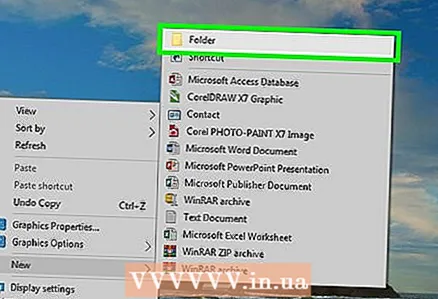 4 Create a folder on your desktop. In this folder, you will create and run a Minecraft server. To create a new folder:
 - Windows: right click on the desktop, select New from the menu, click Folder, enter Minecraft Server and press ↵ Enter;
- Mac: Click on your desktop, click File> New Folder, enter Minecraft Server and press ⏎ Return.
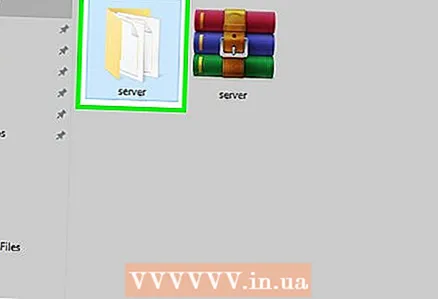
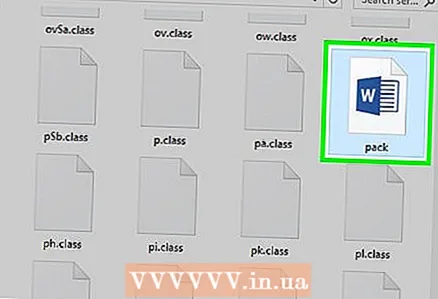
 5 Move the server file to the Minecraft Server folder. Drag the downloaded JAR file to the Minecraft Server folder.
 - Alternatively, you can click on the server file, press Ctrl+C (Windows) or ⌘ Command+C (Mac), open the Minecraft Server folder, then click Ctrl+V (Windows) or ⌘ Command+V (Mac).
Part 2 of 5: How to Create a Server on Windows
 1 Update Minecraft and Java. To update Minecraft, double click on the Minecraft launcher and wait for the game to update. To update Java, open Internet Explorer, go to https://java.com/en/download/installed.jsp, click Confirm Consent and Continue, and follow the onscreen instructions.
 - If nothing happens, Java is up to date.
- Most modern browsers do not support Java, so use Internet Explorer to avoid errors.
 2 Open the Minecraft Server folder. To do this, double click on the folder.
  3 Double click on the downloaded server file. Several files will appear in the folder.
 - Double-click on the server startup file, which has a gear icon rather than a text document.
 4 Accept the server terms of use. In the folder "Minecraft Server" find the text file "eula", double click on it, in the line "eula = false" delete false and replace with true, click Ctrl+Sto save your changes, and then close the "eula" file.
 - Now the line "eula = true" should look like this: "eula = false"
 5 Double click on the downloaded server file. Additional files will appear in the folder.
  6 Close the server when it shuts down. When the bottom of the window displays "Done!" (Done), click the "X" in the upper right corner of the window. Now you can start configuring Hamachi.
Part 3 of 5: How to Create a Server on Mac OS X
 1 Update Minecraft and Java. To update Minecraft, double click on the Minecraft launcher and wait for the game to update.
 - Starting in June 2018, the latest version of Java is version 8 update 171. You can download it by going to https://java.com/en/download/ and clicking Free Java Download.
 2 Double click on the downloaded server file. Several files will appear in the folder.
  3 Accept the server terms of use. In the Minecraft Server folder, find the eula text file and double-click it to open it in TextEdit. Then in the line "eula = false" remove false and replace with true, click ⌘ Command+Sto save your changes, and then close the "eula" file.
 - Now the line "eula = true" should look like this: "eula = false"
 4 Double click on the downloaded server file. Additional files will appear in the folder.
  5 Close the server when it shuts down. When the bottom of the window displays "Done!" (Done), click the "X" in the upper right corner of the window. Now you can start configuring Hamachi.
Part 4 of 5: How to set up Hamachi
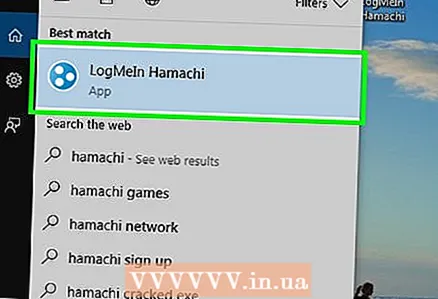 1 Start Hamachi. Open "Start"
  (Windows) or Spotlight
  (Mac) enter hamachi and click or double click on "LogMeIn Hamachi" in the search results.
 - On a Mac, Network is the menu at the top of your screen.
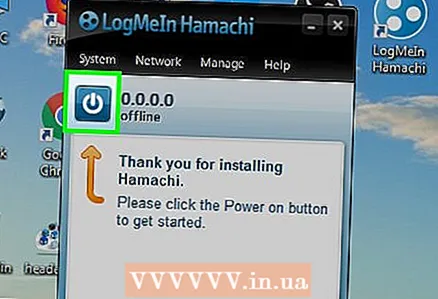 2 Click the icon
  . It's at the top of the Hamachi window. Hamachi turns on, and the authorization window appears on the screen.
  3 Create a Hamachi account. Click "Register" in the upper right corner of the window, enter your e-mail address in the "Email" line, enter the password in the "Password" line, re-enter the password in the "Repeat password" line and click "Create an account".
  4 Click on the tab Network. You will find it at the top of the Hamachi window. A menu will open.
 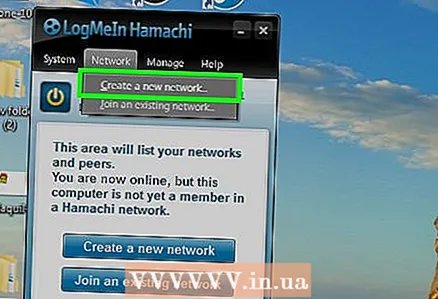 5 Click on Create a network. This option is on the menu. A pop-up window will appear.
 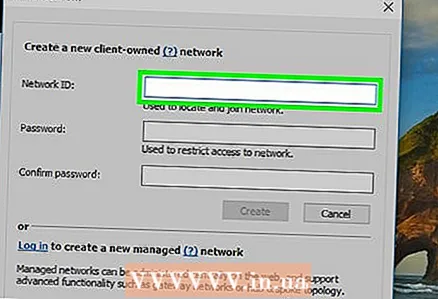 6 Enter the server name. Do this on the "Network ID" line.
 - If you enter a name that is already taken, Hamachi will warn you about it.
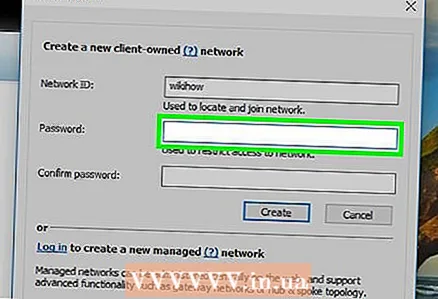 7 Enter the server password. Do this in the "Password" line and in the "Confirm password" line.
 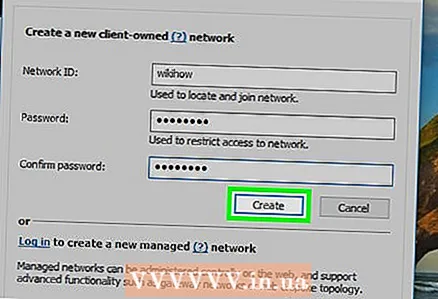 8 Click on Create. It's near the bottom of the window. The server will be created.
  9 Add the Hamachi IP to your server file. For this:
 - right click (or hold Control and left-click) on the IP address at the top of the Hamachi window;
- click "Copy IPv4 Address";
- rename the text file "server.properties" in the "Minecraft Server" folder to "serverproperties";
- double click on the "serverproperties" file and then confirm or select a text editor;
- click to the right of the "server-ip =" line;
- click Ctrl+V (Windows) or ⌘ Command+V (Mac);
- save the file - press Ctrl+S or ⌘ Command+Sand then exit the text editor.
 10 Connect to the network. Right click (or hold Control and left-click) on the server name, and then select Go Online from the menu.
 - If the menu contains the Go Offline item, the server is already connected to the network.
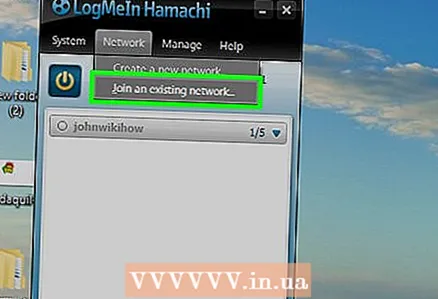 11 Invite friends to connect to your server. To do this, ask them to install Hamachi, and then do the following:
 - open Hamachi;
- click "Network";
- click on "Join an existing network";
- enter the server name and password in the "Network ID" and "Password" lines, respectively;
- click "Connect".
Part 5 of 5: How to Connect to the Server
 1 Run the server file. Double click on the Java Server file in the Minecraft Server folder. The server file command window will open.
 - Make sure the Hamachi server is running.
- To grant yourself moderator rights, enter / op username (where instead of username substitute your Minecraft username) in the line at the bottom of the server window, and then click ↵ Enter.
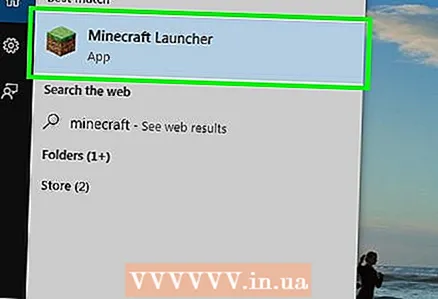 2 Start Minecraft. Double-click the Grass Ground Block icon and then click Play at the bottom of the Launcher window.
  3 Click on Online game. It's in the middle of the main menu.
 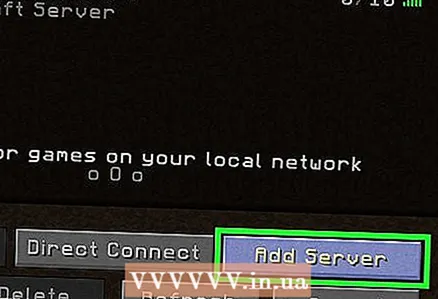 4 Click on Add Server. You will find this option at the bottom of the window.
 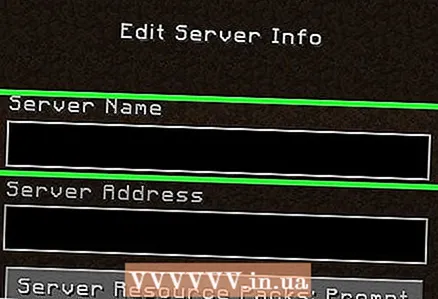 5 Enter the server name. In the "Server name" line, enter the server name that is displayed in Hamachi.
  6 Enter the server address. Click on the "Server Address" line and then click Ctrl+V (Windows) or ⌘ Command+V (Mac). This line will display the IPv4 address that you copied earlier.
 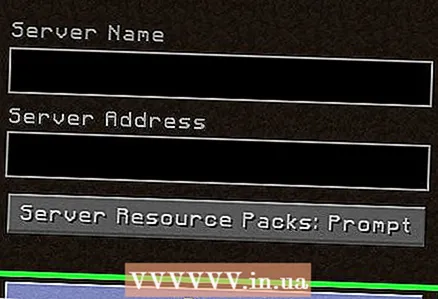 7 Click on Ready. This button is at the bottom of the window. Minecraft will start looking for a server.
  8 Select a server. When your server appears in the search results, click on its name to select it.
 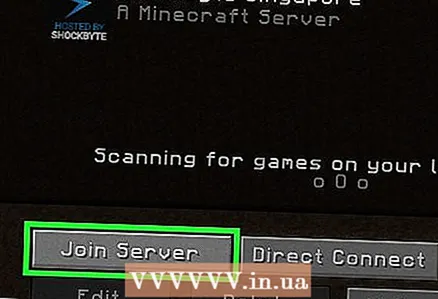 9 Click on Connect. It's near the bottom of the window.
  10 Wait for the server to boot. After that, you will join the game world.
 - You may need to enter a password to join the game world. In this case, enter the password that you provided when you created your server with Hamachi.
Tips
- When hosting a server, it's best to connect your computer directly to a modem to provide the most reliable internet connection possible.
Warnings
- Hamachi and the server file cannot be used for the Windows 10 version of Minecraft.


