Author:
Judy Howell
Date Of Creation:
2 July 2021
Update Date:
1 July 2024
Content
- To step
- Method 1 of 3: PhotoRec (any operating system)
- Method 2 of 3: ZAR (Windows)
- Method 3 of 3: Data Rescue 3 (Mac)
- Warnings
Have you accidentally deleted some files from your SD card, or have you lost files because the SD card is damaged? If you act quickly and stop using the card, you may still be able to recover the files using data recovery software. There are a few free options available for each operating system to this end, as well as paid programs that may be easier to use.
To step
Method 1 of 3: PhotoRec (any operating system)
 Stop using the SD card. If the files have been deleted, there is a chance that the data is still there, but set to be overwritten by new data. By no longer accessing the SD card, you increase the chance that the data will not be overwritten.
 - Until you attempt to recover the files, it is best to remove the SD card from the device you are using it in.
 Download PhotoRec. PhotoRec is a free, open source data recovery program that works on Windows, OS X and Linux.
  Extract the program. PhotoRec does not need to be installed. Extract the file photorec_os just from the ZIP file. It os will be replaced by your operating system. For example, the Windows version is photorec_win
 Insert your SD card. Place your SD card in your computer using an SD card reader, or in your camera, after which you connect it via USB.
  Start PhotoRec. PhotoRec starts in a command window. You use your arrow keys to navigate through the program.
  Select your station. Select your SD card from the list of available drives and press ↵ Enter.
  Select partition. Chances are, your SD card has only one partition. Select it with the arrow keys.
  Select it File Opt-menu. This menu option can be found at the bottom of the window.
  Deselect files you are not looking for. You can speed up the search significantly by only searching for a few file types. Try to save your images, then select only JPG, JPEG, RAW, CR2, PNG, TIFF, GIF, BMP, SR2, and DNG.
  Select the Search menu option to continue. This will open the file menu.
  Select the file type. If you want to restore files from SD card, select Other.
  Select which space on the drive to analyze. If you want to recover deleted files, select Free. If you want to recover files from a damaged card, select Whole.
  Choose a directory to save your recovered files. Create a new location if you need a map that is easy to access.
  Wait for the files to be restored. This process can take quite a long time. The number of recovered files is displayed in real time.
  Browse your recovered files. File names will be corrupted, so you will have to manually search through the recovered files to find the ones you are looking for. If you can't find the images you are looking for, try another data recovery option.
Method 2 of 3: ZAR (Windows)
 Stop using the SD card. If the files have been deleted, there is a chance that the data is still there, but set to be overwritten by new data. By no longer accessing the SD card, you increase the chance that the data will not be overwritten.
 - Until you attempt to recover the files, it is best to remove the SD card from the device you are using it in.
 Download and install ZAR (Zero Assumption Recovery). You will have to purchase the full version of ZAR, and the demo version allows you to restore only images. Download ZAR from the developer's website only.
 - On the ZAR website, click the "image recovery" link at the bottom of the page. This will allow you to install the free demo for image recovery.
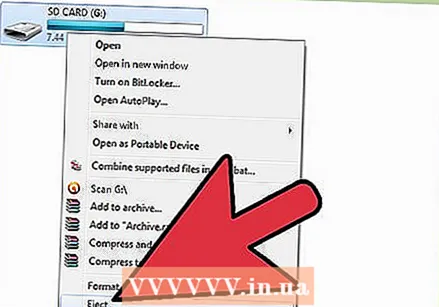
 Insert your SD card. Place your SD card in your computer using an SD card reader, or in your camera, after which you connect it via USB.
 - Your computer may ask to format the SD card or indicate that the card is unreadable. Do not do this, so do not format it, as this can overwrite the location on the map where your images are located.
 Open the Image Recovery tool in ZAR. Start ZAR and click Image Recovery (Free). In other programs you will have a similar button. Some programs may skip this step.
  Select your SD card. In "Disks and Partitions", select the SD card. This should be indicated as an SD card. Click Next to start the recovery scan.
  Choose which files you want to recover. You will be presented with a list of images that the software found on your SD card. Select the images you want to restore, or choose "All" to restore all lost images. You may not get a preview of it, and the file names may have been lost.
 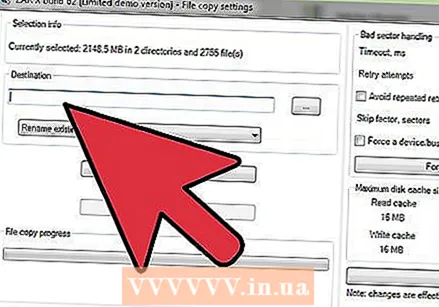 Choose where you want to save the recovered files. If your SD card is damaged, do not save the recovered files on that card. You can create a folder or specify a location on your computer to store the images. This will save your images should something go wrong with the SD card again.
  Copy the files. Click on Start copying the selected files to restore the images. The selected files are saved in the location you specify.
 - Some images may not be fully recoverable. Even though the thumbnail looks okay, the image itself may be partially or completely damaged.
Method 3 of 3: Data Rescue 3 (Mac)
 Stop using the SD card. If the files have been deleted, there is a chance that the data is still there, but set to be overwritten by new data. By no longer accessing the SD card, you increase the chance that the data will not be overwritten.
 - Until you attempt to recover the files, it is best to remove the SD card from the device you are using it in.
 Download and install Data Rescue 3. Data Rescue 3 is not free, but is one of the more powerful data recovery programs available for OS X. You can purchase Data Recovery 3 from the developer's website or the Mac App Store.
 - If you prefer a free option, try PhotoRec.
 Insert your SD card. Insert the SD card into your Mac. If you don't have an SD card slot, you can also connect an external USB card reader or insert the card into a camera and connect it to your computer.
  Start Data Rescue 3. You will find this program after installation in the folder "Applications". Select "Start New Scan" from the main menu.
  Select your SD card. A list of drives appears in the Data Rescue window. Select your SD card from the list.
 - You may also be asked to select a partition. Most SD cards will only have one partition, but if there are more, select the whole SD card.
 Choose your scan method. First, choose "Deleted Files Scan". This will search the free space for files deleted from the SD card. If this method does not yield results, you can proceed with a "Quick Scan" followed by a "Deep Scan". Click Start after selecting a scan type.
  Wait for the scan to complete. This process can take a while, especially with a Deep Scan. If you want to pause the scan, you can click the Suspend button.
  Select the files you want to recover. After the scan is completed, you will be presented with a list of possible files to recover. Check the box next to each file or folder you want to restore.
 - If you have done a Quick or Deep Scan, you will find the files in the "Found Files" section of the results.
- If you performed a Deleted Files or Deep Scan, you will find the files in the "Reconstructed Files" section of the results. File names can usually no longer be recovered.
- You can preview the files by selecting them from the list and clicking "Preview". Not all file types can be previewed.
 Recover the files. When you are done selecting the files, click Recover and select a location on your computer to save the files. Click Open when you have found a suitable location.
Warnings
- Not all lost images can be recovered. If the SD card has become badly damaged or formatted, or if the deleted images are overwritten with new images, it may be impossible to recover your lost images.


