Author:
Ellen Moore
Date Of Creation:
13 January 2021
Update Date:
29 June 2024

Content
The capacity of new USB flash drives (flash drives) is constantly increasing, so sometimes it is advisable to create several partitions on the flash drive. This makes it easier to manage files, or you can create a boot partition and store the data on another partition. To create partitions in Windows, you need to use third-party programs, and this system imposes some restrictions. On Mac OS or Linux, partitions can be created using the built-in utilities.
Steps
Method 1 of 3: Windows
 1 Understand the limitations that Windows imposes. Partitions on a USB flash drive can be created using third-party programs, but Windows will only work with one partition. In the same programs, you can specify the active section, but it will be the only one. There is no way to get around this Windows limitation.
 - Partitions on a flash drive cannot be created using the built-in Disk Management utility - for this you need to use a third-party program.
- In Mac OS and Linus, you can work with all sections of the flash drive.
 2 Create a backup copy of important files stored on a USB flash drive. When creating partitions, all data stored on the flash drive will be erased, so copy it to your computer's hard drive.
 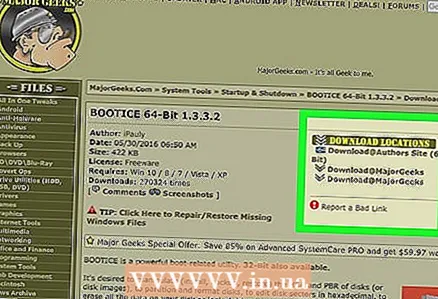 3 Download Bootice. Using this program, you can create several partitions on a USB flash drive, as well as indicate the active partition with which Windows works.
 - Download Bootice from the website majorgeeks.com/files/details/bootice.html.
 4 Unzip the downloaded file to extract Bootice. To do this, you need an archiver that supports the RAR format.
 - 7-Zip is a free archiver that supports RAR format. This archiver can be downloaded from the website 7-zip.org... After installing 7-Zip, right-click on the downloaded archive (RAR file) and select "7-Zip" - "Unpack here".
- Trial version of WinRAR (rarlabs.com) supports RAR format, but works for a limited time.
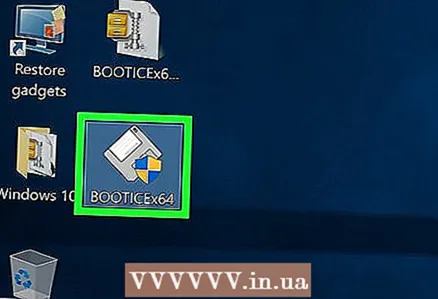 5 Start the Bootice program. It is located in the folder that was created when unpacking the archive. Most likely, Windows will prompt you to confirm the launch of the program.
 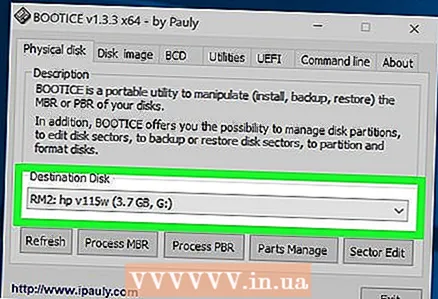 6 Choose the correct USB stick. Open the "Destination Disk" menu and select the USB stick. Make sure not to select your computer's hard drive to avoid losing all of the data stored on it. To choose a flash drive, be guided by its capacity and the letter that designates the flash drive.
 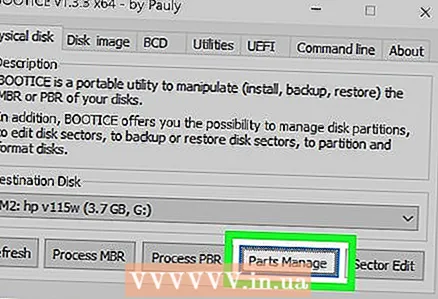 7 In Bootice, click on Parts Manage. The Partition Manager window will open.
 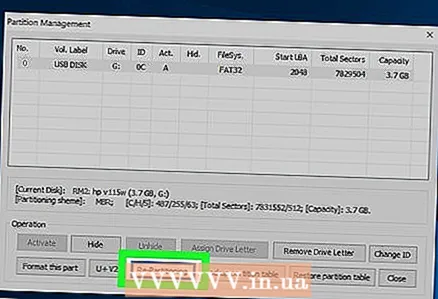 8 Click Re-Partitioning. The Removable disk repartitioning window will open.
  9 Select “USB-HDD Mode (Multi-Partitions)” and click “OK”. The Partition Settings window opens.
 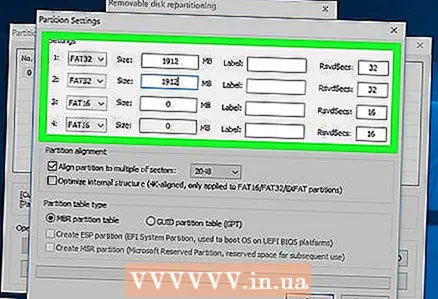 10 Set the size of each section. By default, the available space will be evenly distributed across the four partitions. However, you can manually set the size of each partition. If all four partitions are unnecessary, specify 0 as the extra partition size.
 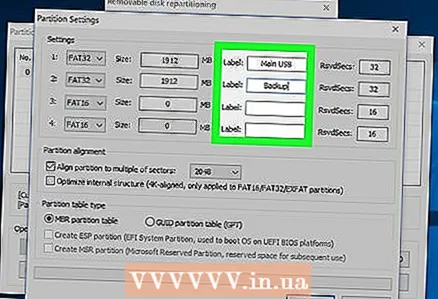 11 Assign labels to the sections. They will help identify the different sections. Remember that Windows only displays one partition, so partition (volume) labels are especially useful.
  12 Indicate the type of each section. Select "MBR" or "GPT" at the bottom of the window. MBR is suitable for storing data or for creating a bootable partition for old systems. GPT is suitable for working with UEFI or for creating a bootable partition for new systems.
 - If you plan to create a bootable GPT partition, check the box next to “Create ESP partition”.
 13 Click "OK" to start the formatting process. The system will notify you that all data stored on the flash drive will be erased. The formatting process will take some time.
 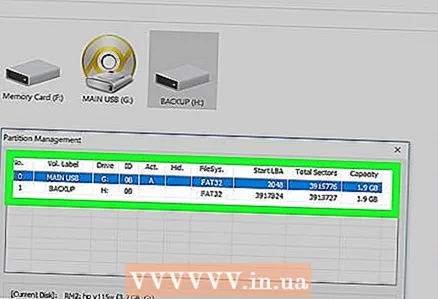 14 Get started with the active partition. When formatting is complete, Windows will display the first partition (as a removable disk). You can work with this section as with any USB flash drive.
 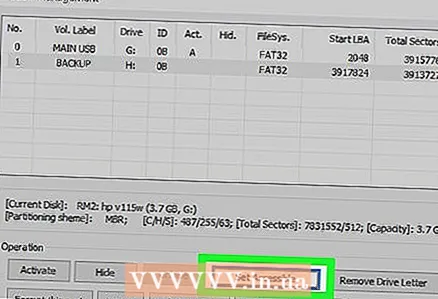 15 Specify the active partition in Bootice. Since Windows only displays one partition, use Bootice to specify it. This will not affect the data stored in the partitions, and the active partition can be changed at any time.
 - In the Partition Manager window, select the partition you want to make active.
- Click Set Accessible. After a moment, the active partition will be changed and Windows displays the new partition.
Method 2 of 3: Mac OS
 1 Create a backup copy of important files stored on a USB flash drive. When creating partitions, all data stored on the flash drive will be erased, so copy it to your computer's hard drive (or to another storage medium).
  2 Open Disk Utility. It is located in the Applications / Utilities folder.
  3 Select your USB stick. Do it in the left pane.
  4 Click Erase. A new window will open.
 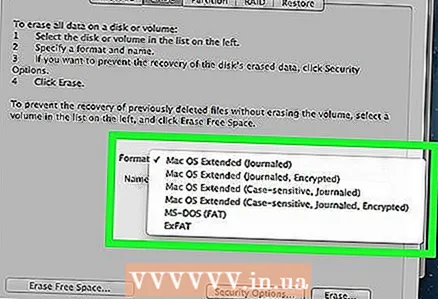 5 From the Scheme menu, select GUID Partition Map. This will create partitions on the USB stick.
 - From the Format menu, choose OS X Extended (Journaled). This will make it easier to resize partitions, but the flash drive will only work on computers running Mac OS.
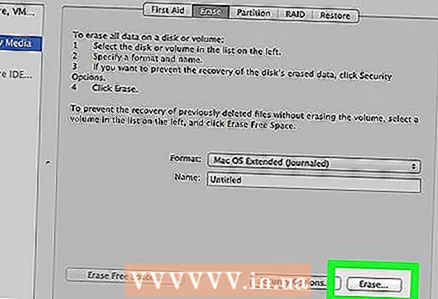 6 Click Erase to format the disk. The new partition scheme is applied, and the Partition button is activated at the top of the Disk Utility window.
 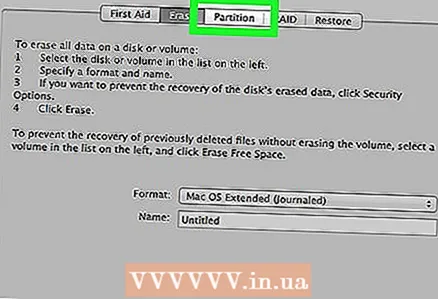 7 Click Section. A new window with sections will open.
 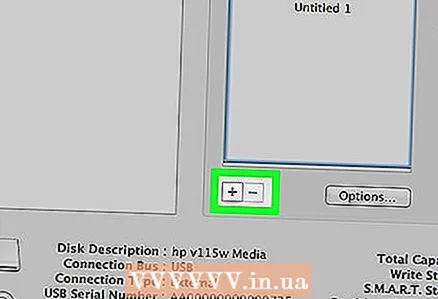 8 Click "+" to create new sections. You can create an unlimited number of sections.
  9 Drag the borders of the pie chart to resize the sections. The size of the partition can be anything, and the sizes of adjacent partitions will be automatically resized accordingly.
 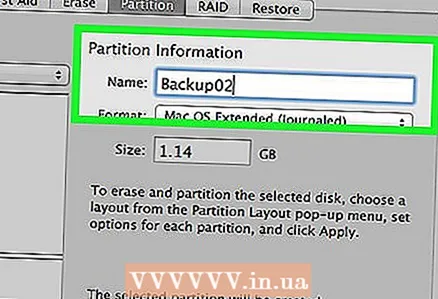 10 Select a section and assign a label to it. Each section can be assigned a unique label to distinguish the sections from each other.
 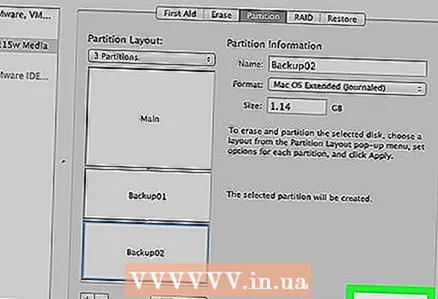 11 Click "Apply" to create sections. This will take some time.
 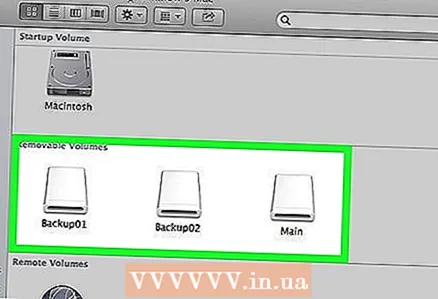 12 Get started with sections. In Mac OS, you can work with the created partitions as if each partition is a separate USB flash drive.
 - If you selected the "OS X Extended (Journaled)" option, the flash drive will only work on computers running OS X. Windows does not support working with multiple partitions on a flash drive (unless you use special programs).
Method 3 of 3: Linux
 1 Create a backup copy of important files stored on a USB flash drive. When creating partitions, all data stored on the flash drive will be erased, so copy it to your computer's hard drive (or to another storage medium).
 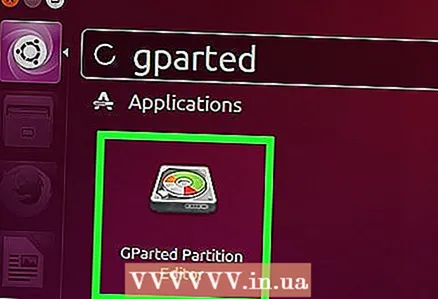 2 Start the GParted Partition Editor program. Ubuntu comes with GParted Partition Editor preinstalled as an example. If your Linux distribution does not have GParted, download it from the website gparted.org/ or through your distribution's package manager.
 - On Ubuntu, open the Main Menu (Dash) and type GParted; or click "System" - "Administration" - "GParted".
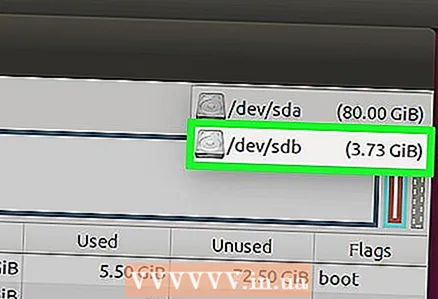 3 In the menu (in the upper right corner), select the USB flash drive. Identify the USB flash drive by its capacity. Make sure not to select your computer's hard drive to avoid losing all of the data stored on it.
 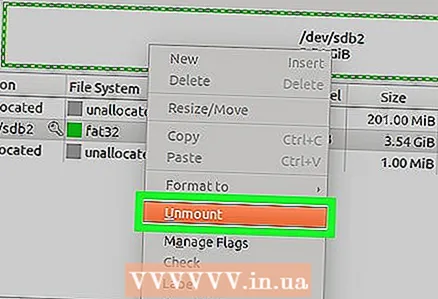 4 Right-click on the light field at the top of the screen and choose Unmount from the menu. Unmounting the flash drive will disable it, which is necessary to prepare for creating partitions.
 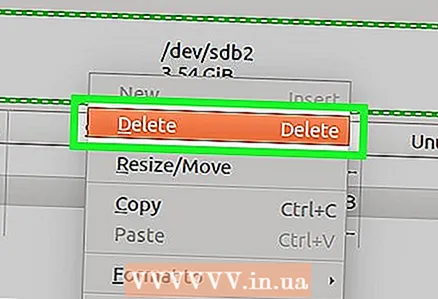 5 Right-click on the field and select Delete. The current partition (on the flash drive) will be deleted.
 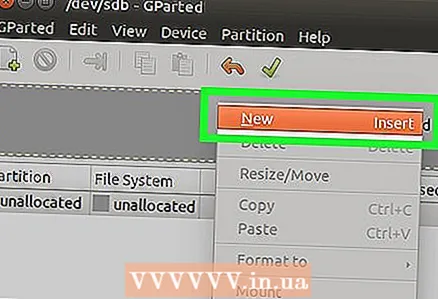 6 Right-click on the field (it will display the word "Unassigned") and select "New" from the menu. The "Create a new partition" window will open.
 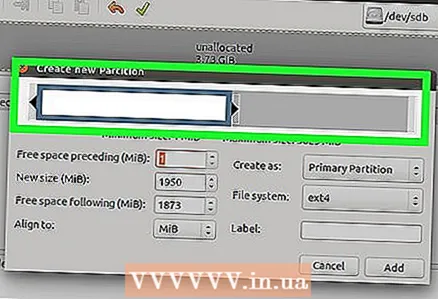 7 Specify the size of the first section. Do this using the slider or enter numbers in the appropriate fields. Don't forget to leave room for additional sections.
  8 Give the section a label. Labels are a simple and reliable way to distinguish sections from one another.
  9 Specify the file system. If the flash drive will only work on computers running Linux, select "ext2". If Windows will boot from the first partition, select "NTFS" (this can be done only on the first partition). Select "fat32" or "exfat" to store data and use the flash drive on computers running different operating systems.
 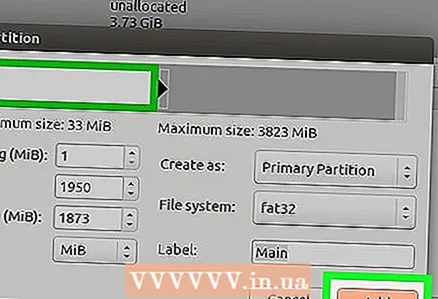 10 Click Add. A new partition will be created based on a portion of the unallocated space.
 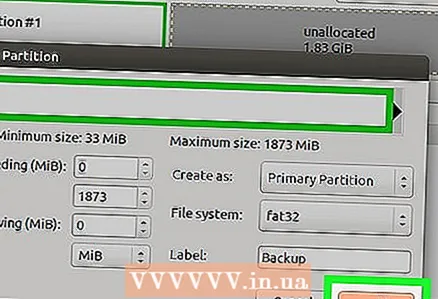 11 Repeat this process to create additional sections. Each time, start by right-clicking the remaining unallocated space. New partitions are created based on the unallocated space that remains after the previous partitions were created.
 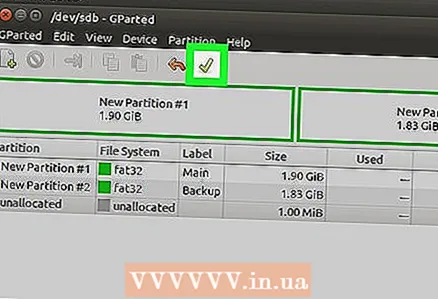 12 When you have finished preparing to create new sections, click on the green checkmark button. Click "Apply" to confirm your decision. New sections will be created on the flash drive. This will take some time.
 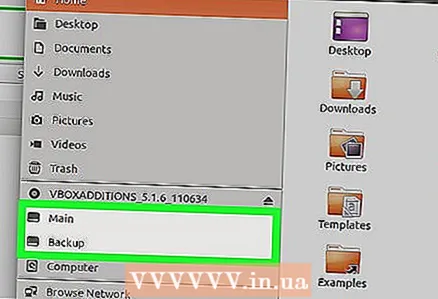 13 Get started with sections. In Linux, you can work with the created partitions as if each partition is a separate USB flash drive.


