Author:
Carl Weaver
Date Of Creation:
2 February 2021
Update Date:
1 July 2024
Content
Visual Basic 6.0 is a programming language developed by Microsoft that can be easily learned and used by a novice as well as experienced programmers. Although it is no longer supported by Microsoft, thousands of applications are still running on it and much more software is still being developed. This tutorial will show you how to create a simple calculator in Visual Basic 6.0.
Steps
 1 Open Visual Basic 6.0 and create a new project Standard EXE Project. Standard EXE projects give you several commands and tools useful for developing simple as well as semi-complex programs.
 - You can also select a project VB Enterprise Edition Projectwhich will give you a lot more tools to work with. For a beginner programmer, it is suggested to use the Standard EXE Project.
 2 Consider the project window. There will be a field with a lot of dots in the center of the screen. This is your form. The form is where you will add various elements (command buttons, images, text fields, etc.) to your program.
 - To the left of the window is the toolbar. The toolbar contains various predefined elements of any program. You can drag these elements onto the form.
- At the bottom right of the window is the layout of the form. This determines where your program will appear on the screen after the project is completed and executed.
- In the middle to the right is the properties window, which define the property of any element selected in the form. You can change various properties using it. If no item is selected, it displays the properties of the form.
- In the upper right corner is the Project Explorer. It shows the various designs, shapes that are included in the project.
- If any of these fields are missing, you can add them by clicking on the "View" button on the Menu bar.
 3 Drag the label onto the form, and change the label title to "Enter first number".
- The label text can be changed using the properties window.
 4 Create a text box to the right of the first label. Remove the text that appears inside the text box by changing the empty "Text" box in the property sheet.
  5 Create another label and change the title to "Enter second number", and create another text box for it on the right.
 6 Drag and create four command buttons below these two labels. Change the title of these command buttons to "Add", "Subtract", "Multiply", "Divide" respectively.
  7 Create another label labeled "Result" and a text box to the right of it, below the four command buttons. This text box will be used to display the result. This completes your project.
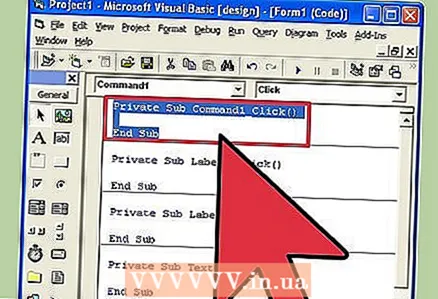
  8 To start coding, in the Project Explorer click on the form and then select the leftmost button. You will be thrown into the coding window.
 - Click on the list in the upper left corner of the encoding window. Click on all the commands one by one (Command1, Command2, etc.), so that the coding plan of them will be visible to you in your coding window.
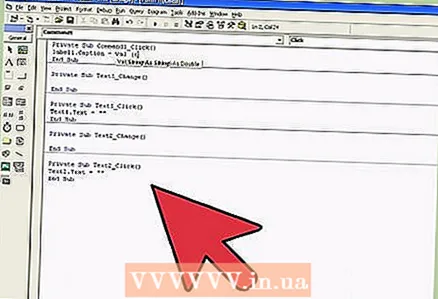
 9 Declare variables. To declare:
 - Dim a, b, r as Integer
- a is the value entered in the first text box, b is the value entered in the second text box and r is the result. You can use any other variables too.
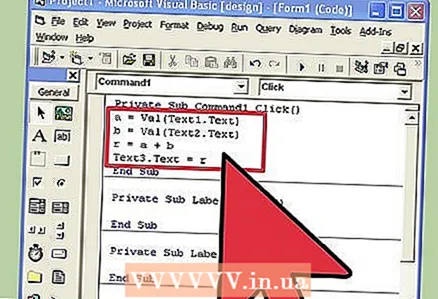 10 Start coding for add command (Command1). The code will look like this:
 - Private Sub Command1_Click ()
a = Val (Text1.Text)
b = Val (Text2.Text)
r = a + b
Text3.Text = r
End Sub
- Private Sub Command1_Click ()
 11 The code for the subtract command (Command2). The code will look like this:
 - Private Sub Command2_Click ()
a = Val (Text1.Text)
b = Val (Text2.Text)
r = a - b
Text3.Text = r
End Sub
- Private Sub Command2_Click ()
 12 The code for the multiply command (Command3). The coding will look like this:
 - Private Sub Command3_Click ()
a = Val (Text1.Text)
b = Val (Text2.Text)
r = a * b
Text3.Text = r
End Sub
- Private Sub Command3_Click ()
 13 The code for the division command (Command4). The coding will look like this:
 - Private Sub Command4_Click ()
a = Val (Text1.Text)
b = Val (Text2.Text)
r = a / b
Text3.Text = r
End Sub
- Private Sub Command4_Click ()
 14 Click the start button or press F5 to execute your program.
- Test all commands and see if your program works.
 15 Save the project and your form. Build your project and save it as .exe file on your computer; run it whenever you want!
Tips
- You can create different variations of the simple calculator. Try using the options window instead of command buttons.
- Add colors to the shape and text boxes using the Properties window to make them look colorful!
- If there is a bug, learn how to debug the program.


