Author:
Joan Hall
Date Of Creation:
2 July 2021
Update Date:
1 July 2024

Content
- Steps
- Method 1 of 3: Creating a Basic Structure
- Method 2 of 3: Planning the Milestones
- Method 3 of 3: Preparation
- Tips
Creating effective lesson plans takes time, diligence, and an understanding of students' goals and abilities. The goal, as with all learning, is to motivate students to understand the essence of what you are teaching so that they remember as much as possible. Here are some ideas to help you get the most out of your class.
Steps
Method 1 of 3: Creating a Basic Structure
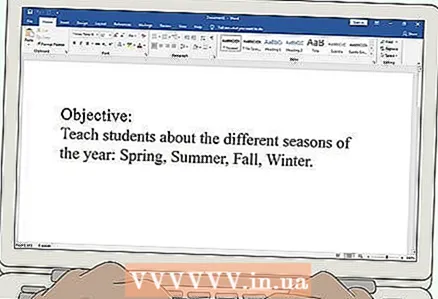 1 Be sure to define your goals. At the beginning of each lesson, write the lesson plan goal at the top. It should be completely simple.Something like, "Students will learn to identify the different body structures of animals that allow them to eat, breathe, move and develop." Basically, this is what the students will know after you work with them! If you want to add something, add it, how they can do it (with videos, games, cards, and so on).
 - If you are working with younger students, your goals may be more basic, like "Improving your reading or writing skills." They can be skill-based or concept-based. Check out the resources on How to Write Educational Goals for more details.
 2 Write an overview of the session. In general terms, outline its main ideas. For example, if your class passes Hamlet Shakespeare, your review may include information about how Hamlet ranks among the rest of Shakespeare's works, how historically accurate events are described, and how themes of desire and gimmicks might relate to current events.
 - It all depends on the length of the lesson. We'll cover six basic steps for any lesson, all of which need to be included in your overview. However, you can always plan more.
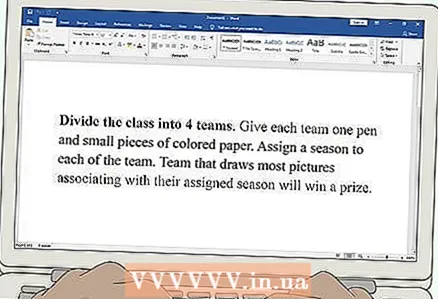
 3 Plan your schedule. If you have a lot of work to do in a given amount of time, break your plan into sections that can be completed faster or slower, rebuilding to accommodate changes if any. Let's use one hour lesson as an example.
 - 1:00-1:10: Warm up... Focus your attention on the lesson and briefly review yesterday's discussion of great tragedies; connect it with Hamlet.
- 1:10-1:25: Presentation of information. To begin, discuss Shakespeare's biography in general terms, focusing on his creative period 2 years before and after writing Hamlet.
- 1:25-1:40: Practical task under the guidance of a teacher... Class discussion of the main themes of the play.
- 1:40-1:55: A more arbitrary practice task. The class writes one paragraph describing the current event in Shespearian terms. Individually encourage capable students to write 2 paragraphs and help those who are slower.
- 1:55-2:00: Conclusion. We collect work, give homework, dismiss the class.
 4 Get to know your students better. Be clear about who you are going to educate. What is their learning style (visual, auditory, tactile, or combined)? What do they already know and what they might not be sufficiently aware of? Design your plan to work for all students in the class, then make the changes that need to be considered for students with disabilities, for those with difficulty or lack of motivation, and for talented students.
 - 50/50 chances that you will be working with a bunch of extroverts. and introverts. Some students will be more vivid in individual assignments, while others will reveal themselves better in pair work or in groups. With this knowledge, you can design activities that are suitable for people with different interaction preferences.
- You will also solve the question of those students who understand the topic as well as you (unfortunately!), And those who seem to be not stupid, but look at you as if you are from Mars. If you know who these children are, you can competently combine or separate them at work (to win!).
 5 Use several forms of student interaction. Some students are good on their own, others are good in pairs, and still others are good in large groups. As long as you allow them to interact and develop each other, you are doing your job. But since every student is an individual, try to create opportunities for all types of interactions. Your students (and class cohesion) will benefit from this!
 - Indeed, any activity can be managed in such a way as to work separately, in pairs or in groups. If you already have some interesting ideas, see if you can tweak them to mix different interactions. Sometimes it just takes an extra pair of scissors!
 6 Address a variety of learning styles. You will definitely have a few students who can't sit out 25 minutes watching a video, and some who get bored of reading two pages of an excerpt from a book. None of these students are more stupid than the other, so help them by switching activities and using the abilities of each student.
 - Each student learns in his own way. Some need to see the information, some have a better listening experience, and others need to literally touch it. If you had a great time talking, stop and let them talk about it. If students have read something, come up with a practice activity so they can use their knowledge. This will make schoolchildren less bored!
Method 2 of 3: Planning the Milestones
 1 Warm up. At the beginning of each lesson, the students' minds are not yet focused on work. If someone were to suddenly begin explaining open-heart surgery, you could probably only say, “Wow, slow down. Go back to“ grab a scalpel. ”“ Make it easy for them. This is what the warm-up is for - it will not only allow you to assess the knowledge of the students, but also help them get back on track.
 - The warm-up could be a simple game (perhaps about vocabulary to see their current level of knowledge (or what they remember from last week!), Or it could be questions, discussion, or pictures to start a conversation. Anyway, get the students talk and let them think about the topic (even if you didn't explicitly give it that way).
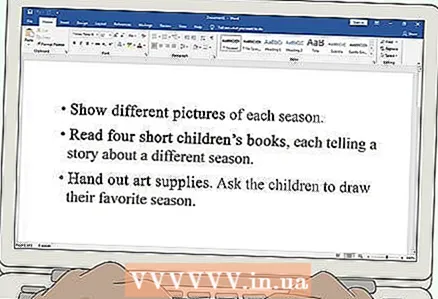
 2 Submit information. It's quite simple, isn't it? Regardless of your lesson format, you need to start by presenting the information. It could be a video, song, lyrics, or even a concept. This is the basis on which the entire lesson is based. Without this, the students will not achieve the desired results.
 - Depending on the level of knowledge of the students, you will probably have to go back to the basics. Think about how far back you will have to go. The sentence "He hung his coat on a hanger" does not make sense if you do not know what "coat" and "hanger" are. Explain the very basics to them and work on those points in the next lesson (or two).
- It may be helpful to tell the students directly what they will be learning. I.e, explain your goals to them... You won't find a clearer way to do this! So everyone will go away, knowingwhat we learned that day. Nothing around the bush!
 3 Let the students practice under your guidance. Now that they have received the information, you need to design such an activity to bring it into active use. However, this is still new material for students, so start with activities that will direct them in the right direction. Design worksheets, match assignments, or use images. You should not start your essay before you complete the filling in the gaps exercise!
 - If you have time for two activities, so much the better. It is a good idea to test knowledge at two different levels: for example, writing and speaking (two different skills). Try to include different activities for students with different abilities.
 4 Check their performance and measure progress. After working under your guidance, rate your students. Do they understand what you explained to them before? If so, that's great. You can move on, perhaps adding more difficult concept elements or working through more difficult skills. If they didn’t understand you, go back to the past information. How to present it differently?
 - If you have been with the same group for a while, then most likely you know students who may have difficulty with certain concepts. If so, pair them with the students to make the session a success. You don't want certain students to lag behind, or the whole class to wait for everyone to reach the same level.
 5 Let the students work without their guidance. Now that the students have learned the basics, let them show their knowledge on their own. This does not mean that you have to leave the class! It simply implies that it is time for students to get into the creative process, which will allow them to truly internalize the information you are presenting. How to achieve the success of the intellectual activity of schoolchildren?
 - It all depends on the subject and the skills you want to use. It can be anything from a 20-minute puppet-making project to a two-week heated debate about transcendentalism.
 6 Leave time for questions. If there is enough time in your class to cover a subject, leave ten or so minutes at the end for questions. You can start with a discussion and move on to more detailed questions on this topic. Or, use the remaining time to clarify — these two methods will benefit your students.
 - If your group is full of children who cannot be forced to raise their hand, then let them work with each other. Give them an aspect of the topic to discuss and about 5 minutes to talk about it. Then take the discussion to class and discuss ideas in the group. Interesting moments will surely come up!
 7 Complete the lesson specifically. In a way, the lesson is like a conversation. If you just stop it, it will appear to be suspended in mid-air. It's not that bad ... but it just leaves a weird and uncomfortable feeling. If time permits, summarize the day with class members. It's a good idea to literally show them that they have learned something!
 - Take five minutes to walk through the concepts you learned during the day. Ask them conceptual questions (without entering new information) to re-enact what you did and received in the day. It's kind of a cyclical trick that summarizes your work!
Method 3 of 3: Preparation
 1 If you're nervous, write a detailed lesson outline. For young teachers, a detailed synopsis is an excellent support. Although it takes a lot longer, be sure to write it down if it helps you. Knowing exactly what questions you want to ask and where you need to turn the conversation will make it easier.
 - As you learn, you will be able to pay less and less attention to this. In the end, you will be able to come to the lesson with little or no support. You shouldn't spend more time planning and taking notes than the lesson itself! Just let this be your initial preparation method.
 2 Leave room for maneuver. You schedule your lesson by the minute, right? Great - but know that this is only your support. You won't say, "Kids! It's 1:15 now! STOP EVERYTHING YOU'RE DOING." This is not how teaching works. While you're better off trying to stick to your curriculum within reason, give yourself some wiggle room.
 - If you find yourself running out of time, consider what you can and cannot release. What must be learned in order for children to learn more? And what is “water” in essence and just helps to kill time? On the other hand, if you have time left, it is better to have an additional activity that you can use, if anything.
 3 Reschedule your activity. Better to have extra activities left over than not enough for the rest of the lesson. Although you are calculating the timing of the lesson, plan on the bottom bar. If something can take 20 minutes, count on 15. You never know how quickly your students will get through!
 - The easiest way is to come up with a quick closing game or discussion. Bring class members together and invite them to discuss their views or ask questions.
 4 Prepare the outline so that the replacement teacher understands everything. If there are any problems and you are unable to teach the lesson, you need someone else to understand your outline. On the other hand, if you write it in advance and forget something, it will be easier for you to fill in the gaps in your memory if the outline is clear.
 - There are many different templates you can find online, or ask other teachers what format they follow. If you follow one or the other, it will be easier for you. The more consistent the better!
 5 Develop a contingency plan. In your teaching career, you will have days when students zip through your plan and leave you in shock. You will also have days when the tests were postponed, only half of the class came, or the video, the DVD player "swallowed" your disc. When a day like this rears its ugly head, you should have a plan in reserve.
 - Most experienced teachers always have a lot of outline plans at hand that they can pull out at any time. If you have had a particularly successful lesson on the Pennett Lattice, keep this material for later. You can turn it into a different lesson with a different class about evolution, natural selection, or genes, depending on the capabilities of the next class. Or you might have a lesson in store on, say, Beyoncé (think about civil rights or the women's rights movement, spreading pop music, or just a Friday afternoon music lesson). Any.
Tips
- After the lesson is over, review your outline and think about how it actually worked. What will you do differently next time?
- Review new material with students and give them lesson goals for a week or two.
- Be prepared to deviate slightly from your lesson plan. Plan how to get students back on track again if you stray from the main topic.
- Remember to make sure what you teach is in line with the curriculum from the Ministry and the guidelines of your school.
- If making outline plans isn't your thing, consider the Dogme teaching method. It eliminates textbooks and allows students to control the process.
- Make it clear that you will expect them to answer your questions in class by a certain date.


