Author:
Helen Garcia
Date Of Creation:
20 April 2021
Update Date:
1 July 2024

Content
1 Choose paper to determine the size and color of your future fan. If you're new to origami, know that specialty origami paper can be purchased at craft stores. Plain tissue paper or thin cardboard can also be used as a popular alternative. You can fold origami products from any type of paper, if it has a suitable thickness for this.- Origami paper, also called kami, is traditionally used in this famous Japanese art form. It is often viewed as the original origami paper and usually has only one side dyed.Kami is the most convenient to use because it is thin, flexible and often already cut into squares. However, kami was invented as a less expensive alternative to classic paper, which may indicate a possible low quality. Poor paper quality usually counterbalances confidence in your own paper handling skills, so consider this when choosing between paper and other types of paper.
- For origami, you can use regular printer paper. When choosing paper for printers, look for thinner papers as they will be easier and more flexible to fold, while thicker paper will curl and fold unevenly. For making paper fans, printer paper is a good choice and can be found in abundance right at school or work, just be sure to ask permission if you haven't purchased the paper yourself.
- Another popular choice for origami paper is thin cardboard or decorative paper. The advantages of thin board are that it comes in an endless variety of shapes and colors; however, sometimes it can be too thick and elastic, which will lead to cracking in places where it bends.
- The best way to check the thickness of the paper is to fold a few folds on it. If the paper doesn’t make even, smooth folds, or if it tears under the pressure of those folds, it’s likely too thick for origami.
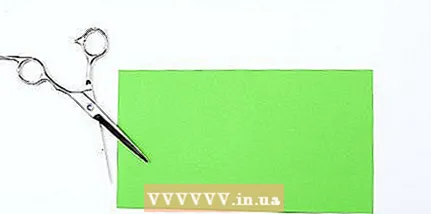 2 Cut the paper according to the desired size of the future fan. If you want a wider fan, use rectangular paper. Your fan will be about two-thirds the length of the paper. Otherwise, you can use a square sheet of paper. From a square sheet, a fan is made about two-thirds of the side of the square.
 - It is a good idea for beginners to use 15cm x 15cm paper, but you can also use a larger piece of paper if you want a wider fan. A 15cm x 15cm piece of paper will allow you to make a small fan with a handle. If you need a larger fan, try starting with a 20cm x 20cm piece of paper.
 3 Cut a square piece of paper into a rectangle. If you are using a rectangular piece of paper, skip this step. If using a square sheet, fold the top of the sheet by about one centimeter. Start working with paper face up; if the paper is the same on both sides, the choice of the front side does not matter. Fold by aligning the corners of the top of the paper with the sides of the paper, then gently pushing the fold from the center to the sides. Unfold the fold and cut off the excess paper along the trail of the fold using scissors. You now have a rectangular piece of paper.
 - If you have access to a paper cutter, use it. The paper cutter allows you to cut the paper quickly and evenly by inserting the sheet into the cutter and straightening it at right angles, and then quickly lowering the knife onto it. The cutter can be effectively used to cut multiple sheets of paper at the same time.
- Cut the paper slowly. To keep your weigher straight, you need to cut as straight as possible. If you're having trouble getting a straight cut, try using larger scissors to get a smoother cut.
Part 2 of 3: Folding the Fan
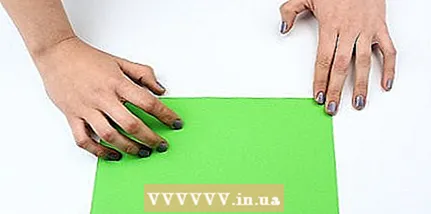 1 Place the decorative side of the paper down. She should inspect the back (unadorned or white) side up.
 - 2 Fold the top edge of the paper one third. Think of it like folding a hot dog bun, you need to make a long, narrow fold along the long edge of the sheet. To get an even fold, remember to align the corners of the paper with the sides of the sheet, and then crease the fold from the center to the sides.
- You can improve the fold already made on the paper with your fingers, pushing them directly into the fold.
- In the place of the fold, the back sides of the paper should touch. If the back of your paper is white, then the white side will touch the white side.
- Take the folded paper and look at the profile of the fold from the side, making sure the decorative side of the paper is facing down. Note the “V-shaped” fold. Due to its shape, this fold is called a “V-fold”.
- 3 Fold the paper again, but in half vertically, fold the fold, and then unfold. Keeping the original fold of the previous step, you need to perform the second “sandwich fold”. That is, it should be short and transverse, like the fold of bread when making sandwiches (as opposed to the long longitudinal fold of a hot dog bun). Fold the left side of the paper to the right side, align the corners and fold out from the center to create an even V-fold, then unfold the paper again. You will now have a clear vertical line down the center of the paper.
- 4 Fold the two vertical sides of the paper toward the center fold. In this case, the sides of the paper should meet in the center, but should not overlap. This is called a wicket fold. When doing it, imagine double-wing closing doors.
- 5 Continue making vertical wicket folds. Fold the vertical sides towards the center twice more, or do this until you have two folds approximately 1 cm wide.Fold the sides towards themselves, forming two narrower folds each time. Be sure to check every step that your folds are even and well-wrinkled.
- 6 Unfold all previously made vertical folds. Be careful when unrolling the paper to avoid tearing the fruits of your hard work. You can now see some vertical fold marks on the paper. The width of each section divided by folds is approximately 1 cm. Do not unbend the horizontal fold you made in the second step.
- 7 Rotate the paper 90 degrees. Now the fold of the paper made in the second step will lie vertically on the left side, and the folds that were previously vertical will become horizontal.
- Depending on your main working arm, you may find it more convenient to position the vertical fold to the right. Try putting the paper down this way and see what works best for you in the following steps.
- 8 Make a V-fold along the bottom mark of the fold. Starting at the bottom, fold the bottom edge of the paper up. When viewed from the side, you should have a V-shaped fold profile. Remember to align the edges of the paper with the folds so that everything works out nicely and neatly.
- 9 Fold the bottom edge of the paper in the opposite direction along the next fold line. Hold your previous fold and fold the paper underneath. In this fold, the decorative side of the paper will meet the decorative side. This is called a “slide fold”. When viewed from the side at this fold, you can notice its similarity to the top of a mountain, that is, it is opposite to the V-shaped fold.
- If you count the folds of the paper from below, then the V-fold should go first, and above it the fold-slide.
- 10 Repeat alternating folds along the remaining horizontal fold marks. Do a V-fold, then a slide, and so on. This series of folds resembles an accordion. As you fold the paper, you will immediately notice the characteristic fold pattern.
- If you make a mistake, don't be impatient and keep working. The task may seem overwhelming at first, but after the first few attempts, the process is easy enough.
Part 3 of 3: Making a pen
- 1 Cut a piece of string about the width of your fan. A suitable length of string is approximately 15 cm, which is the original length of the side of the paper before folding.When it comes to choosing a rope for the handle of a fan, you can use yarn, twine, cord, or something similar. Choose a color that works well with your fan, but don't be limited to the traditional color palette. Unleash your creativity.
- 2 Wrap the string around the fan handle. If you look at the finished fan, its handle will be the part that does not fold apart. Choose the handle length that suits you by holding the folds of the fan in different places and choosing the most optimal handle position for you. While pinching the bottom edge of the vera, wrap the yarn, thread, or cord around the paper several times in this area. Tie a knot and cut off any excess string.
- If it seems to you that your fan is too big, then you can cut off its bottom edge. Do this by positioning the handle in your chosen location slightly above the bottom edge of the vera, and then trim off the excess bottom of the paper under the handle.
- When it comes to tying string around the evening handle, having a lace bow on it gives the fan a simple yet cute touch. If reliability is more important to you, try tying a double knot.
- Also you can decorate the evening handle. Sew beads, pendants or feathers to the yarn or cord to add volume to the handle.
- 3 Attach your fan to the wrapper of your gift, hand it to the doll, or use it to decorate the table setting, or find another creative way to use it. Now that you know how easy it is, you can make some more fans.
- If you want to redo your fan, simply unwind the handle and unfold the paper. After the accordion folds appear on the paper, you may want to decorate them, for example, using glitter glue or stickers. After that, you can easily assemble your fan again, since all the necessary folds are already present on it.
Tips
- You can decorate the fan by pre-stamping the paper for it with decorative stamps or by drawing stencils along the future top edge of the fan and its middle.
- Roll the paper on a hard, flat surface; this will make it easier to make neat and tidy folds.
- Another easy way to decorate your fan is to apply glitter glue. Just decorate the paper with this glue and let it dry before you start rolling. Try drawing spirals, dots, or different shapes.
- Using scissors, you can cut a decorative design on your folded fan. Look for special scissors with patterned cuts for a special effect. Be careful when cutting folded paper to avoid cutting yourself.
What do you need
- Paper (rectangular or square origami paper)
- Yarn, cord or thread
- Scissors
- Paints, colored pencils, markers, stencils and so on (optional)


